Here is a fun and easy project to make in an afternoon– a wooden toy dragon named Fred. Follow this step-by-step guide to build Fred and enjoy for generations.

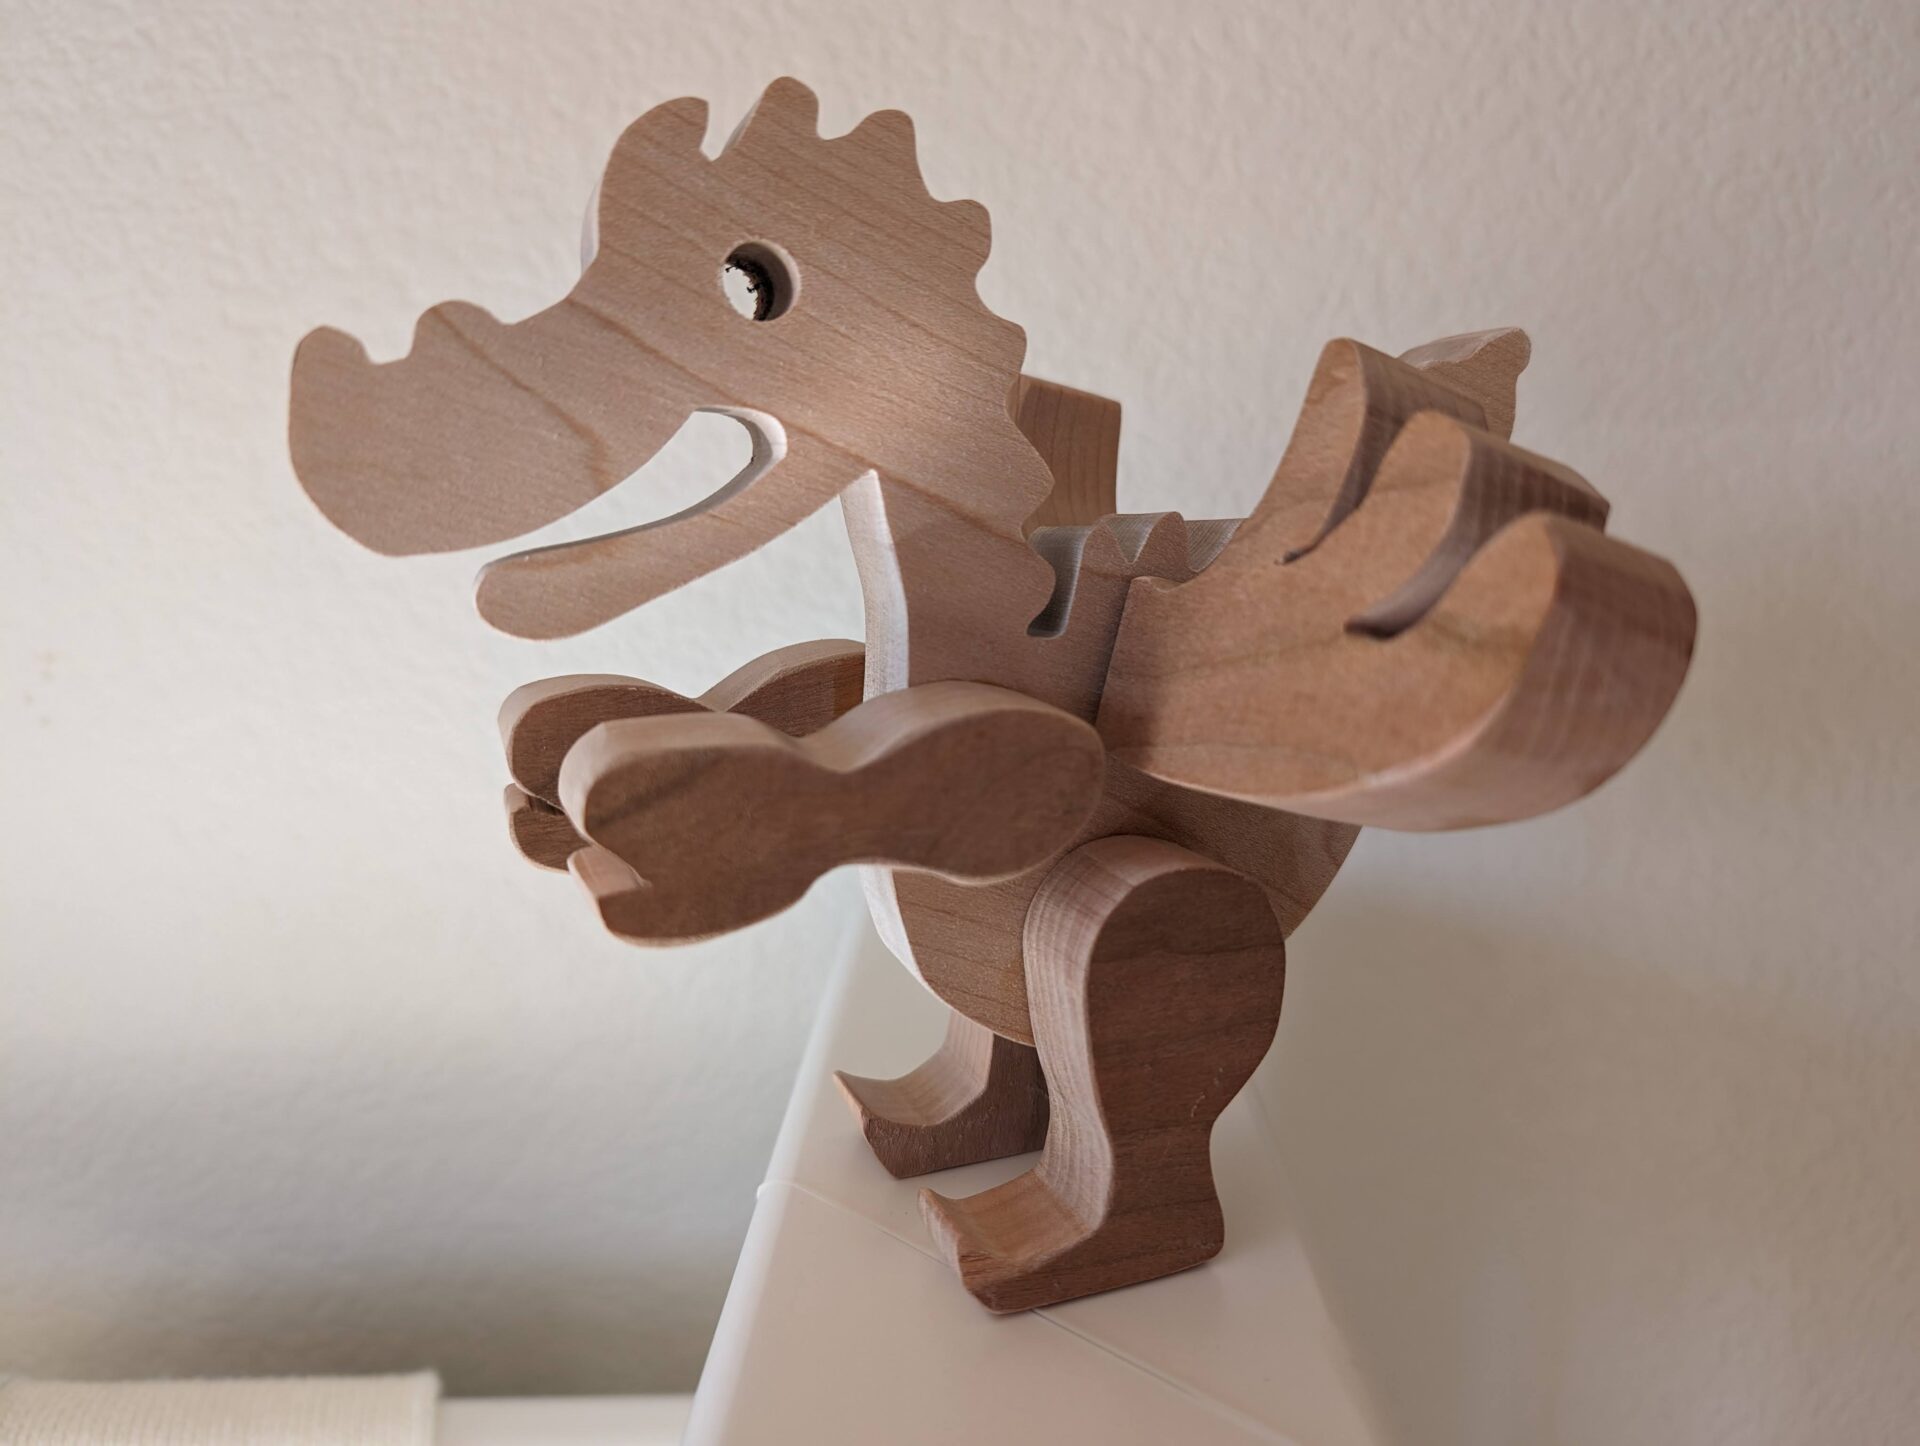
Finished Fred the Dragon
Key Project Details
Meet Fred the Dragon, an affable and fun loving dragon with rotating wings. He is made of solid hard wood – cherry and maple and can stand on his own. This is a fun and easy build.
| Time to Build | 1/2 Day + 24 hours for glue drying tIme |
| Difficulty | 1 of 5 |
| Dimensions | 7 x 6.5 x 6.5 inches (LxWxH) |
| Materials Needed | 3/4 inch Cherry (wings, hands and feet) 3/4 inch Maple (body) 3/8 inch Dowel (4 inches) 3/8 inch Forstner bit Wood Glue (Tite Bond II) 3M Super 77 (spray adhesive) Masking tape 180 Grit Sandpaper Osmo Hard Wax Oil + Our Product Review |
| Tools Needed: | Scroll Saw + Our Product Review Drill Press (or Cordless Drill) Clamps Disc or Belt Sander (or equivalent) |
| Lessons Learned: | Lower the speed of the scroll saw to cut hard wood |
Download Free Plans:

Step-by-Step Build Instructions
STEP 1:
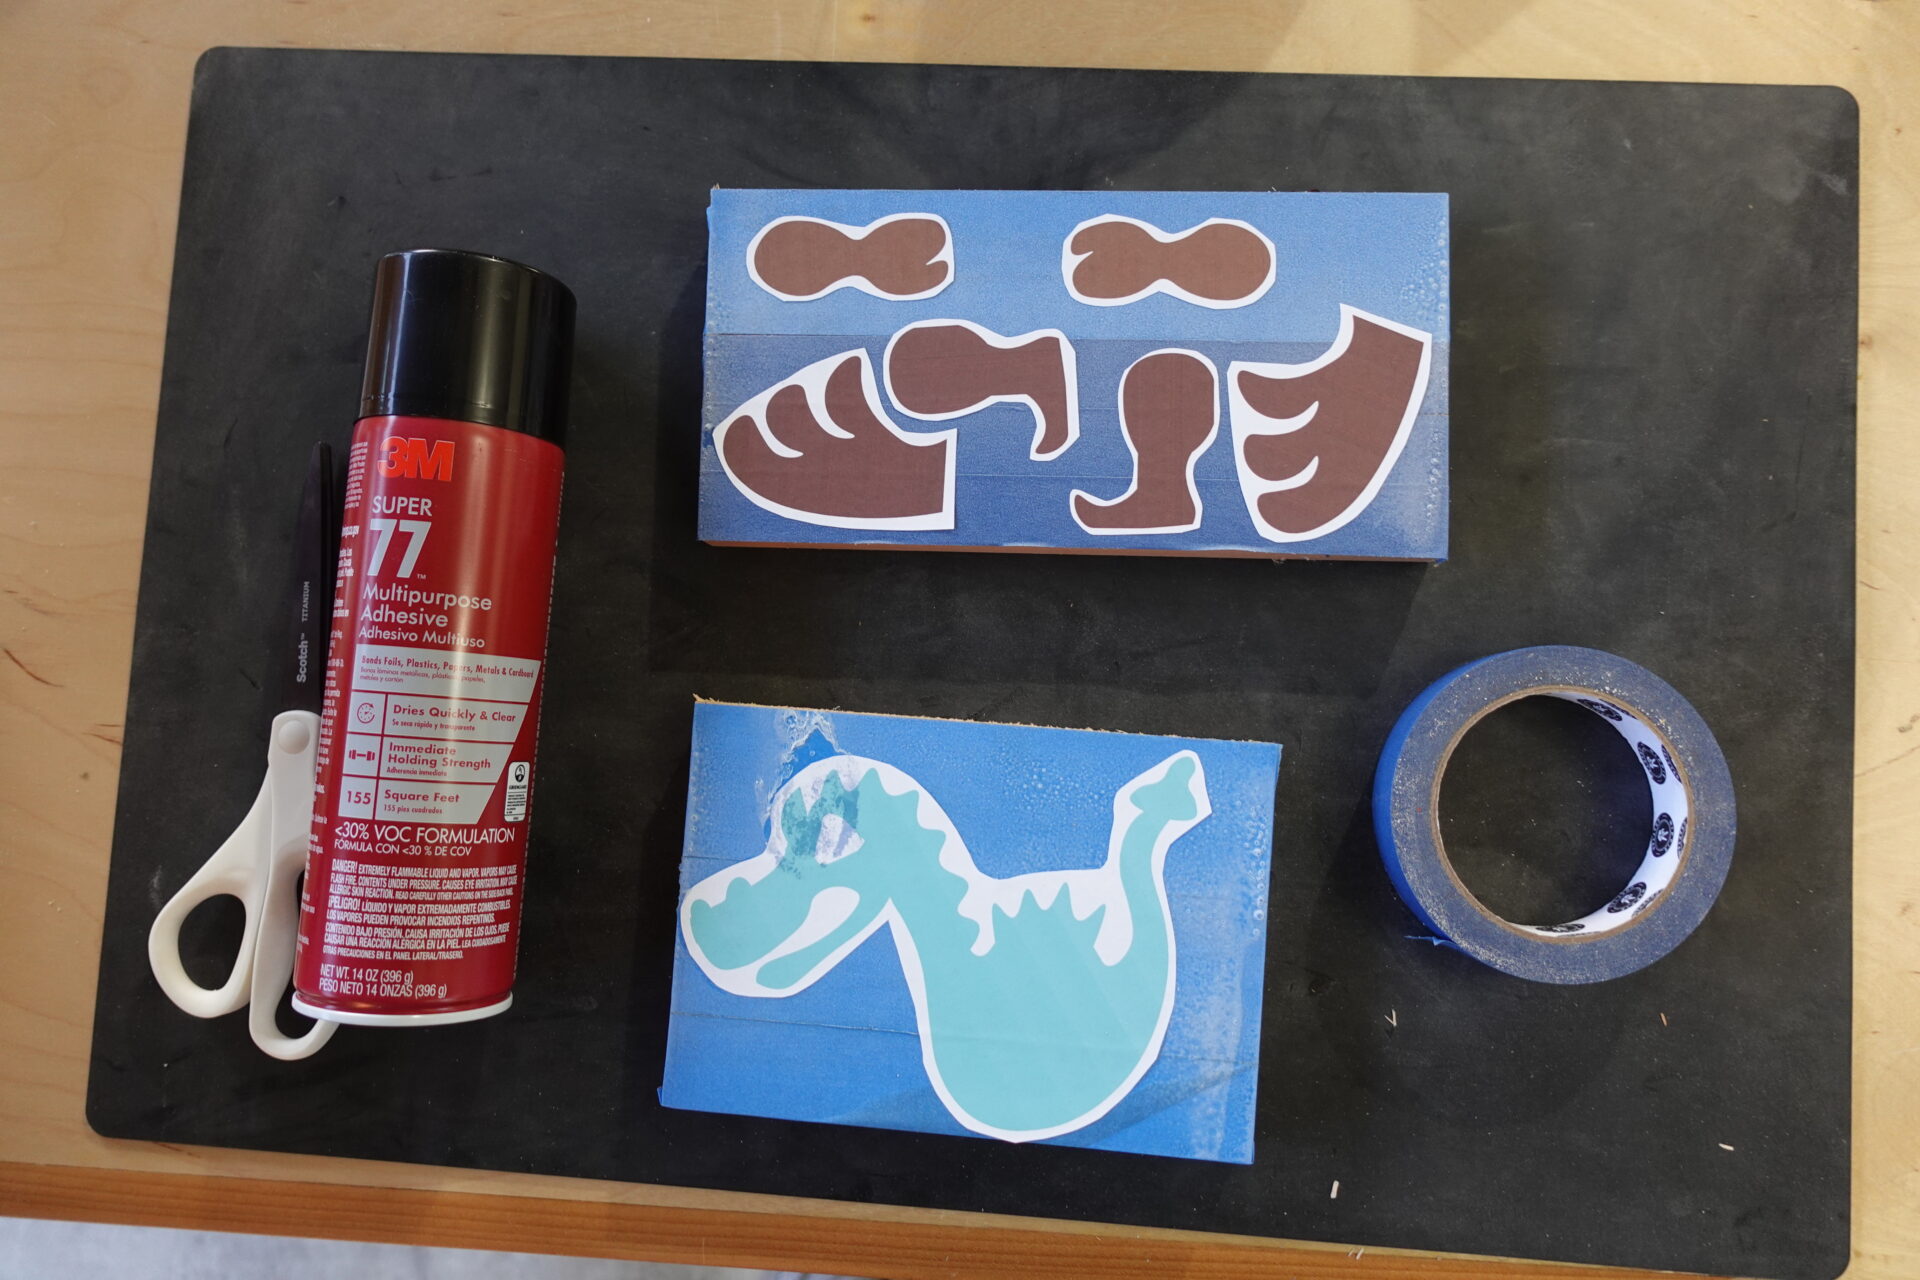
Print the plans and cut out the parts with a scissors as shown above. Then put down masking tape over the wood and use spray adhesive (3M Super 77) to attach the paper plans to the masking tape. I chose maple for the body and cherry for the contrasting other parts.
STEP 2:
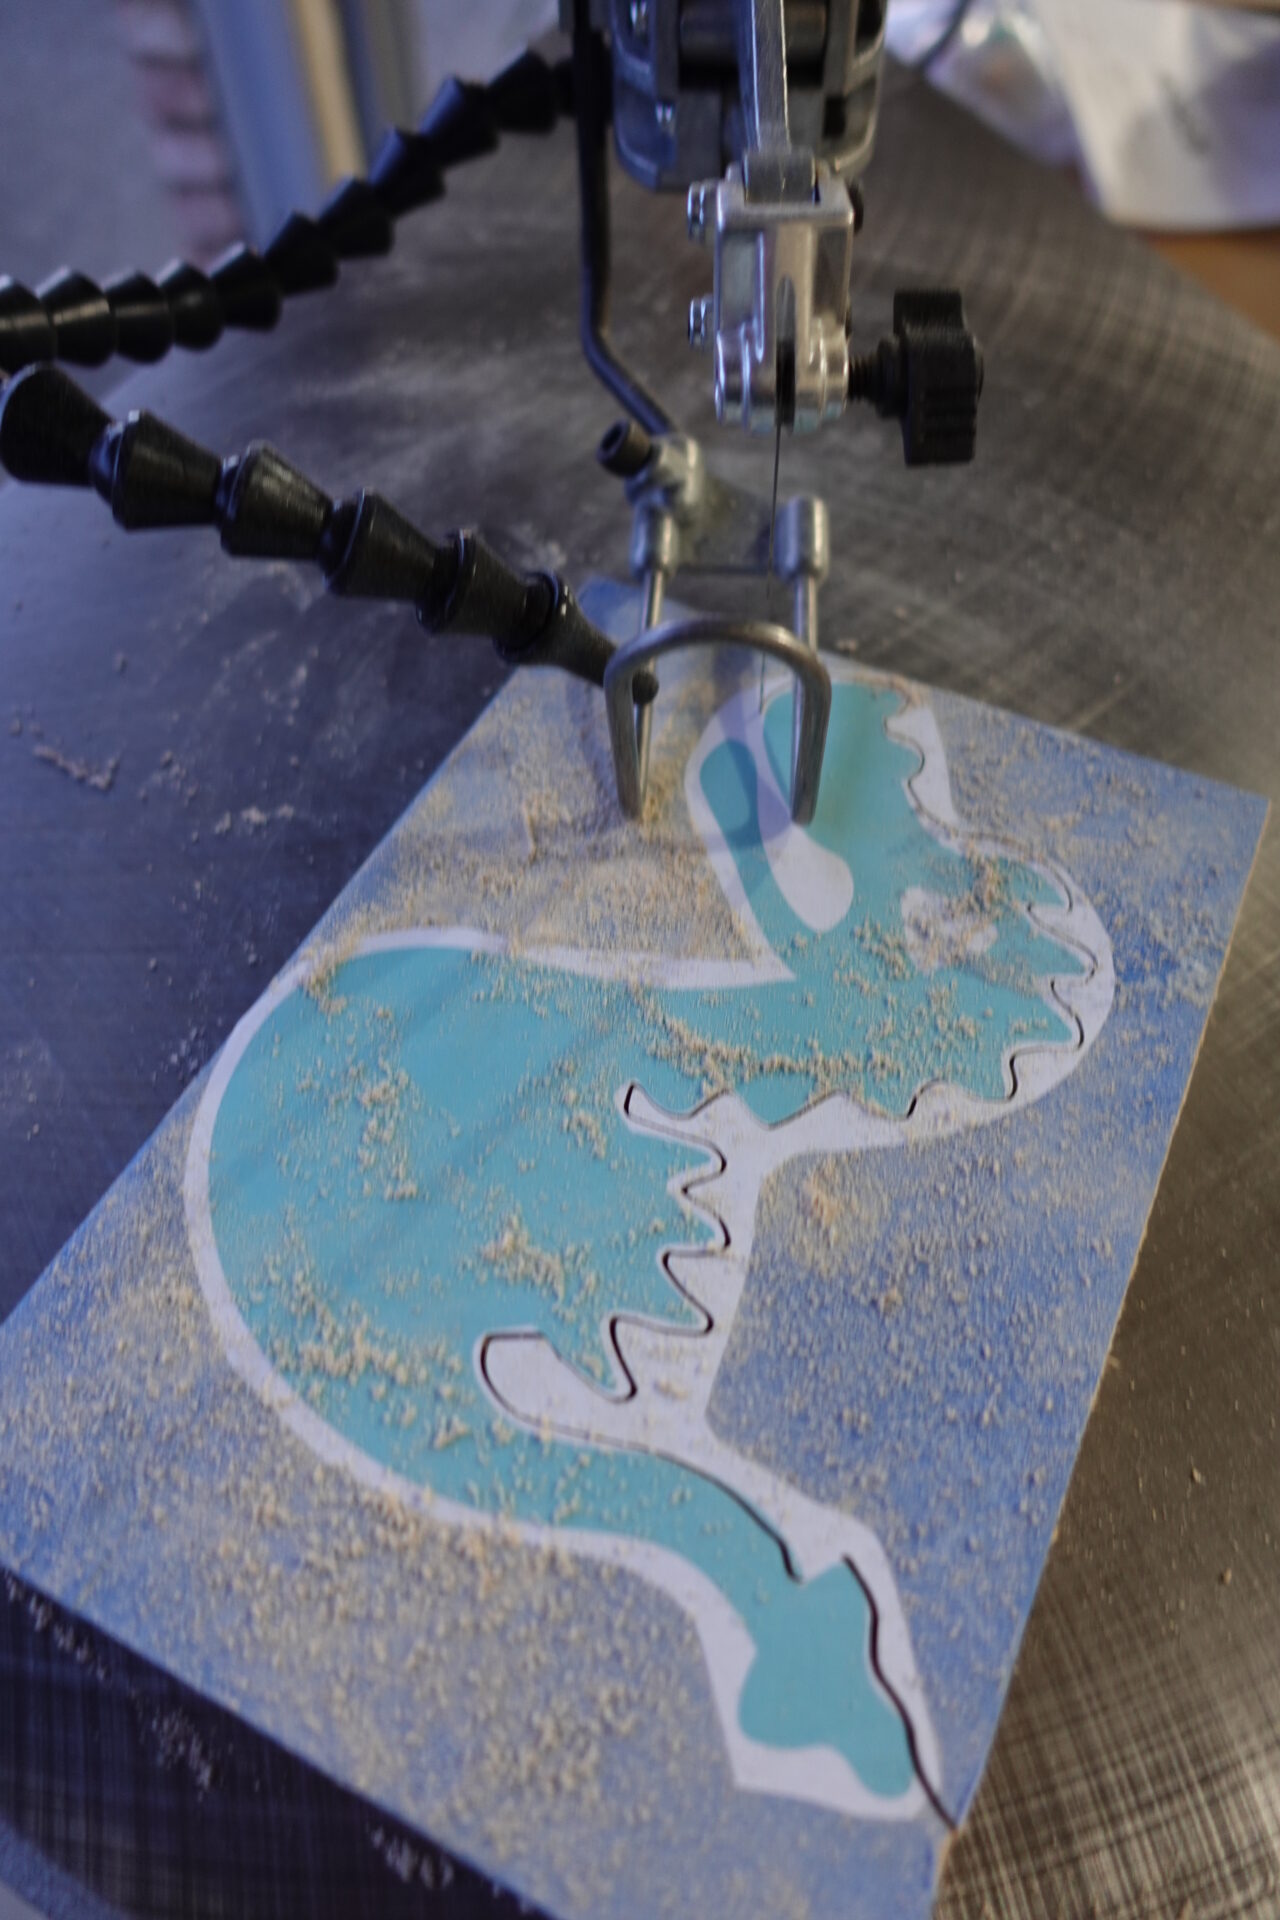
Cut the pattern out using a scroll saw.
STEP 3:
Use a 3/8 inch Forstner bit to cut out the eye holes. Optional: Thread a scroll saw blade inside the hole and cut out the eye pattern.
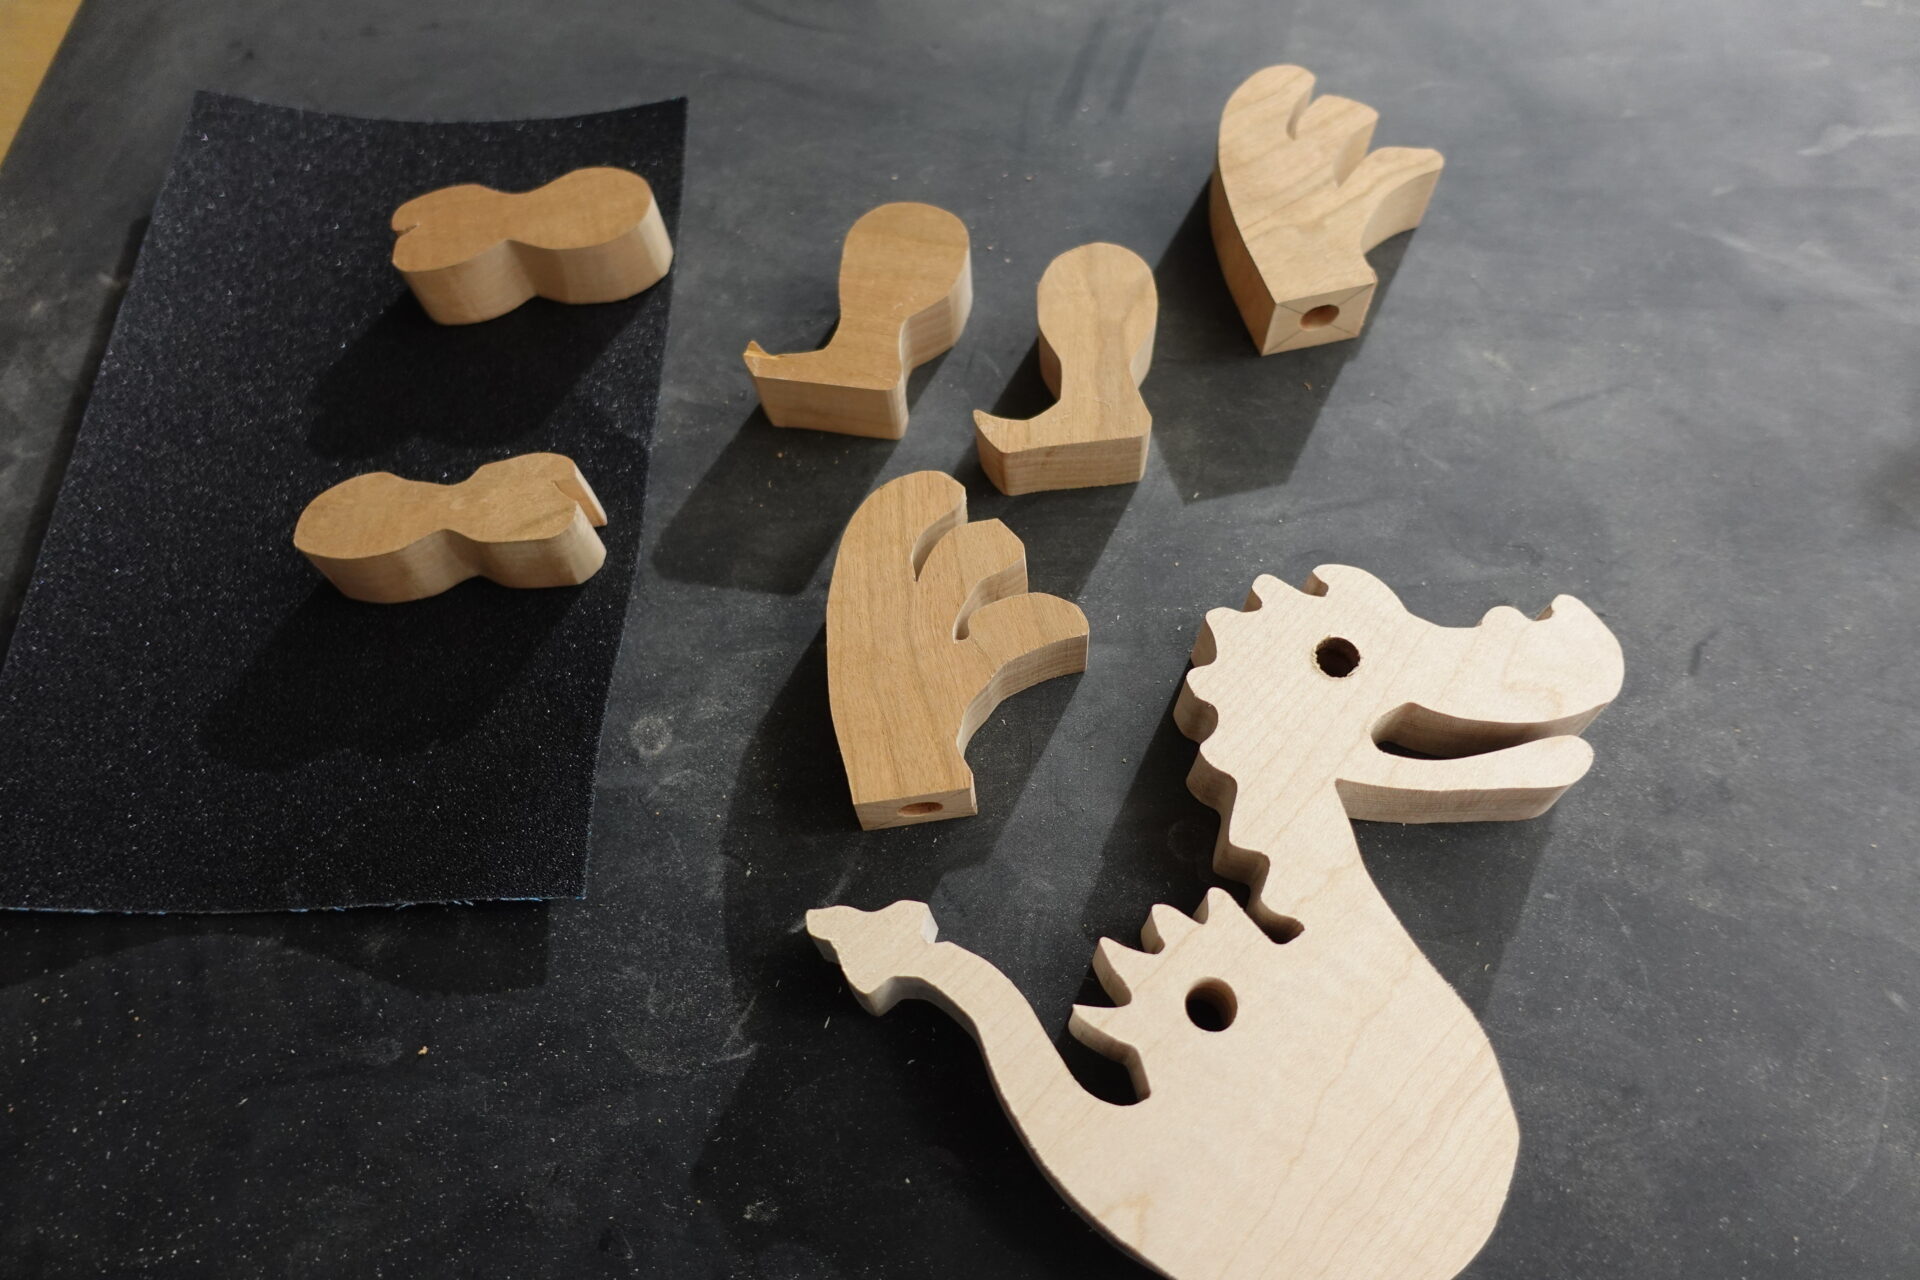
STEP 4:
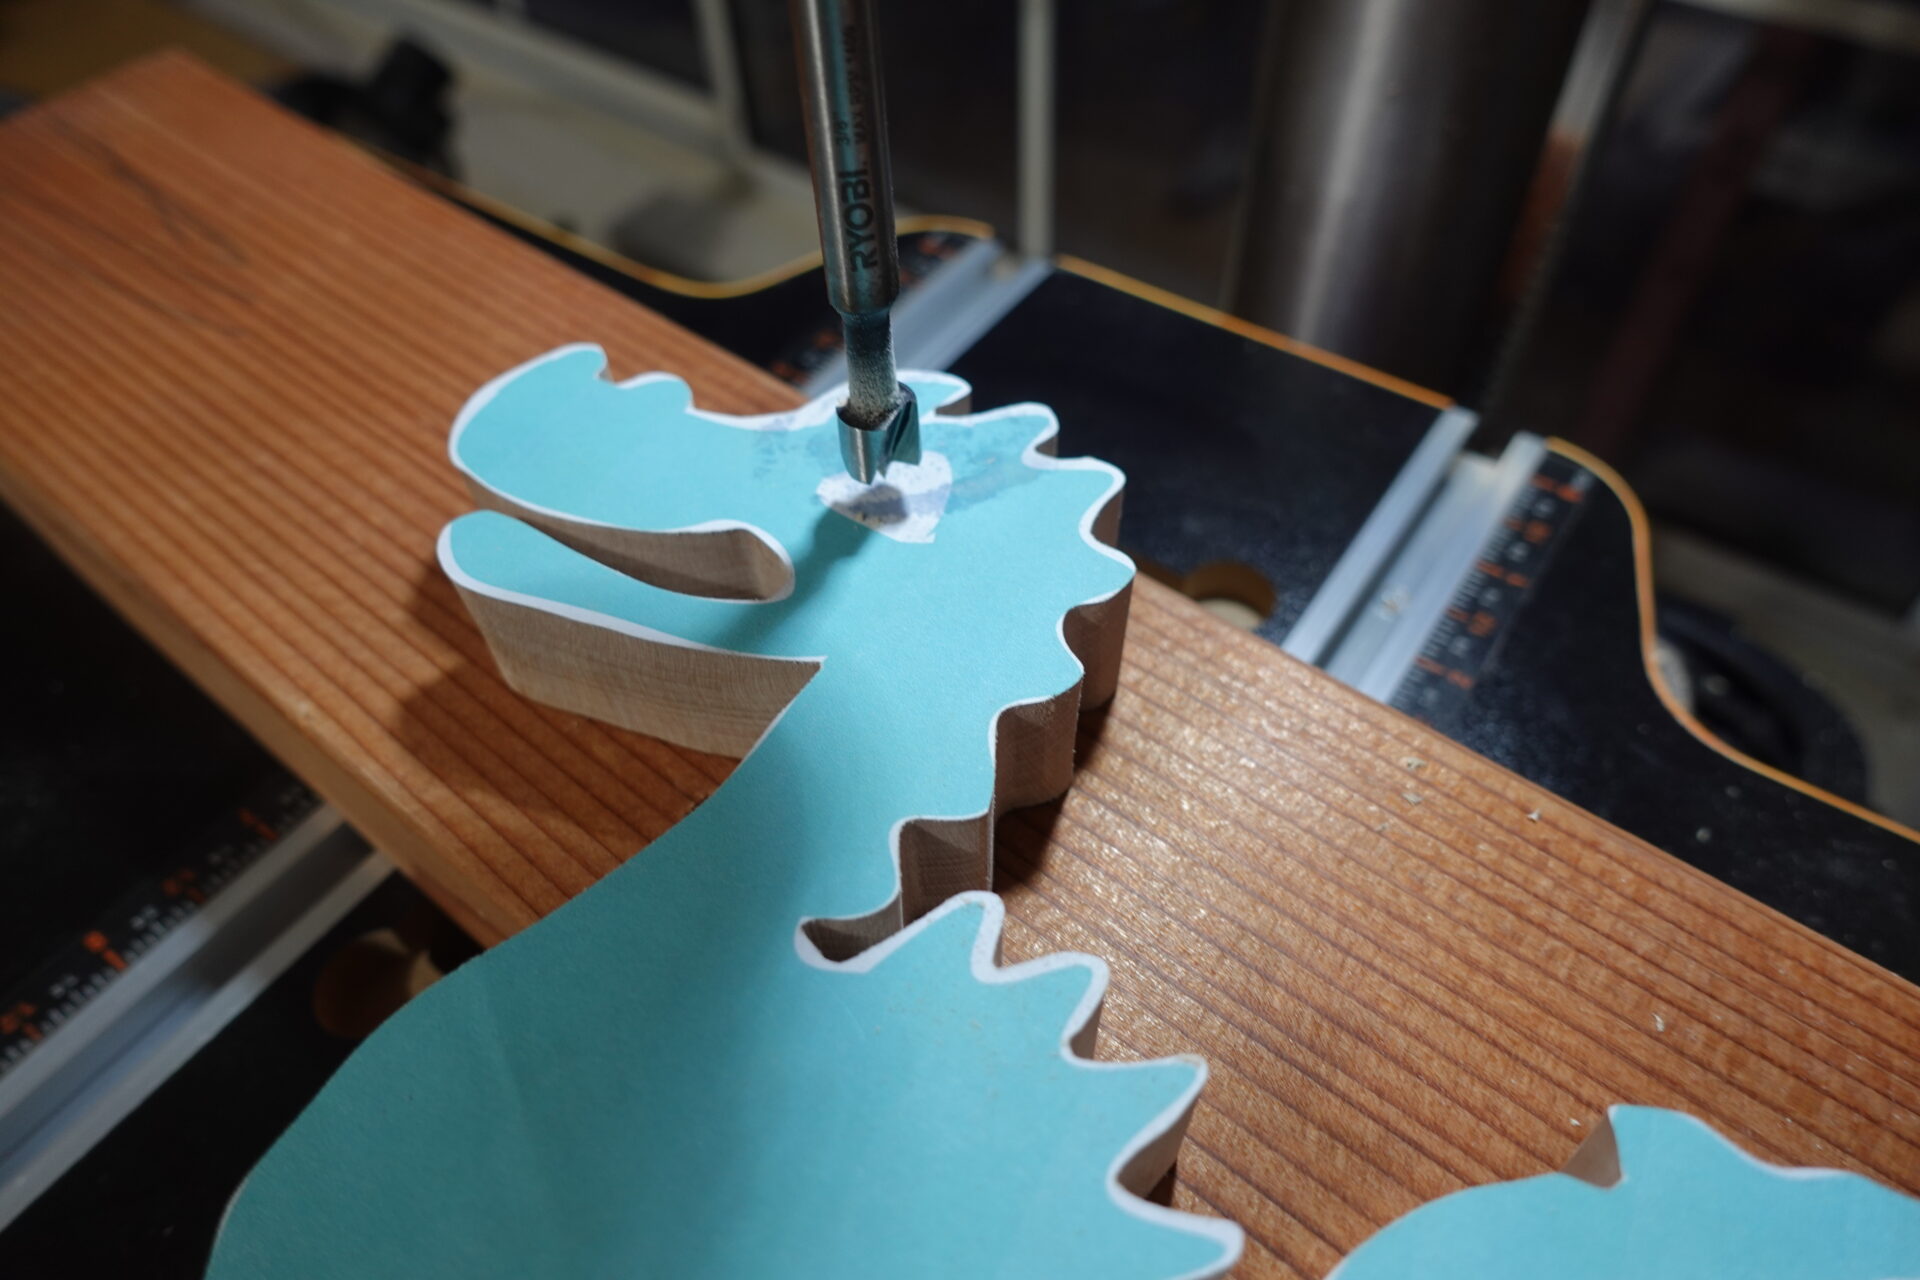
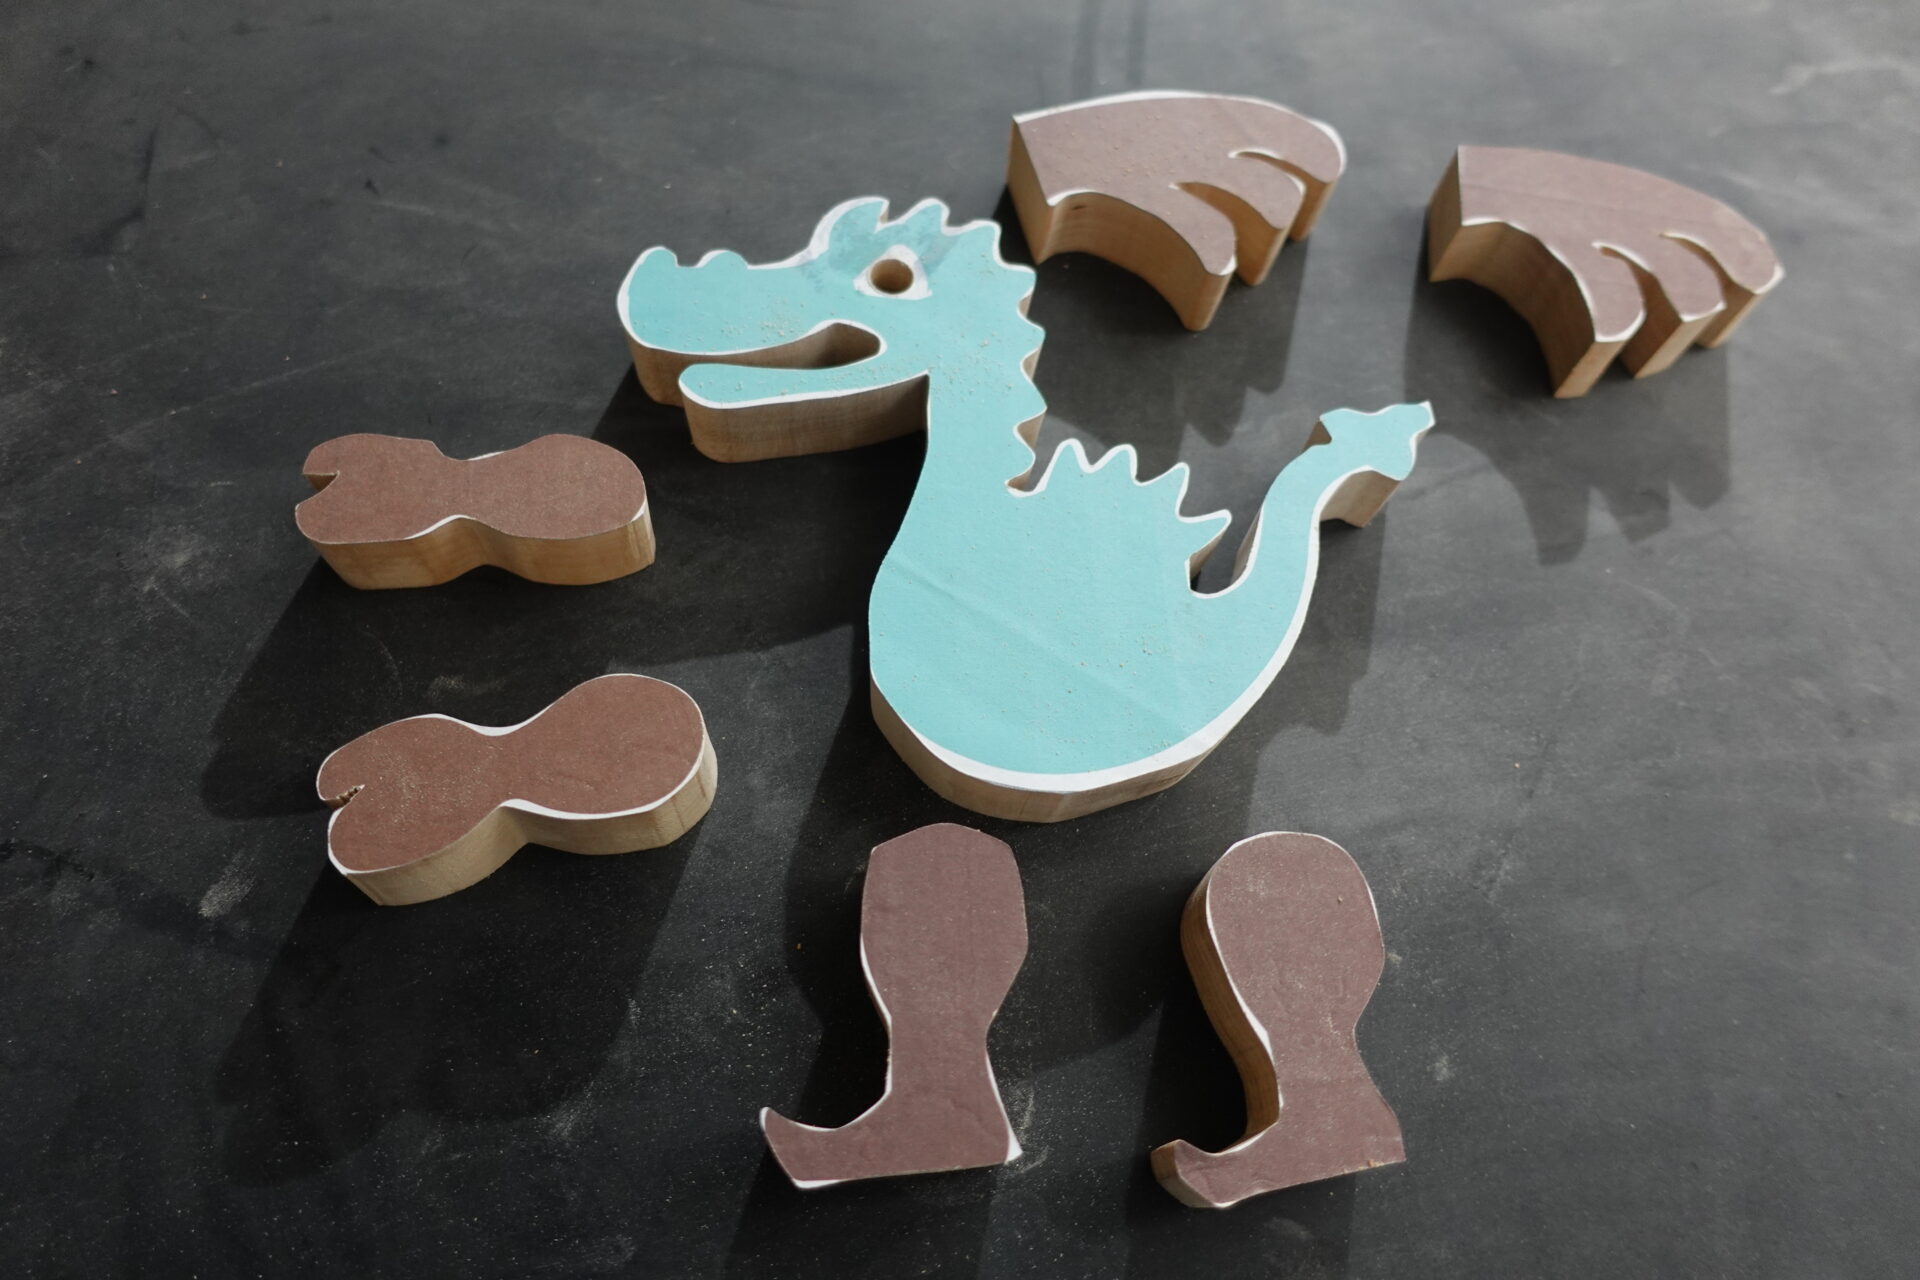
Cut out all the remaining parts including the legs, hands and wings.
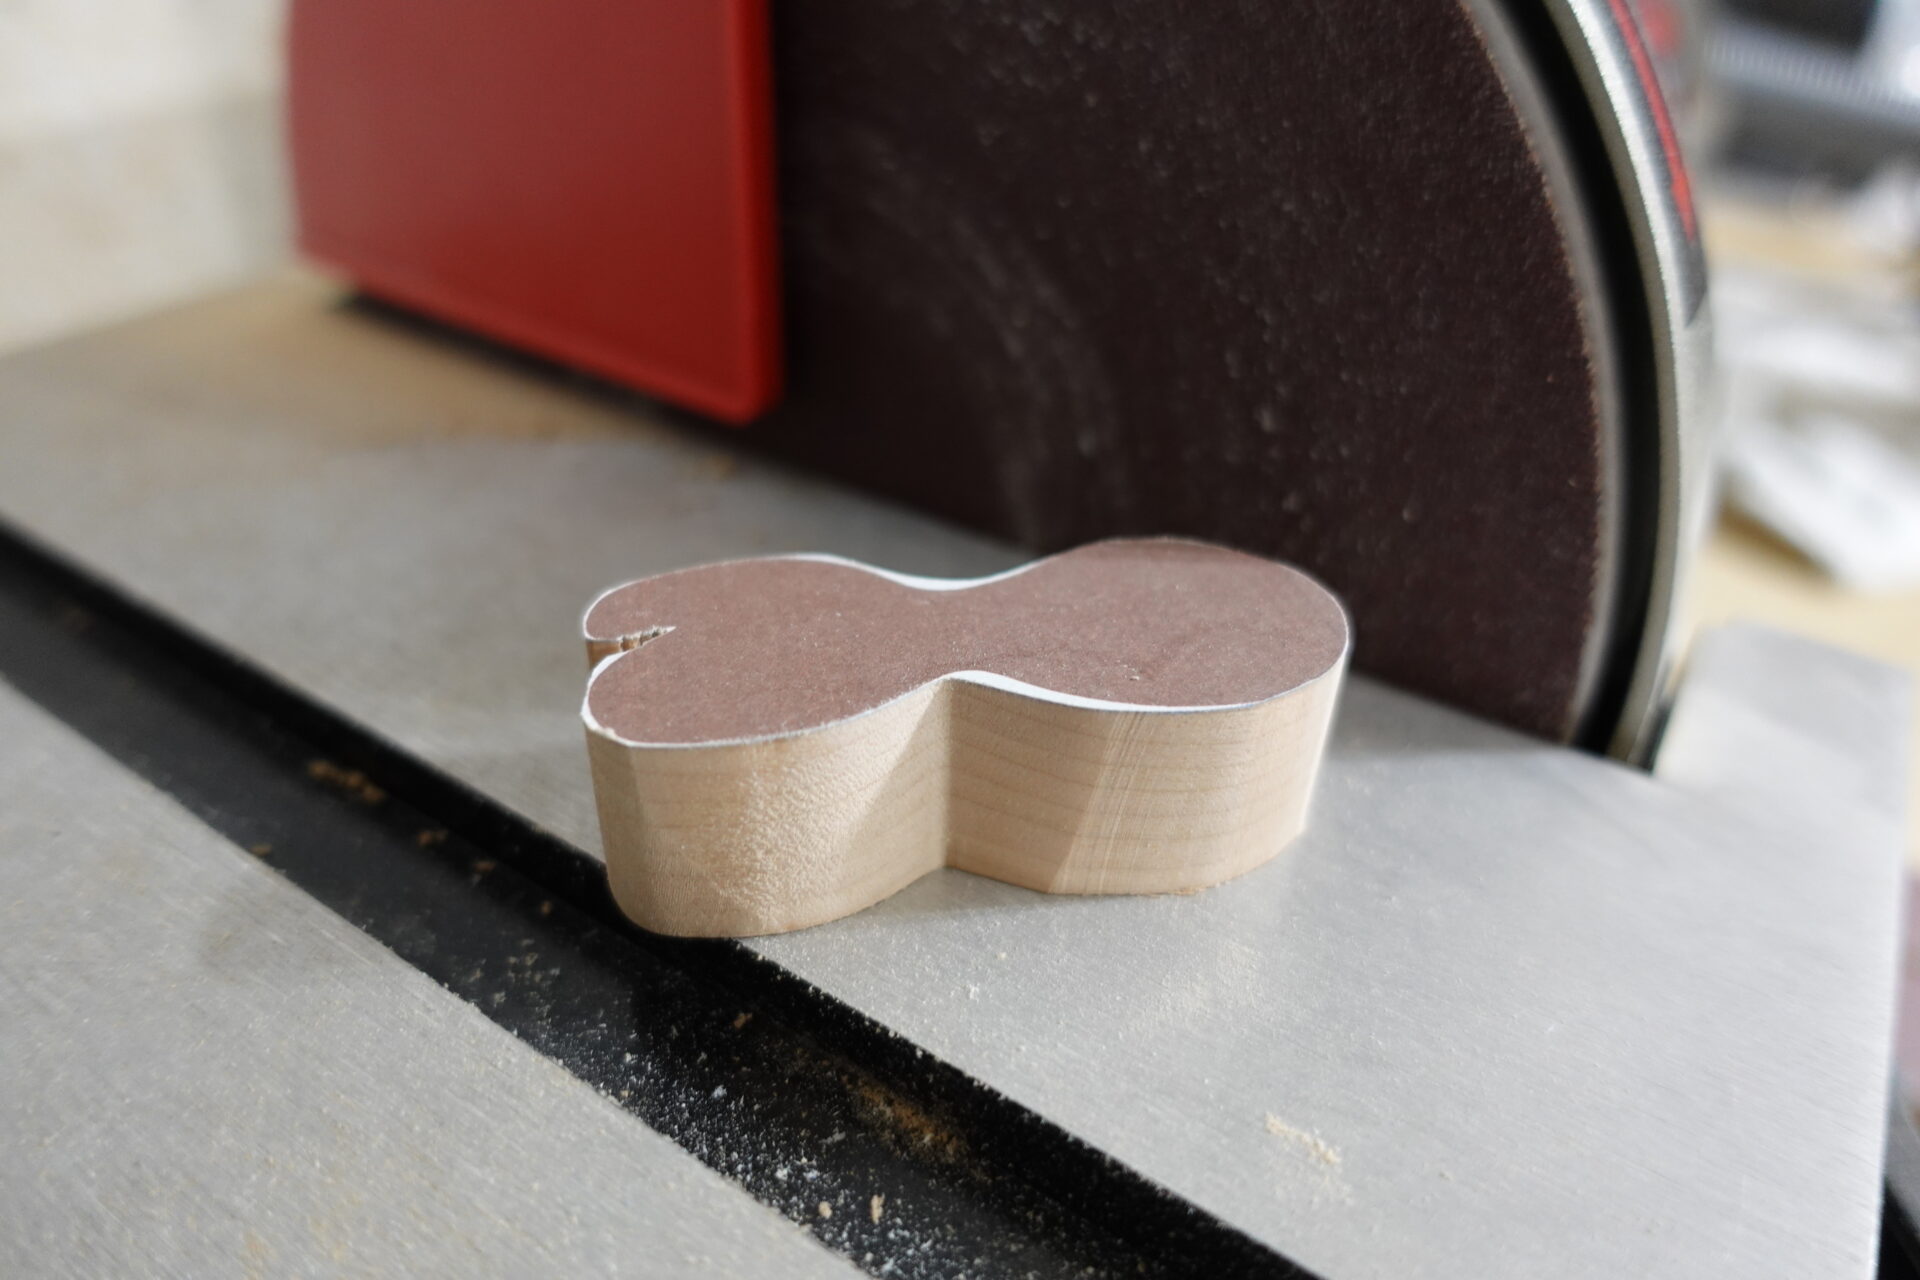
STEP 5:
Use a disc / belt sander (or equivalent sander) to smooth the edges and refine to the correct dimensions.
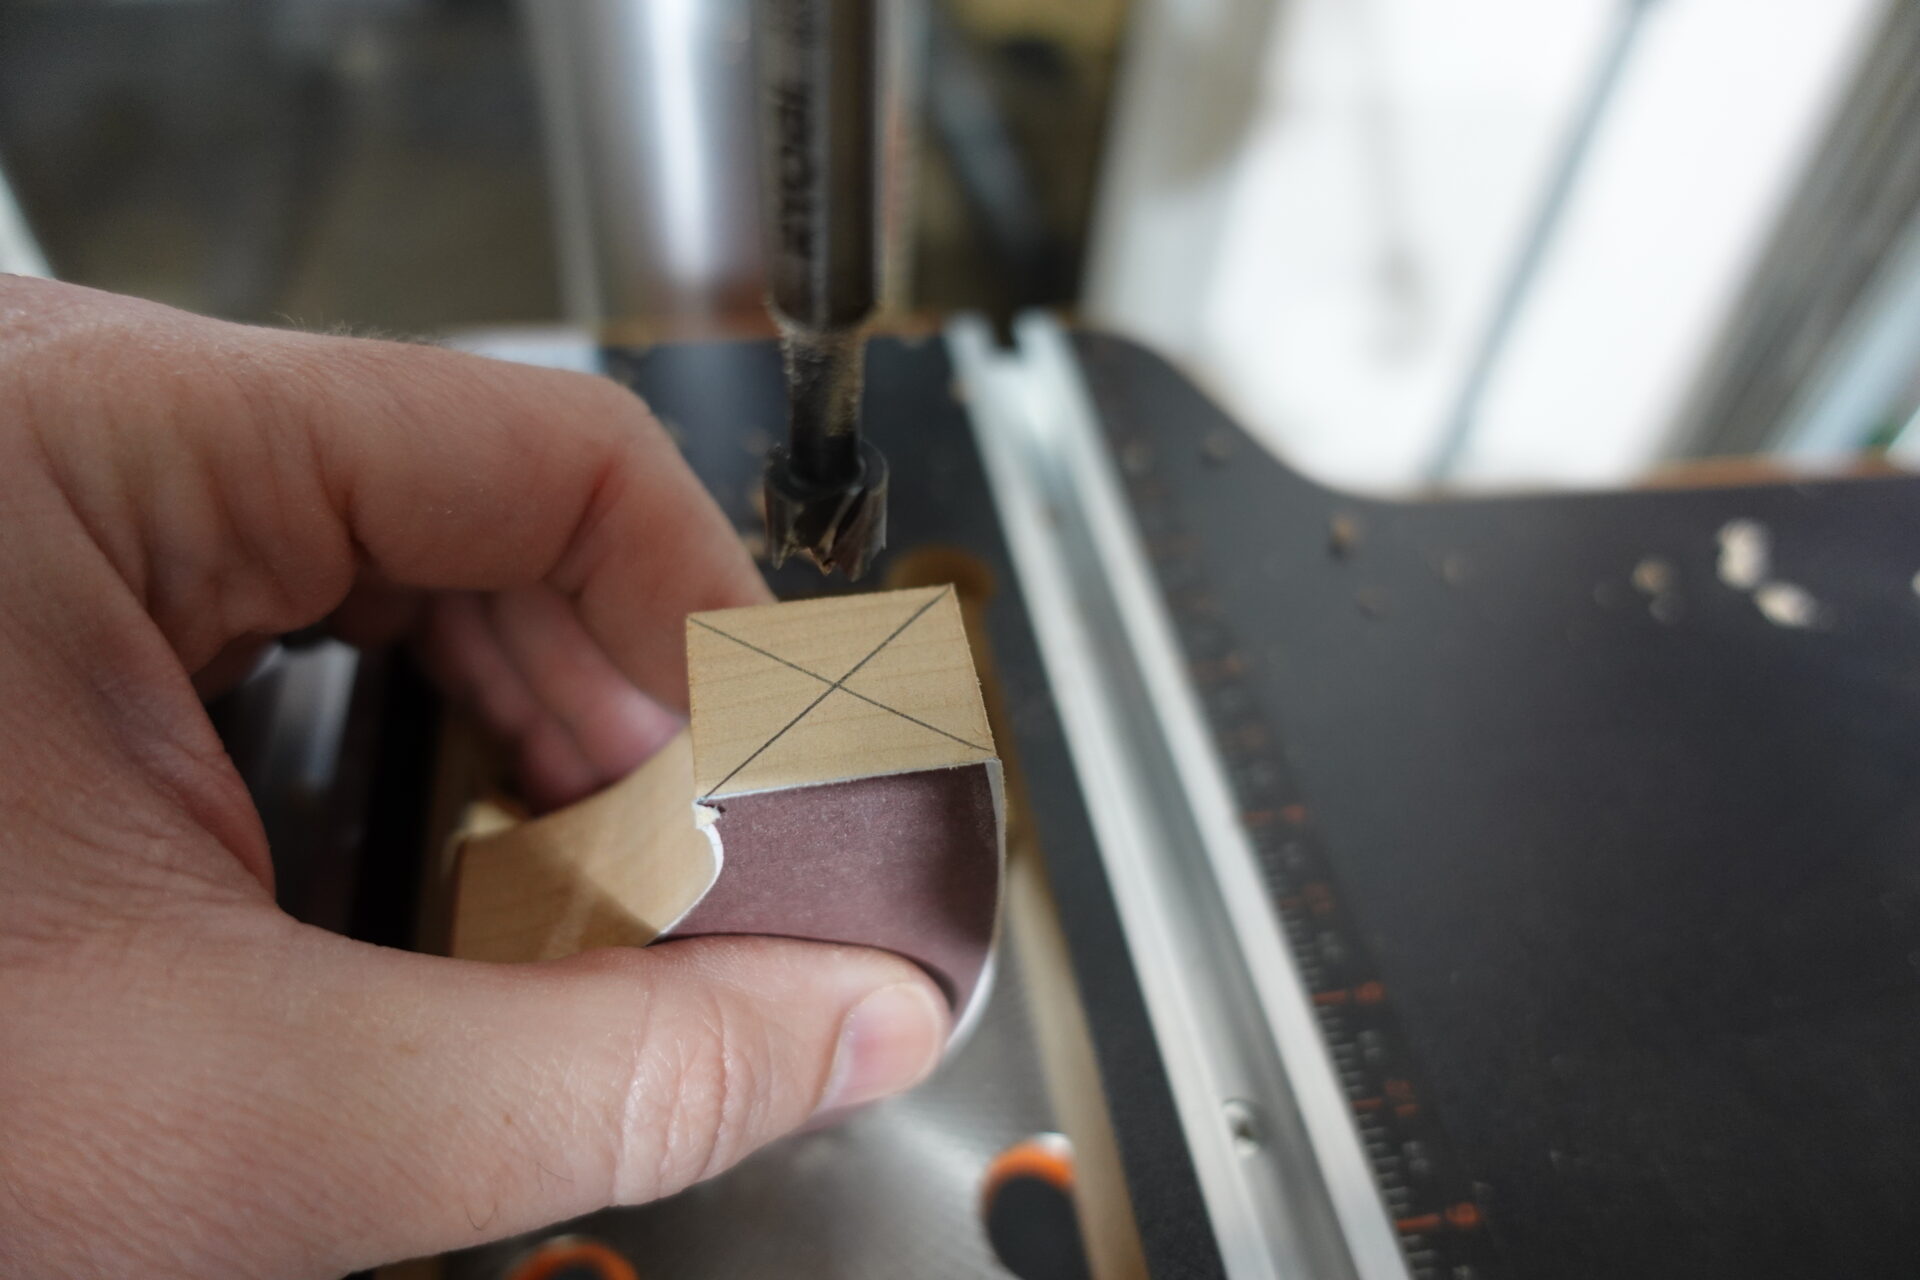
STEP 6:
Mark the center of the wings by drawing a line from each corner. Then drill with 3/8 inch Forstner bit. The depth does not need to be precise, but 1/2 inch should be good. (We’ll find the precise depth in a later step.)
STEP 7:
Drill the hole for the wings using that trusty 3/8 inch Forstner bit.
STEP 8:
Sand all parts with 180 grit sandpaper especially around the edges.
STEP 9:
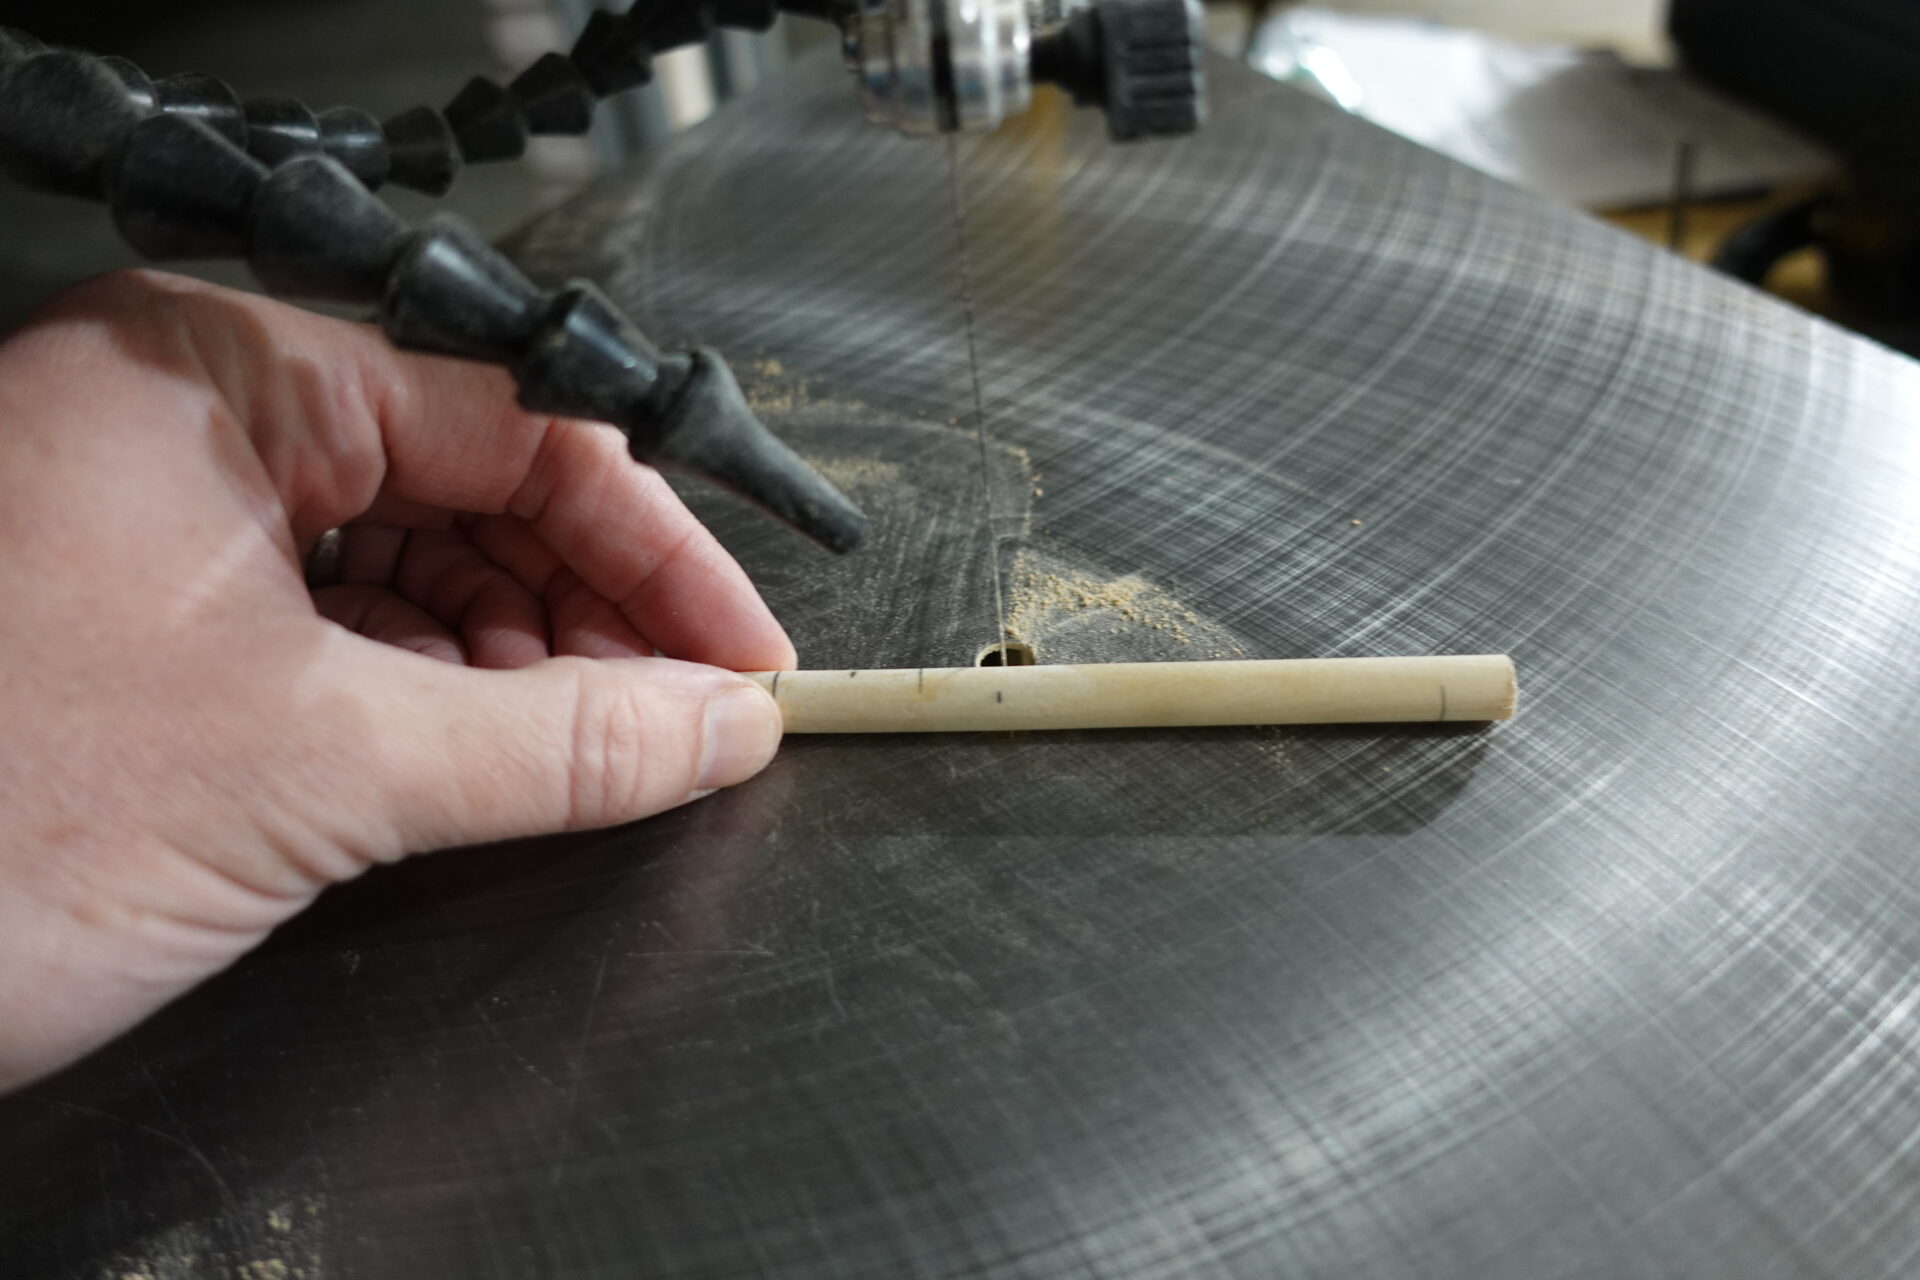
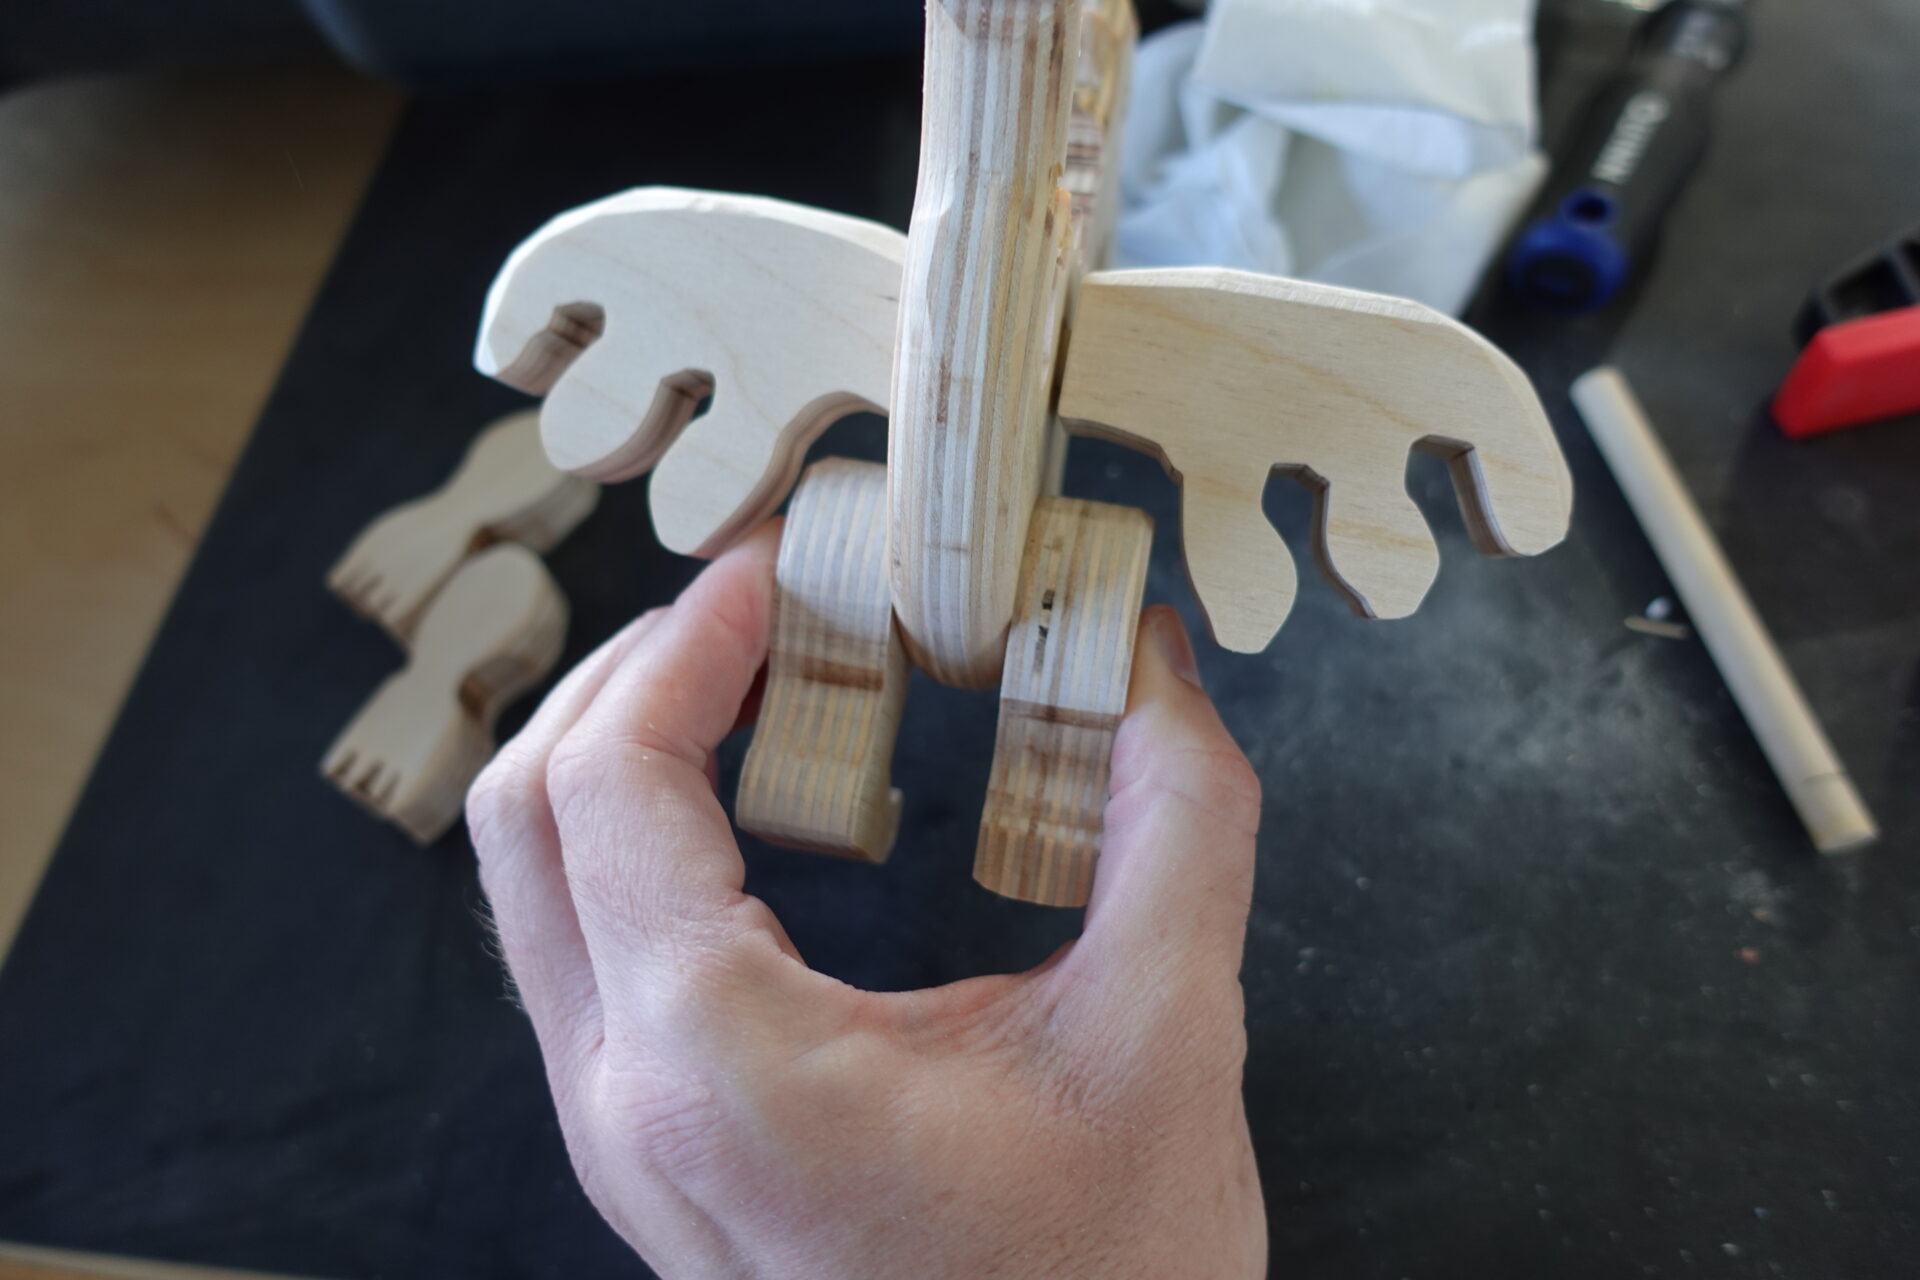
This is a great trick so you don’t need to fiddle with exact depth measurements. First, mark the depth of the dowel on one side of the wing.

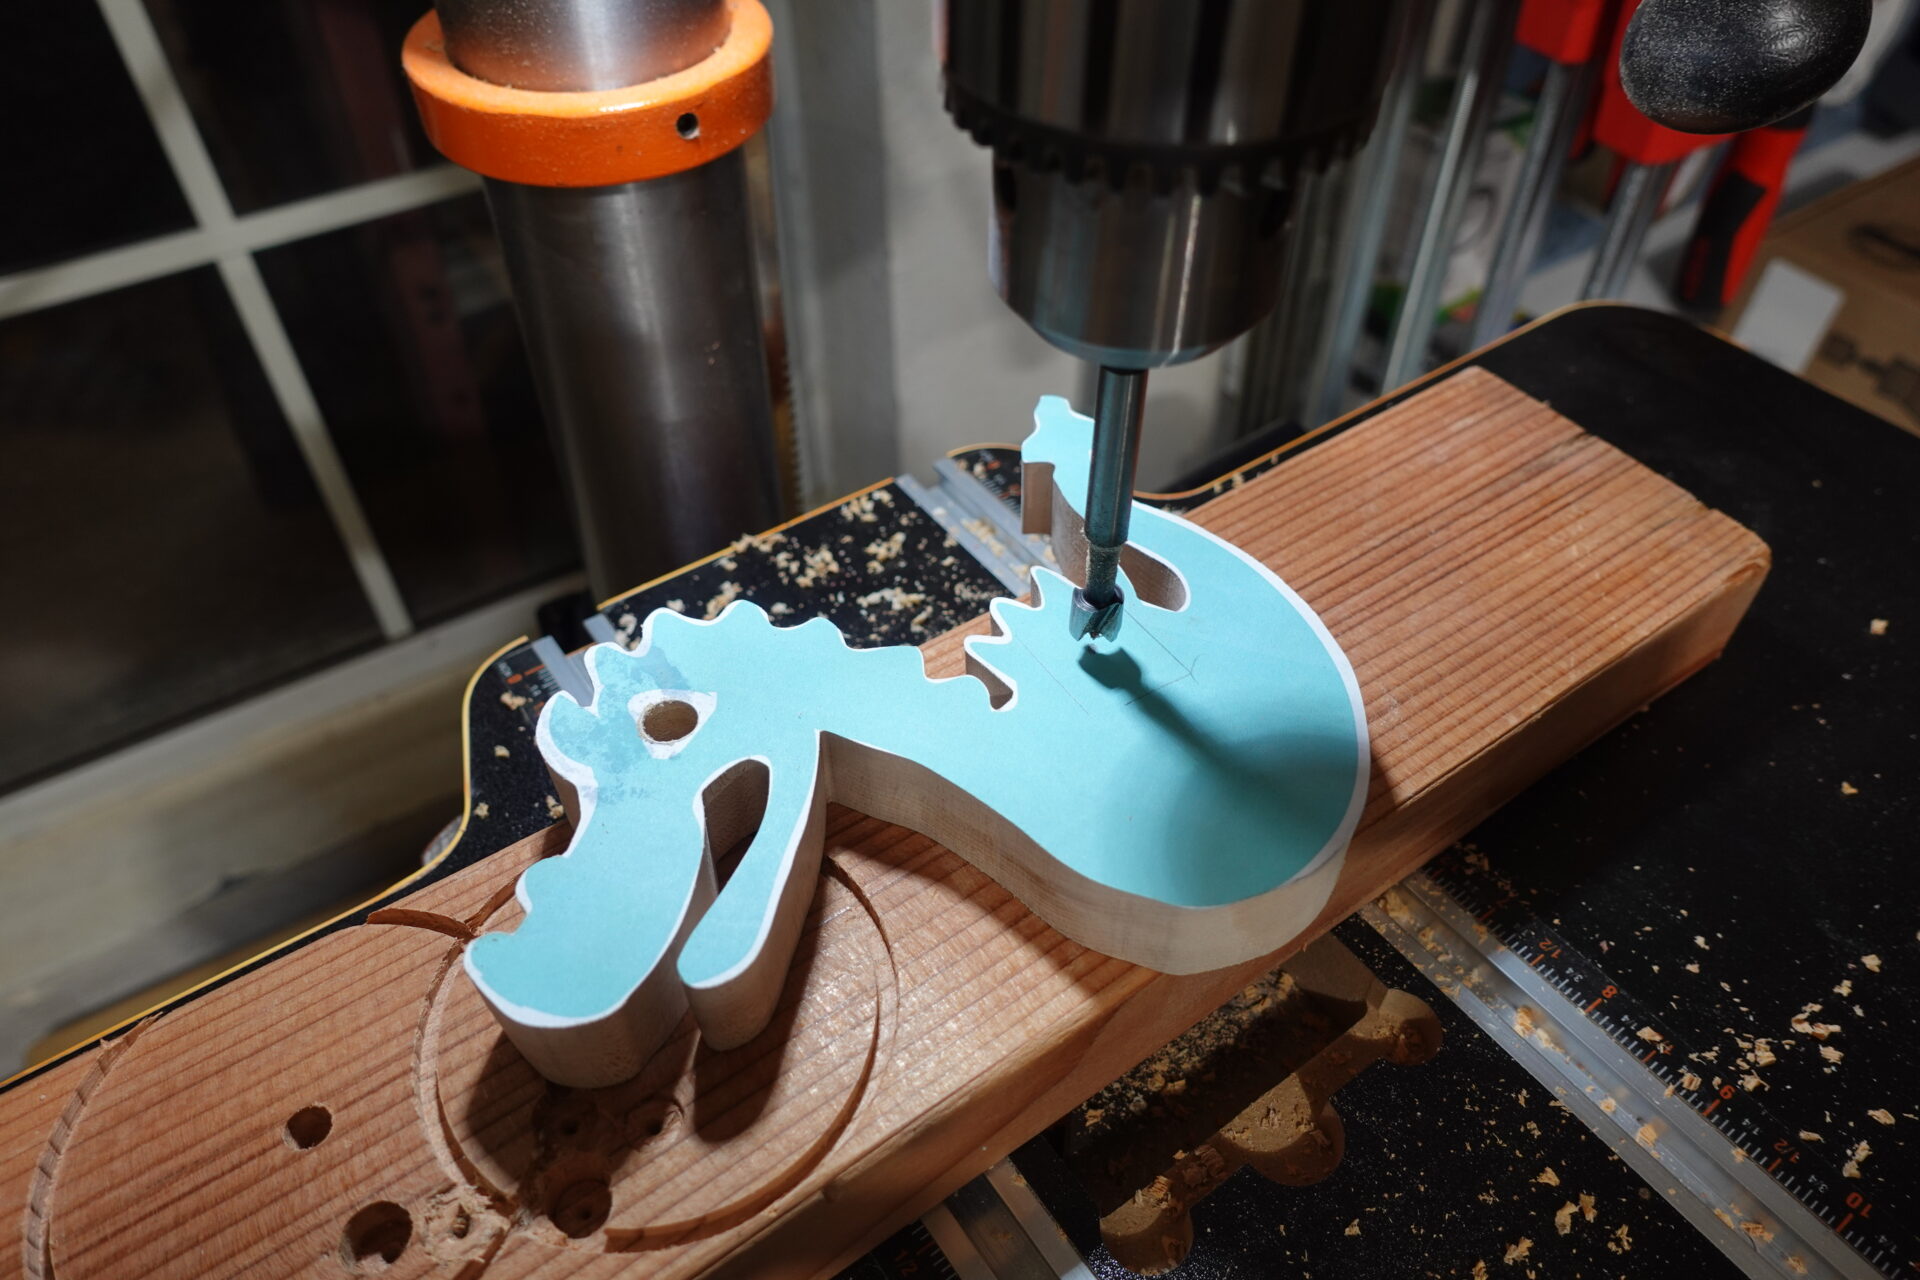
STEP 10:
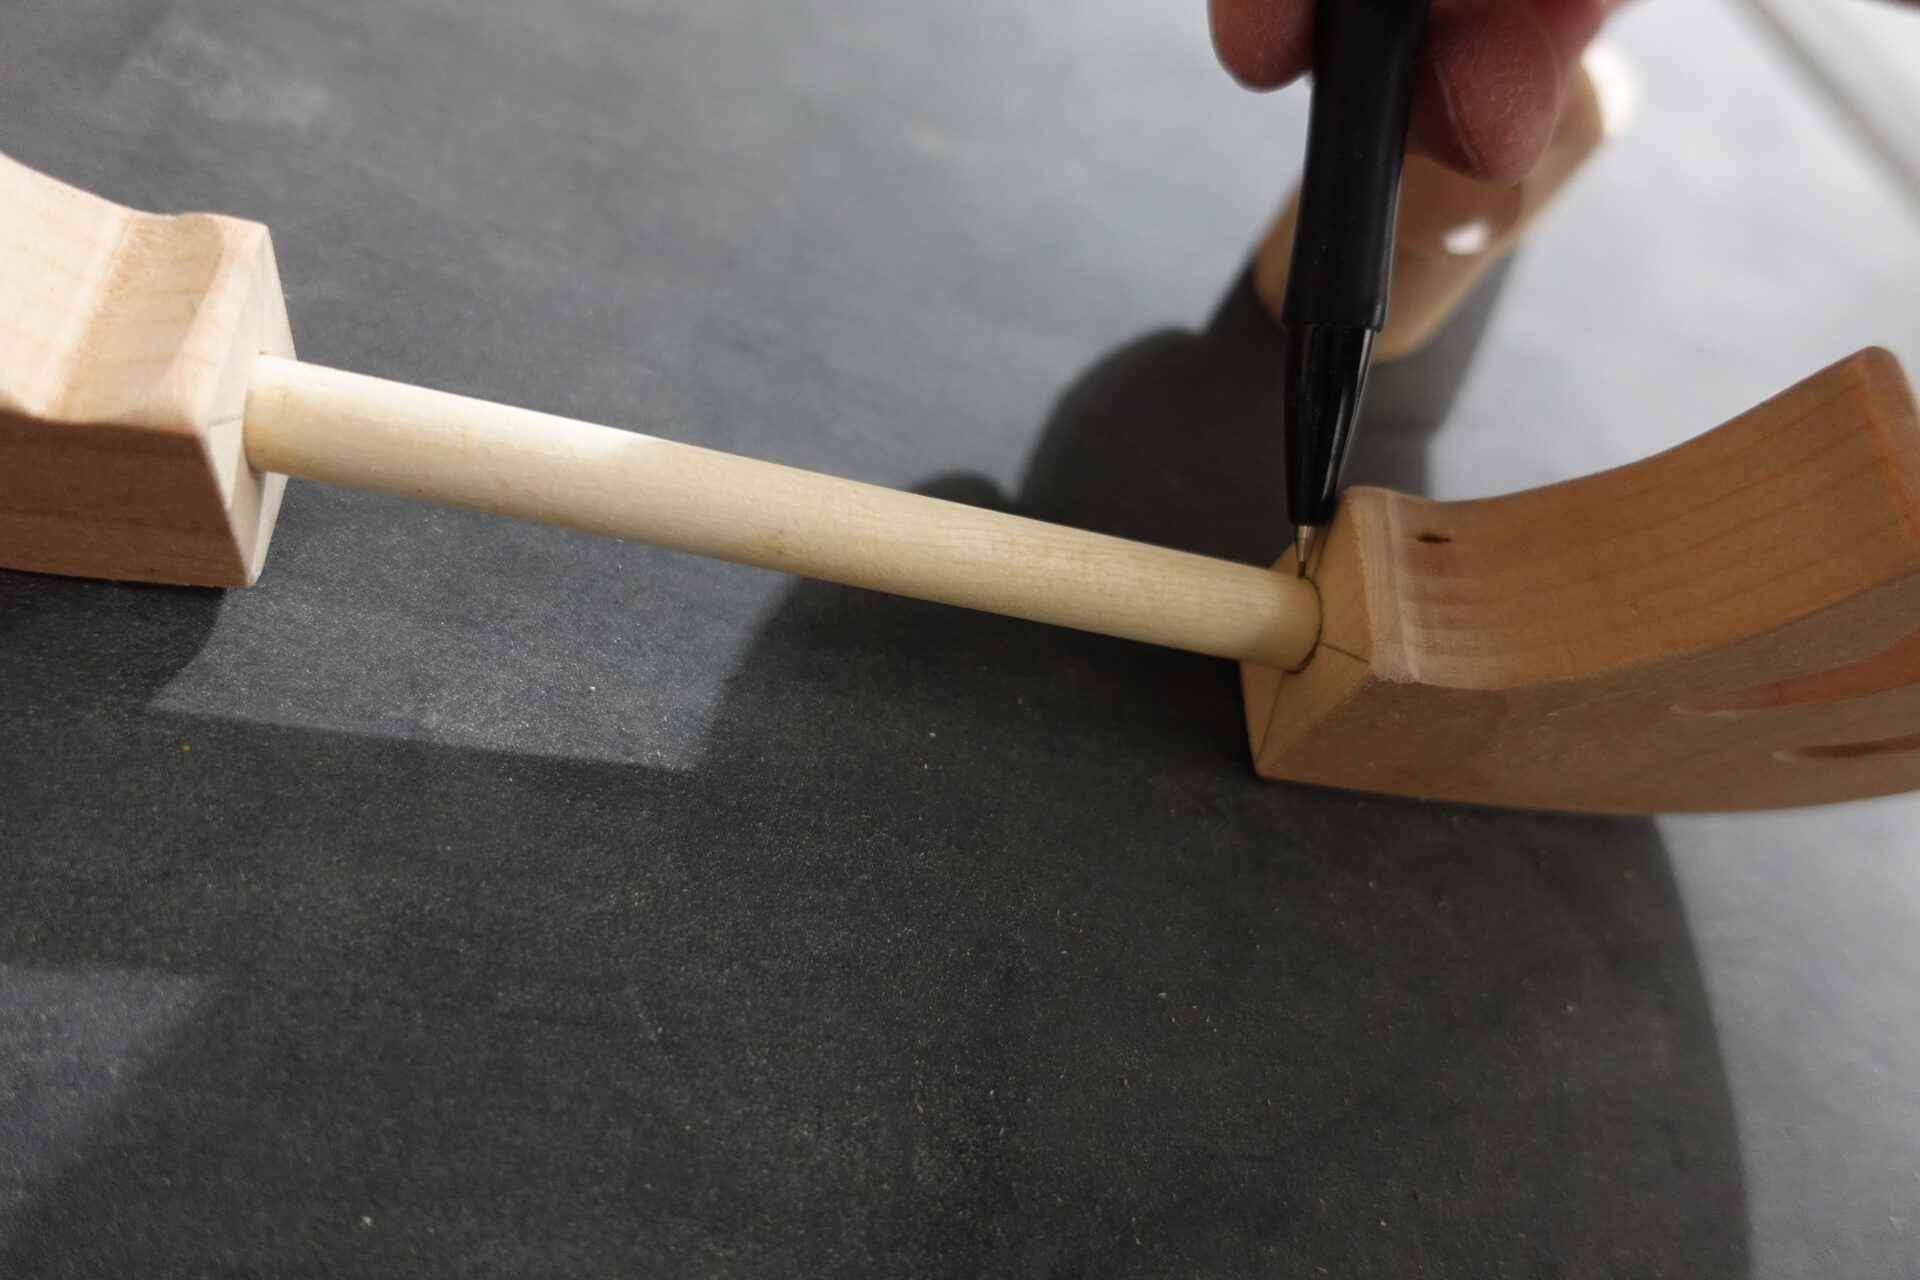
Next, insert the other end of the dowel into the wing and thread through the body. Now mark where the dowel meets the edge of the body as shown in the picture above.
STEP 11:
Now add the measurement from Step 9 to the marking from Step 10 and add 1/16 inch. This will allow the wings to rotate after they are glued in place to the wings.
STEP 12:
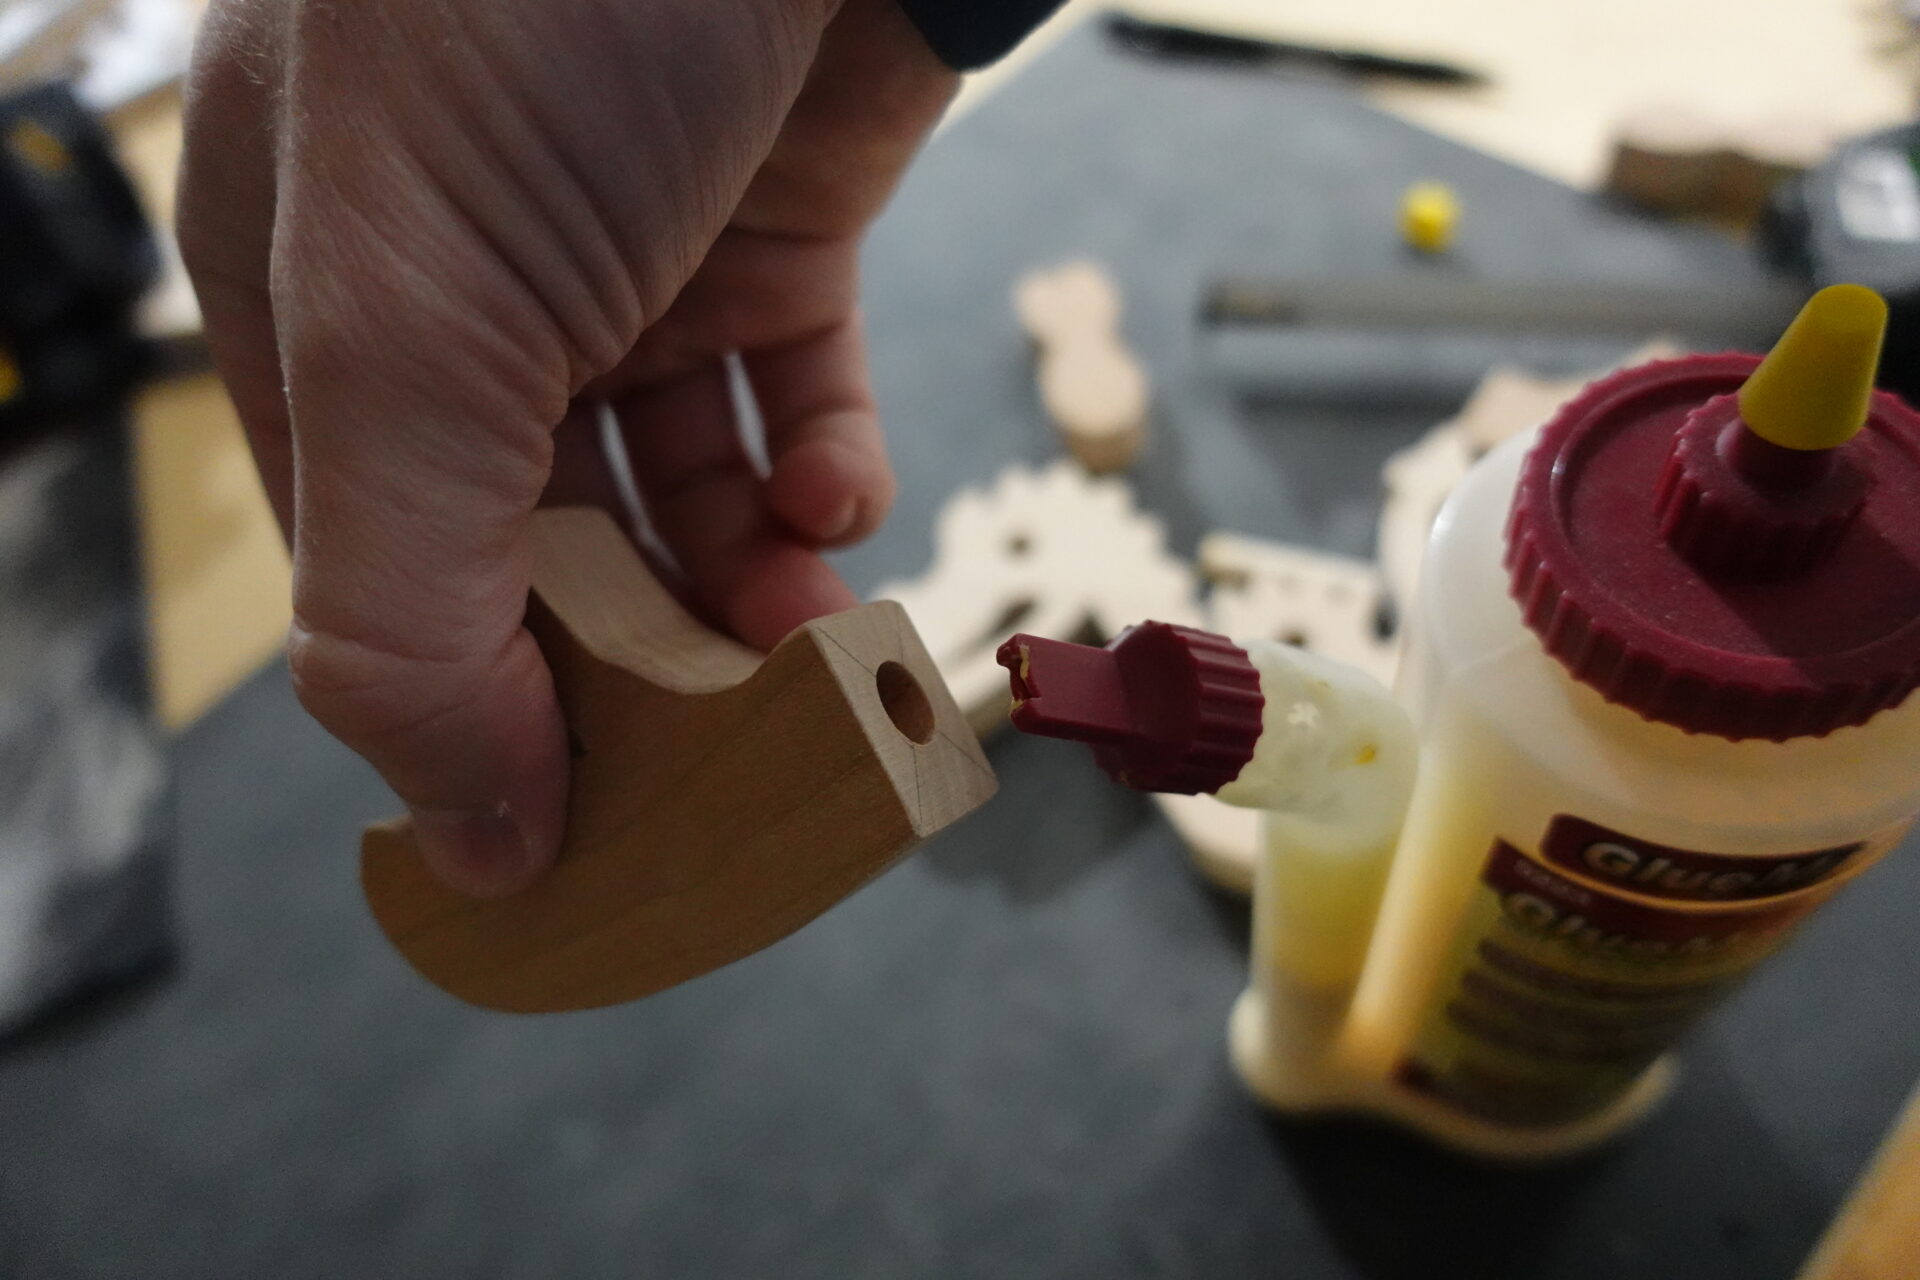
Add glue to the dowel holes in the wings.
STEP 13:
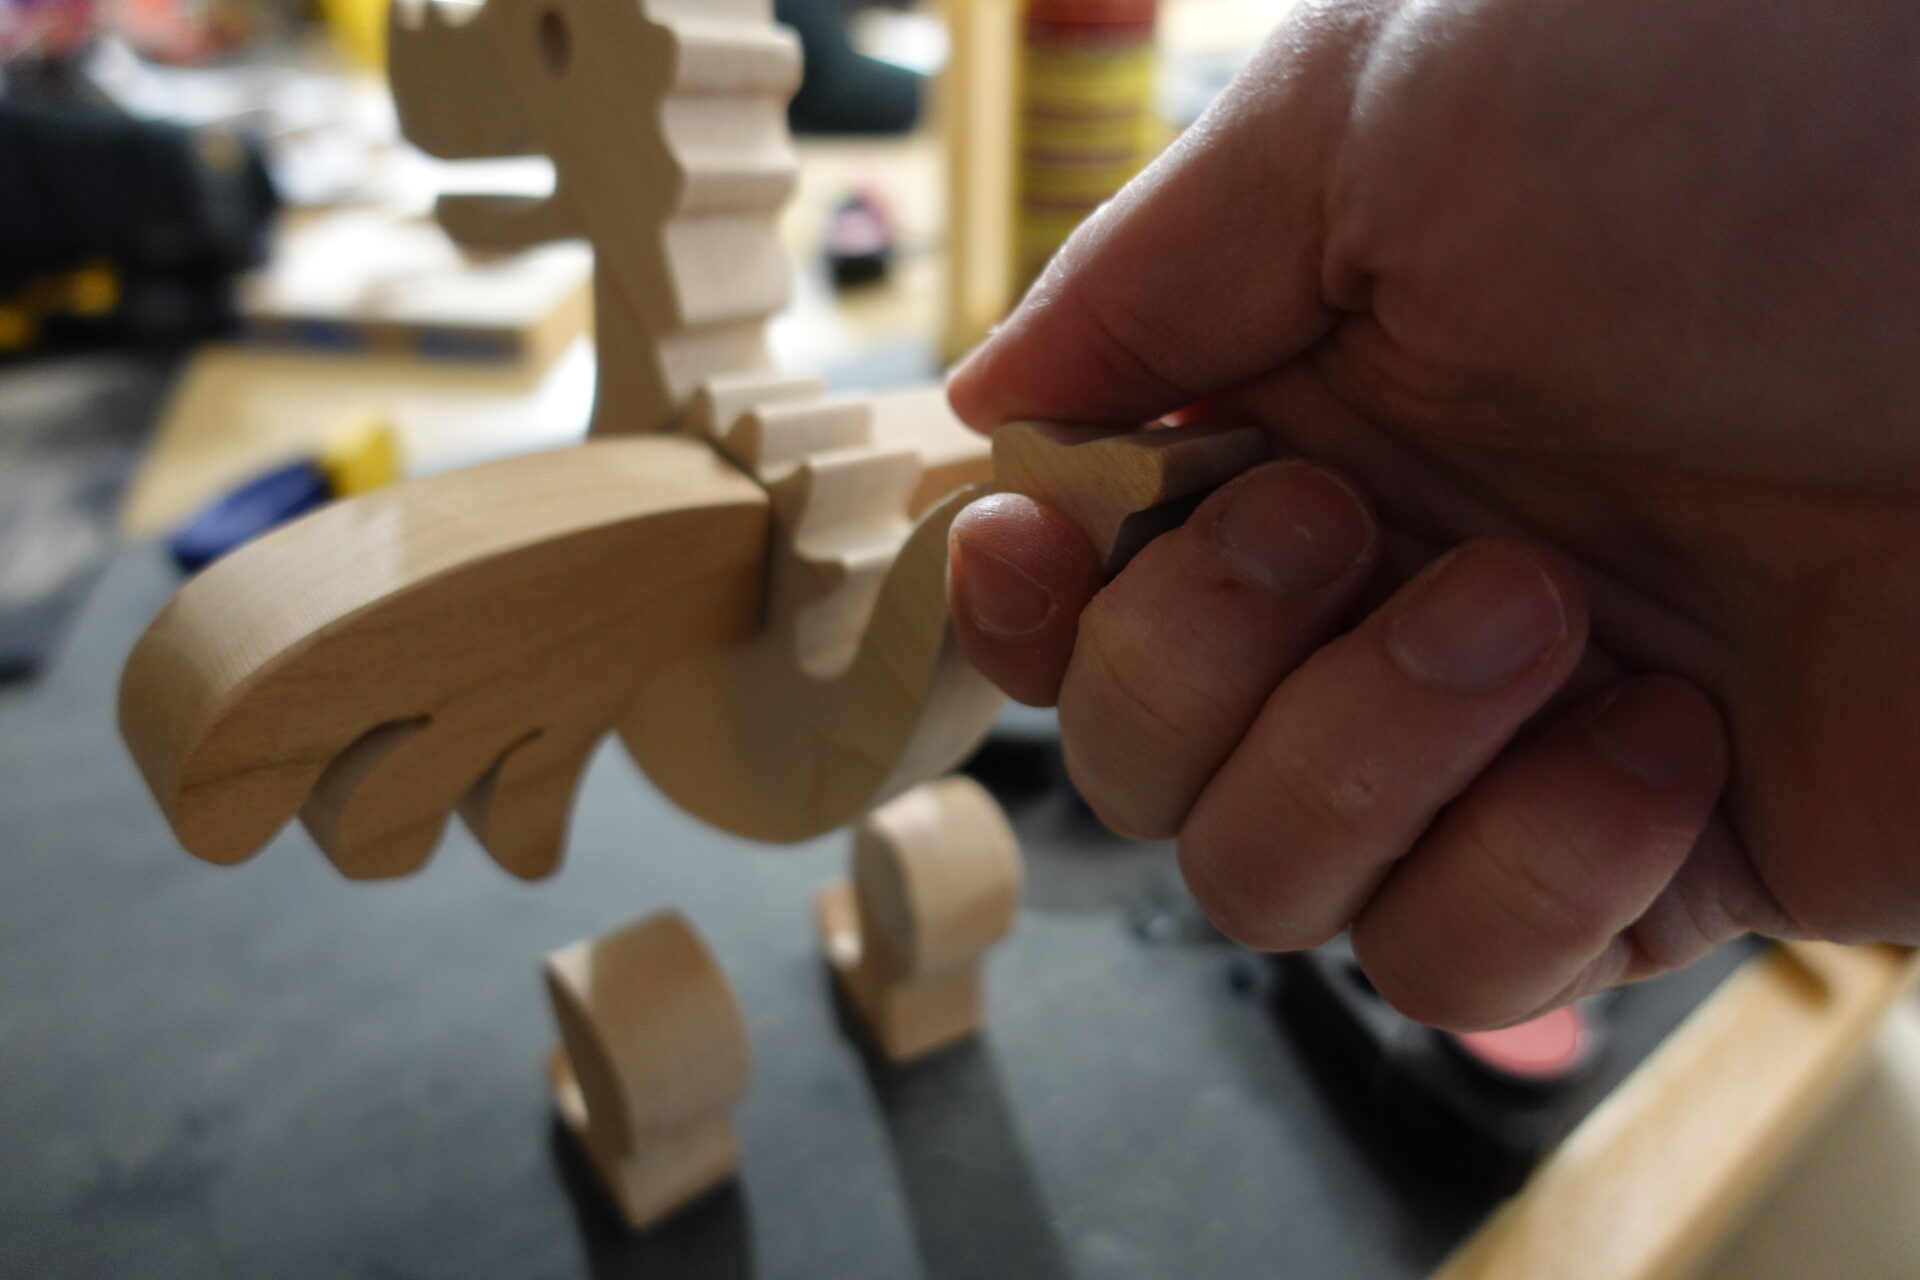
Insert the dowel into the one wing and press firmly to extract any air and glue at the bottom. Then thread through the body and do the same with the other wing. You may need to remove and wipe off any excess glue. NOTE: Be sure the wings rotate freely and no glue is on the inside of the dragon body.
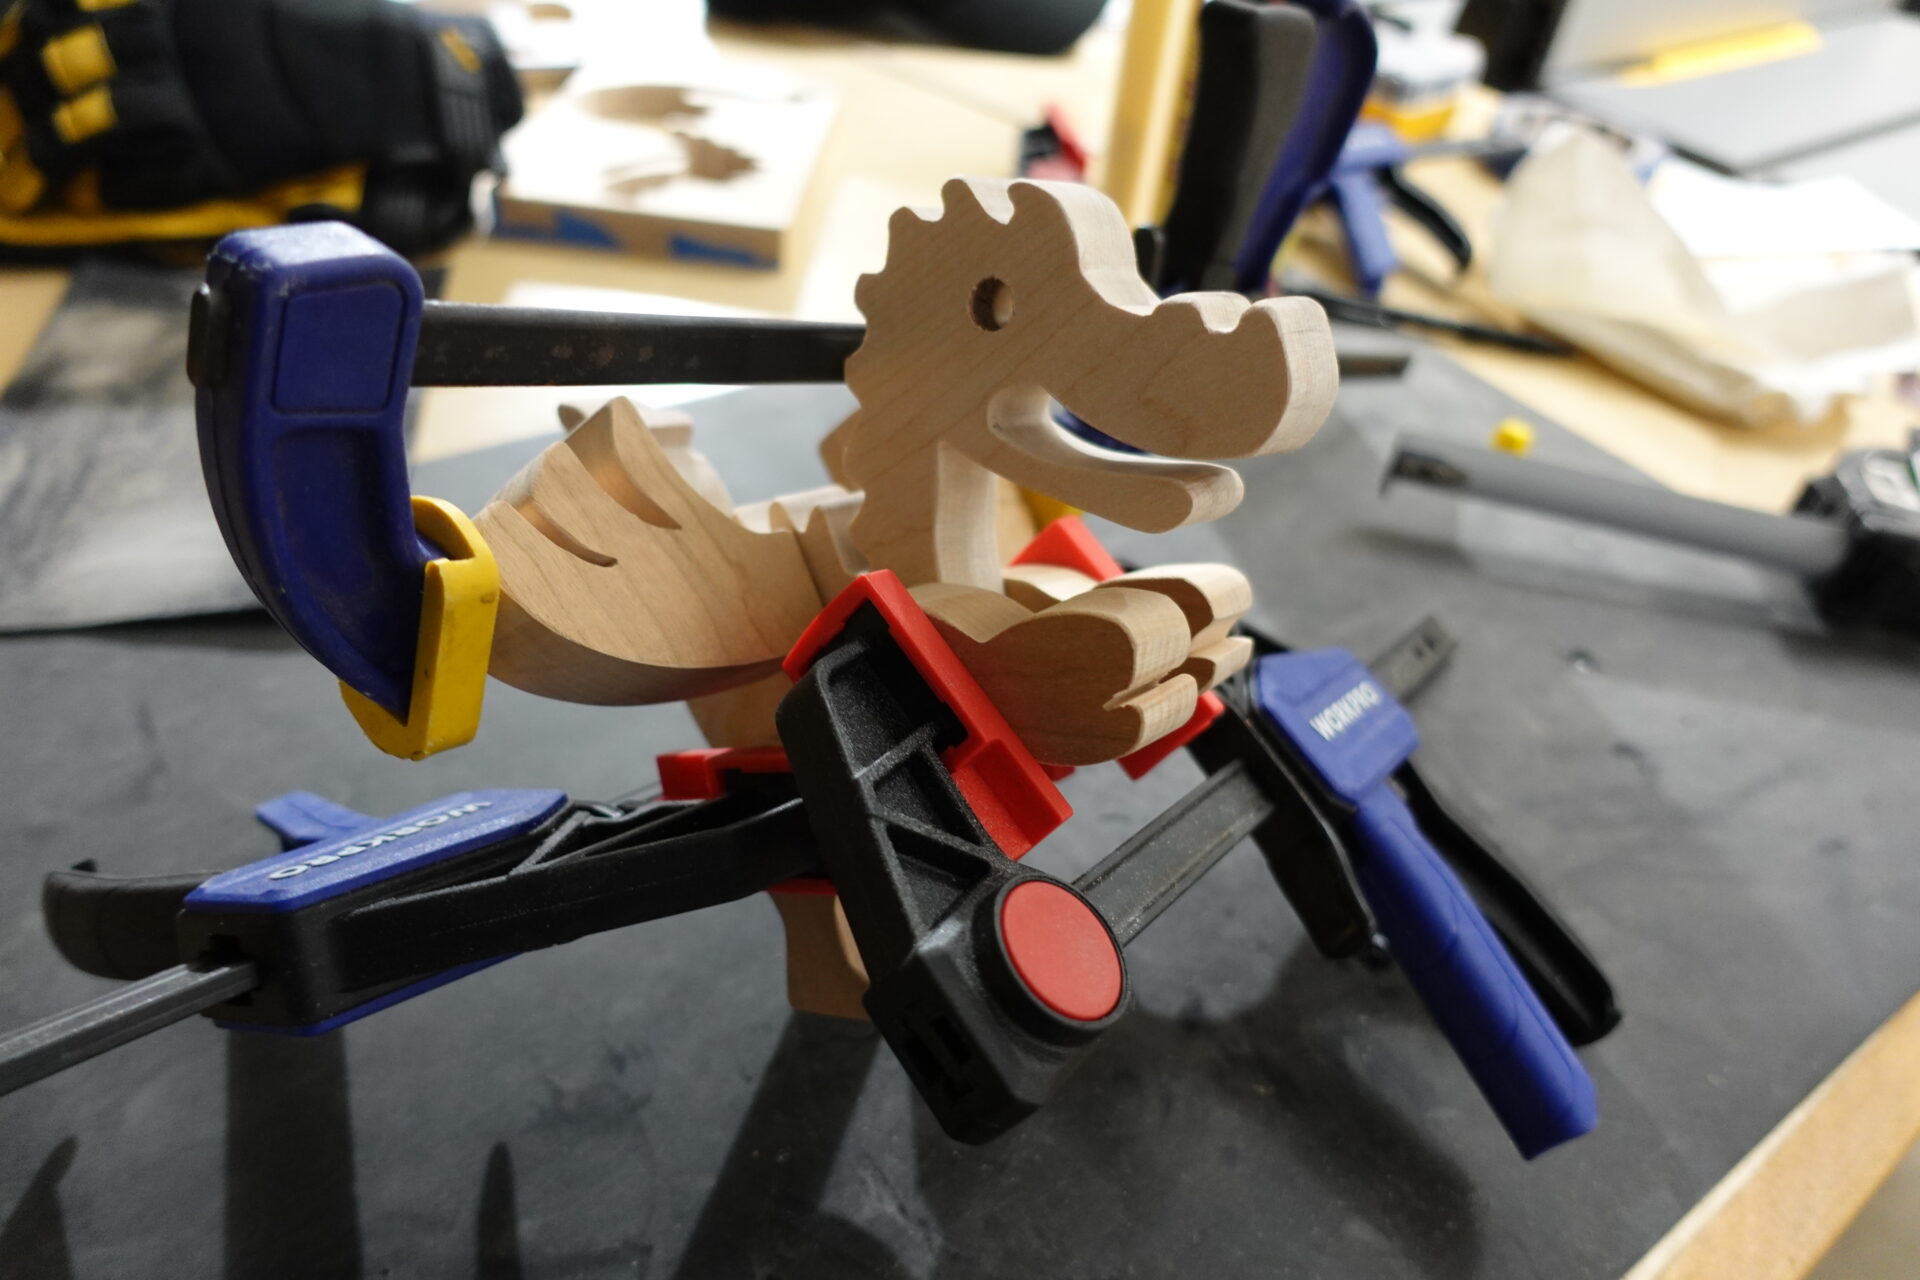
STEP 14:
After the glue is in place for the wings, clamp the wings. Next add glue to the legs and position the body so the wings can rotate and the wings can rotate. Then add the clamps to the legs. Finally, add glue to the hands and clamp.
Wait 24 Hours for Glue to Dry…
STEP 15:
(Optional): Sand again and remove all dust before applying Osmo Hard Wax Oil (+ Our Product Review) which is safe for children’s toys. Use gloves and non-abrasive pads to work the oil into the surface of the wood. Let sit for about 15 minutes and wipe the excess with a paper towels. IMPORTANT: Safely dispose of wet rags, gloves, and pads which can be flammable.