I used Osmo Hard Wax Oil on my workbench and was really surprised by the results. Read below for my experience with Osmo.
I just built a miter station for my shop and needed a durable finish to protect the surface. The top surface is a smooth birch veneer over “B” quality plywood. I decided to give the Osmo Hard Wax Oil Finish a try because I really liked the results from Rubio Monocoat Oil Plus 2C from another project and wanted to see the difference.
Another great benefit of this Osmo product is that it is based on natural vegetable oils (sunflower oil, soybean oil, thistle oil, waxes, and silica, siccatives (drying agents).
Preparation
The manufacturer recommends first sanding the entire area to with a coarse sand paper and finishing the with a final sand of 180 – 240 grit. I was very hesitant to start with an abrasive coarse sanding on the first pass because I have seen problems in the past with my orbital sander getting too aggressive and causing swirl marks in the veneer. So I started with a 300 grit and then moved to a 400 grit, making sure to completely blow and wipe away any excess dust in between sanding.
Note: The hard wax and oil combination in the finish needs to bond and attach to the wood fibers. So if you sand too smoothly, there will be less bonding of the finish and more likely to result in a tacky or sticky top layer. Because I was too worried about busting through the veneer, I didn't risk going down to the recommended sub 180 grit. Fortunately, it turned out okay but the second coat was a bit dicey.
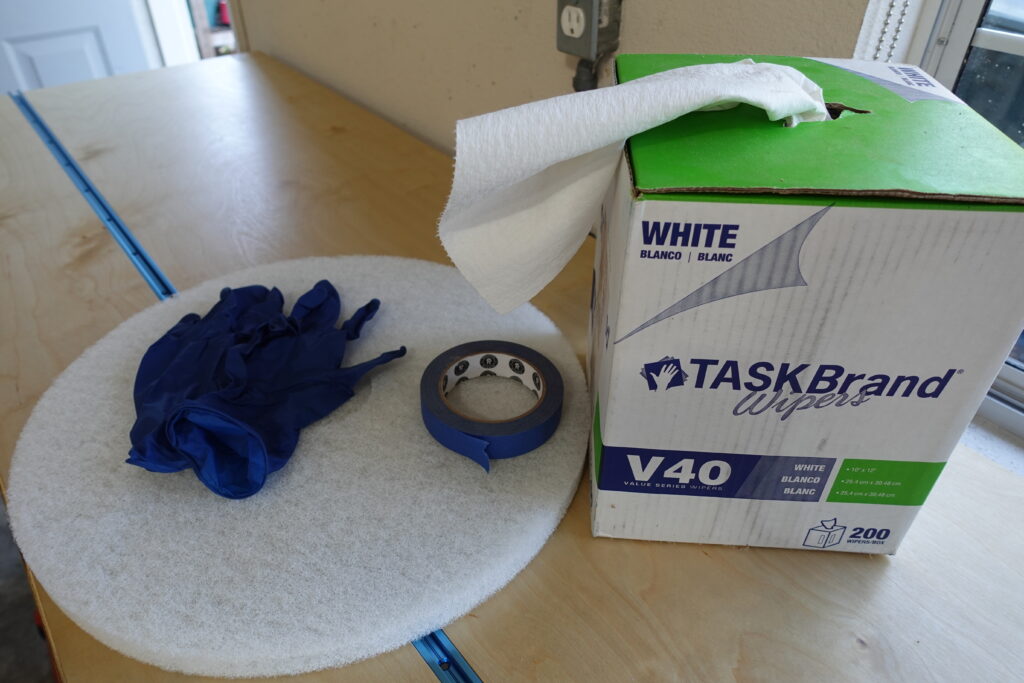
Next I gathered my supplies and materials:
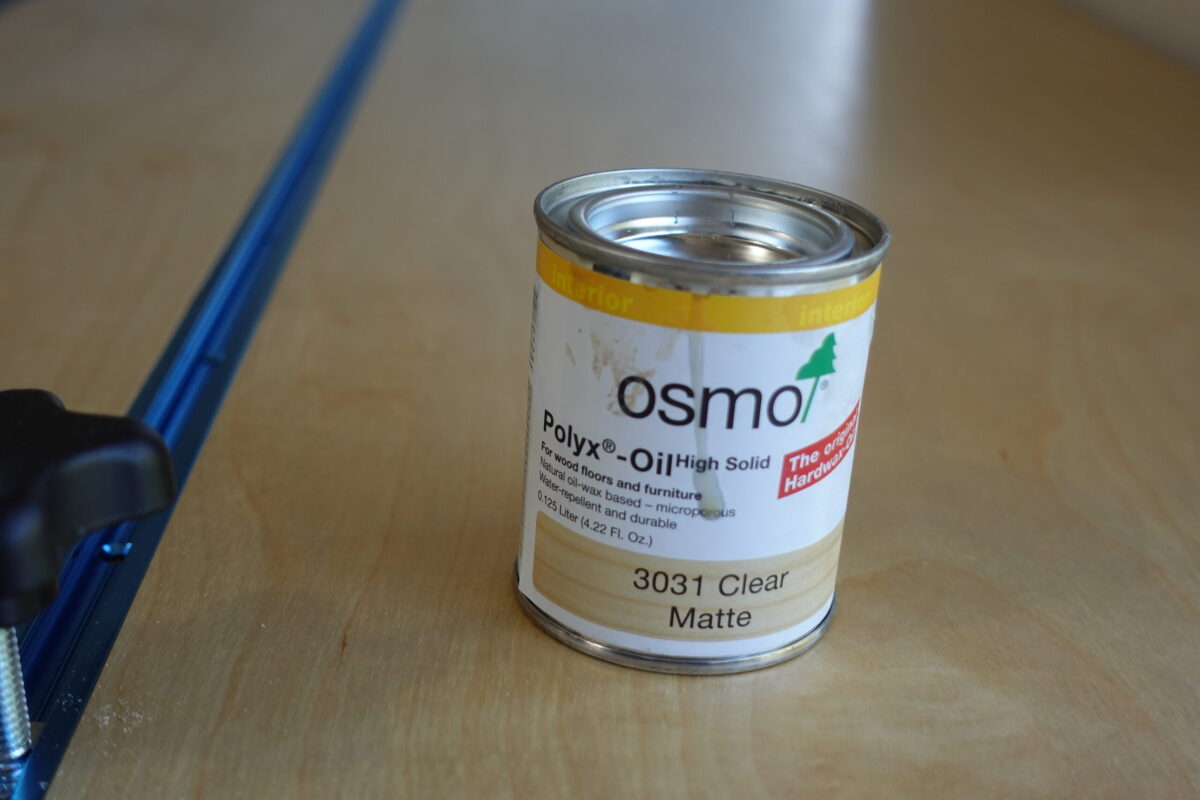
+ Osmo Hard Wax and Oil Finish 3031 Clear Matte
+ Nitrite Gloves
+ Non-Abrasive Applicator
+ Pencil to stir
+ Shop Towels
+ Masking Tape (blue painters tape)
Application
First Coat
Once the surface was completely free of dust, I used blue painters tape to tape the edges of the workbench so I wouldn’t need to worry about being precise around the face of the workbench. After all the windows and doors were open, I stirred up the contents of the can with a pencil and started to apply the finish. I used a non-abrasive pad to work the finish into all the fibers of the wood. Using circular motions and also back and forth motions with and against the grain. I didn’t have a problem applying the finish against the grain.
I was using a very small can (0.125 Liter) and I was worried about not having enough to cover 20 square feet. Happily, a little goes a long way, and I was able to squeeze out a bunch of Osmo out of the pad and onto the work surface and continue rubbing it in. In all, I used about 3/4 of the can.
Dry Time
After about 15 minutes of letting the wax oil penetrate the wood, I wiped off all the excess with a shop towel. Then I cranked up the fan and let surfaces dry for 24 hours.
Note: I put all the wet abrasive pads, used shop towels and gooey gloves loosely on the concrete floor to prevent any possibility of spontaneous combustion. I didn't have an unused paint can with water, but I would recommend submerging in that instead.
Second Coat
After the first coat dried, I was really impressed by the slick and smooth surface– it felt like glass to the touch. I was tempted to leave it, but Osmo recommends two coats. So I went ahead and did the same thing for the second coat, I dipped the non-abrasive pad into the can and started it working it across the surface.
I noticed I couldn’t see which parts were covered by Osmo unless I bent down found a glare hitting the surface with just the right light. This took a lot longer to apply the second coat.
I took my time and finished all the surfaces. But when I went to wipe off the excess, I panicked because it was super tacky and sticky to the touch!
I started panicking and rubbed as hard as I could to get off the excess. It didn’t really work so I grabbed a huge piece of the non-abrasive pad and rubbed super hard to get off the excess. To the credit of Osmo, I couldn’t see any noticeable damage or negative effects of the harsh rubbing. Phew!
I finished as best as I could to clean the surface of any remaining oil and called it a day, saddened by the likely probability that the surface was ruined. I convinced myself that I sanded with too fine of a grit and the finish didn’t properly bond to the wood, making the second coat too tacky. Anyway, I researched on Reddit and a few people mentioned just to leave it alone for 24 hours. So I did just that.
Final Result
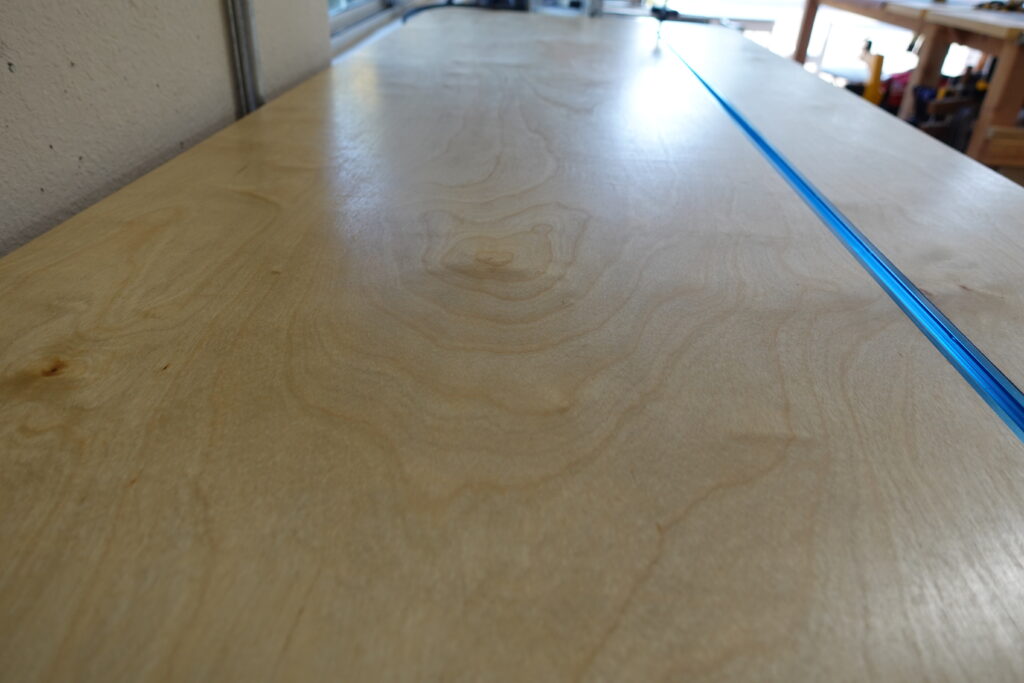
So next day, I ran down to the shop to take a look. Was it still super sticky? Was it dry finally? Would I need to sand it down a bit? Well, to my absolute and utter shock, the surface felt like glass. It was not ruined, but in fact felt amazing. No tacky feel and super hard to the touch. I even tried to dig my finger nail into it and there was no damage whatsoever.
Parting Thoughts
I am a big fan of Osmo now and trust the product a lot more after this experience. I would highly recommend it with a couple caveats. First, it takes two coats to apply and is a bit messy for the clean up. Second, it doesn’t have the best smell (I definitely prefer the smell of Rubio Monocoat.) Third, it’s expensive- the little can was almost $30 USD. That said, it’s a great product and worth testing.
I did try this product for the first time. I was expecting that the company would give better information on how to apply their product. I had to look up individual to get their input. I sand all my surface to 320 grit and I noticed that the penetration in the wood is not even. Furthermore if you have very hard wood (ice, jatoba, caruma) or padoux the penetration is not good. The product stay sticky and difficult to wiped off excess. If you use less dense wood like maple, mahogany, cherry etc the product adheres fine and after the second coat it’a look great.
It is not for all type of wood so be warned.
Great tip on the dense hard woods. Thank you for sharing!