Follow along these step-by-step instructions to build your own vintage art deco race car.

Key Project Details
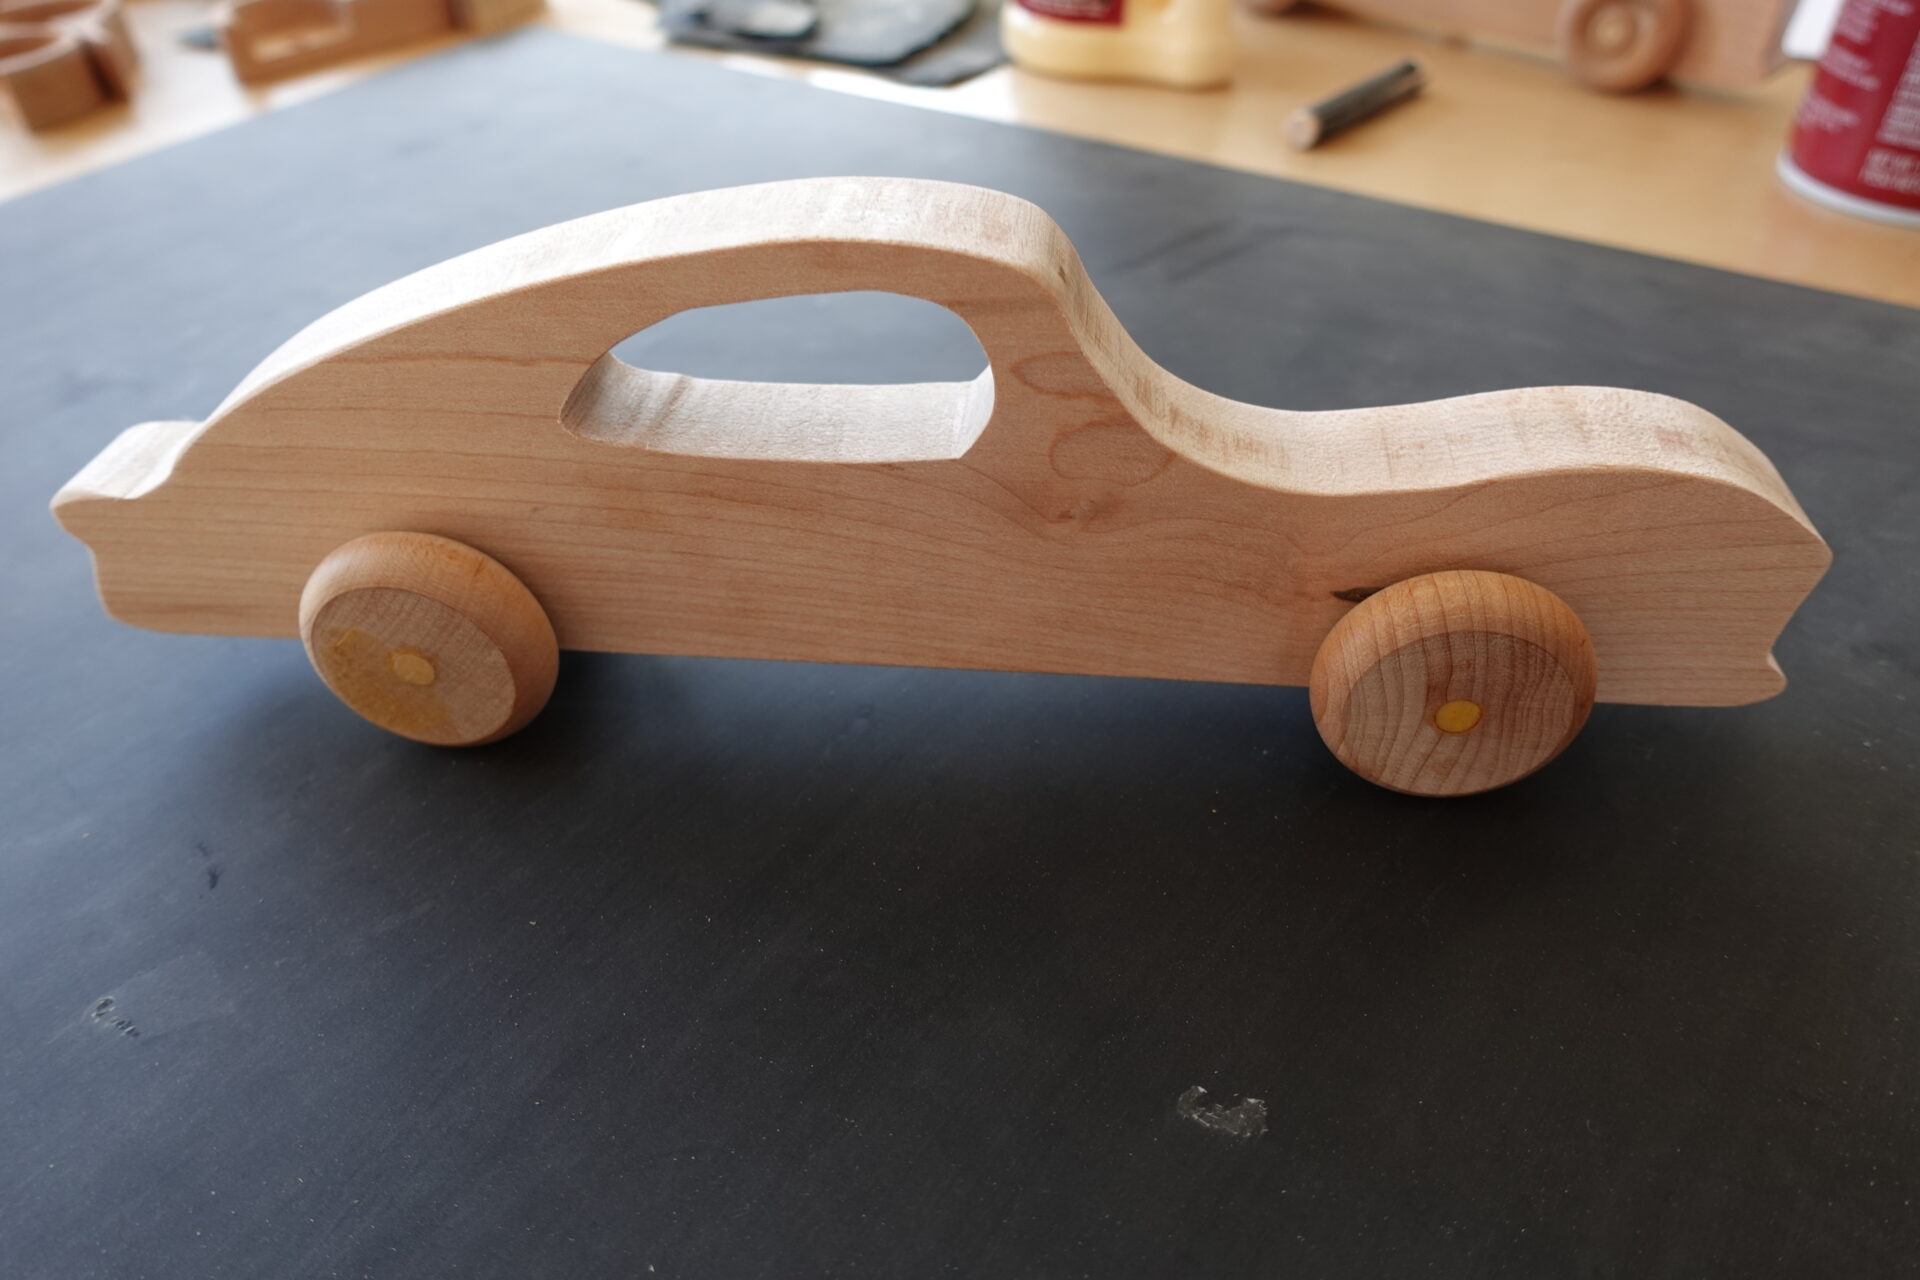
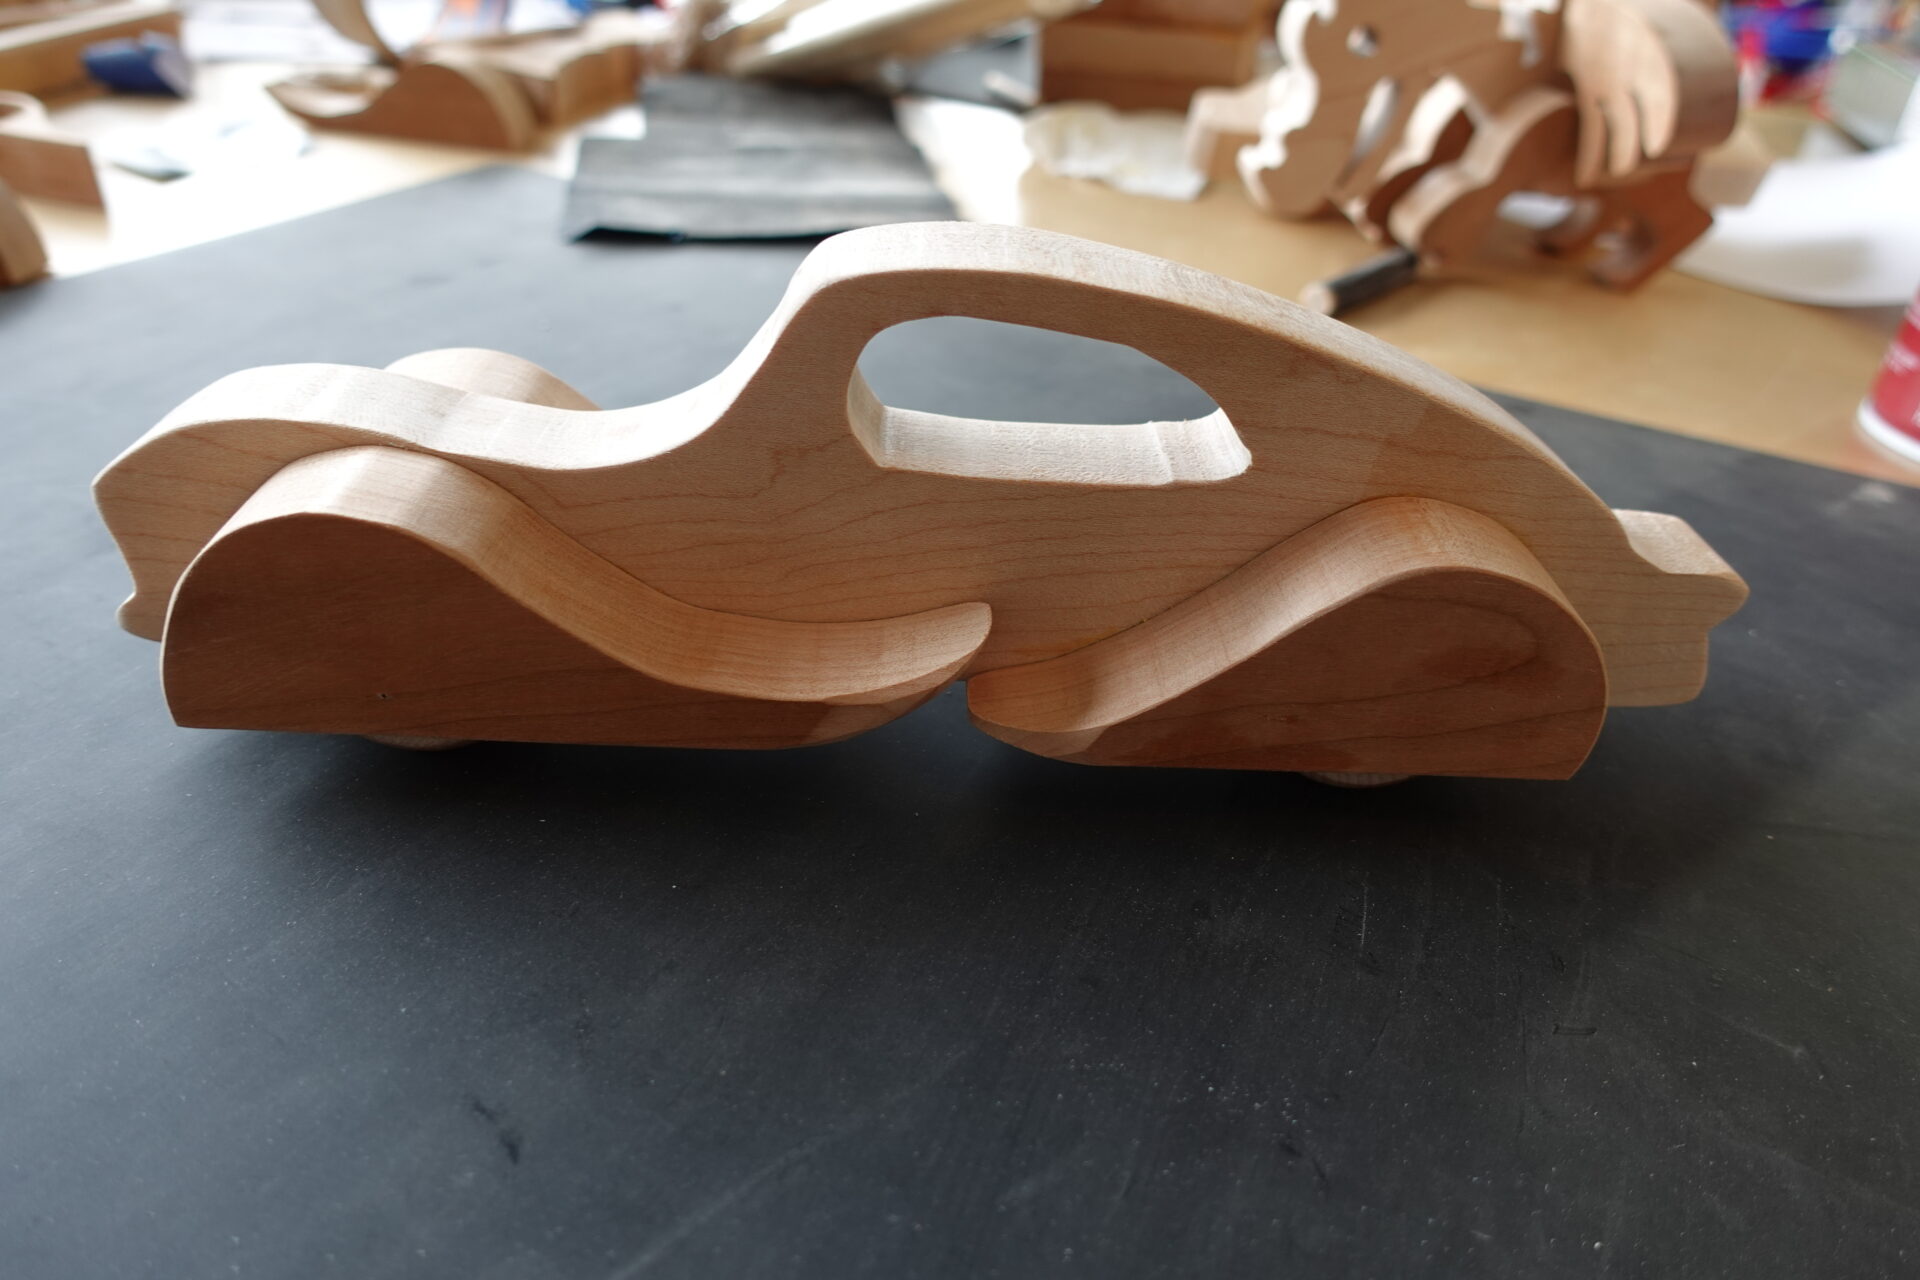
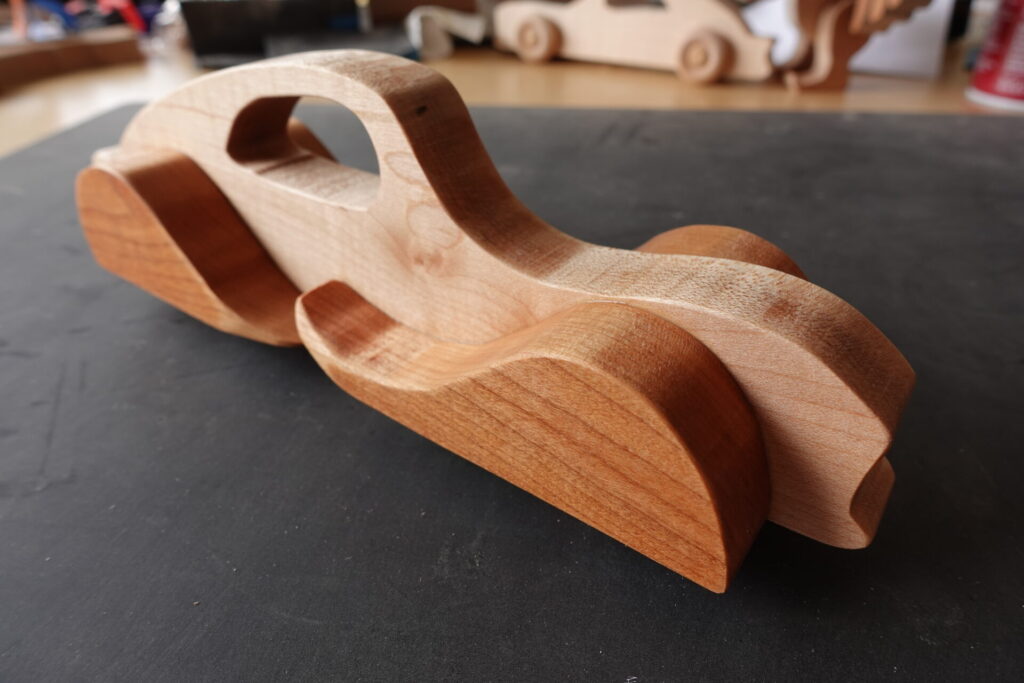
With big ostentatious wheel covers, this little roadster is a throw back to the art deco era of classic cars. The 1930’s ushered in advances in aerodynamics and new ballistic technology which influenced many of the car designs. This racer pays homage to the vintage era by hiding the wheels in large covers.
| Time to Build | 2 Days ( 2 x 24 hours glue drying time) |
| Difficulty | 2 of 5 |
| Dimensions | 10 x 2-1/2 x 3-1/4 inches (LxWxH) |
| Materials Needed | 3/4 inch Cherry (wheel covers) 3/4 inch Maple (body) Wooden Wheels (1.5″ diameter) 1/4 inch Dowel (6 inches) 1/4 inch Forstner bit 1-3/4 inch Forstner bit Wood Glue (Tite Bond II) 3M Super 77 (spray adhesive) Masking tape Playing Cards 180 Grit Sandpaper Osmo Hard Wax Oil + Our Product Review |
| Tools Needed: | Scroll Saw + Our Product Review Drill Press (or Cordless Drill) Clamps Disc or Belt Sander (or equivalent) |
| Lessons Learned: | Having quality forstner bits makes this project a dream |
Download Free Plans:

Step-by-Step Build Instructions
STEP 1:
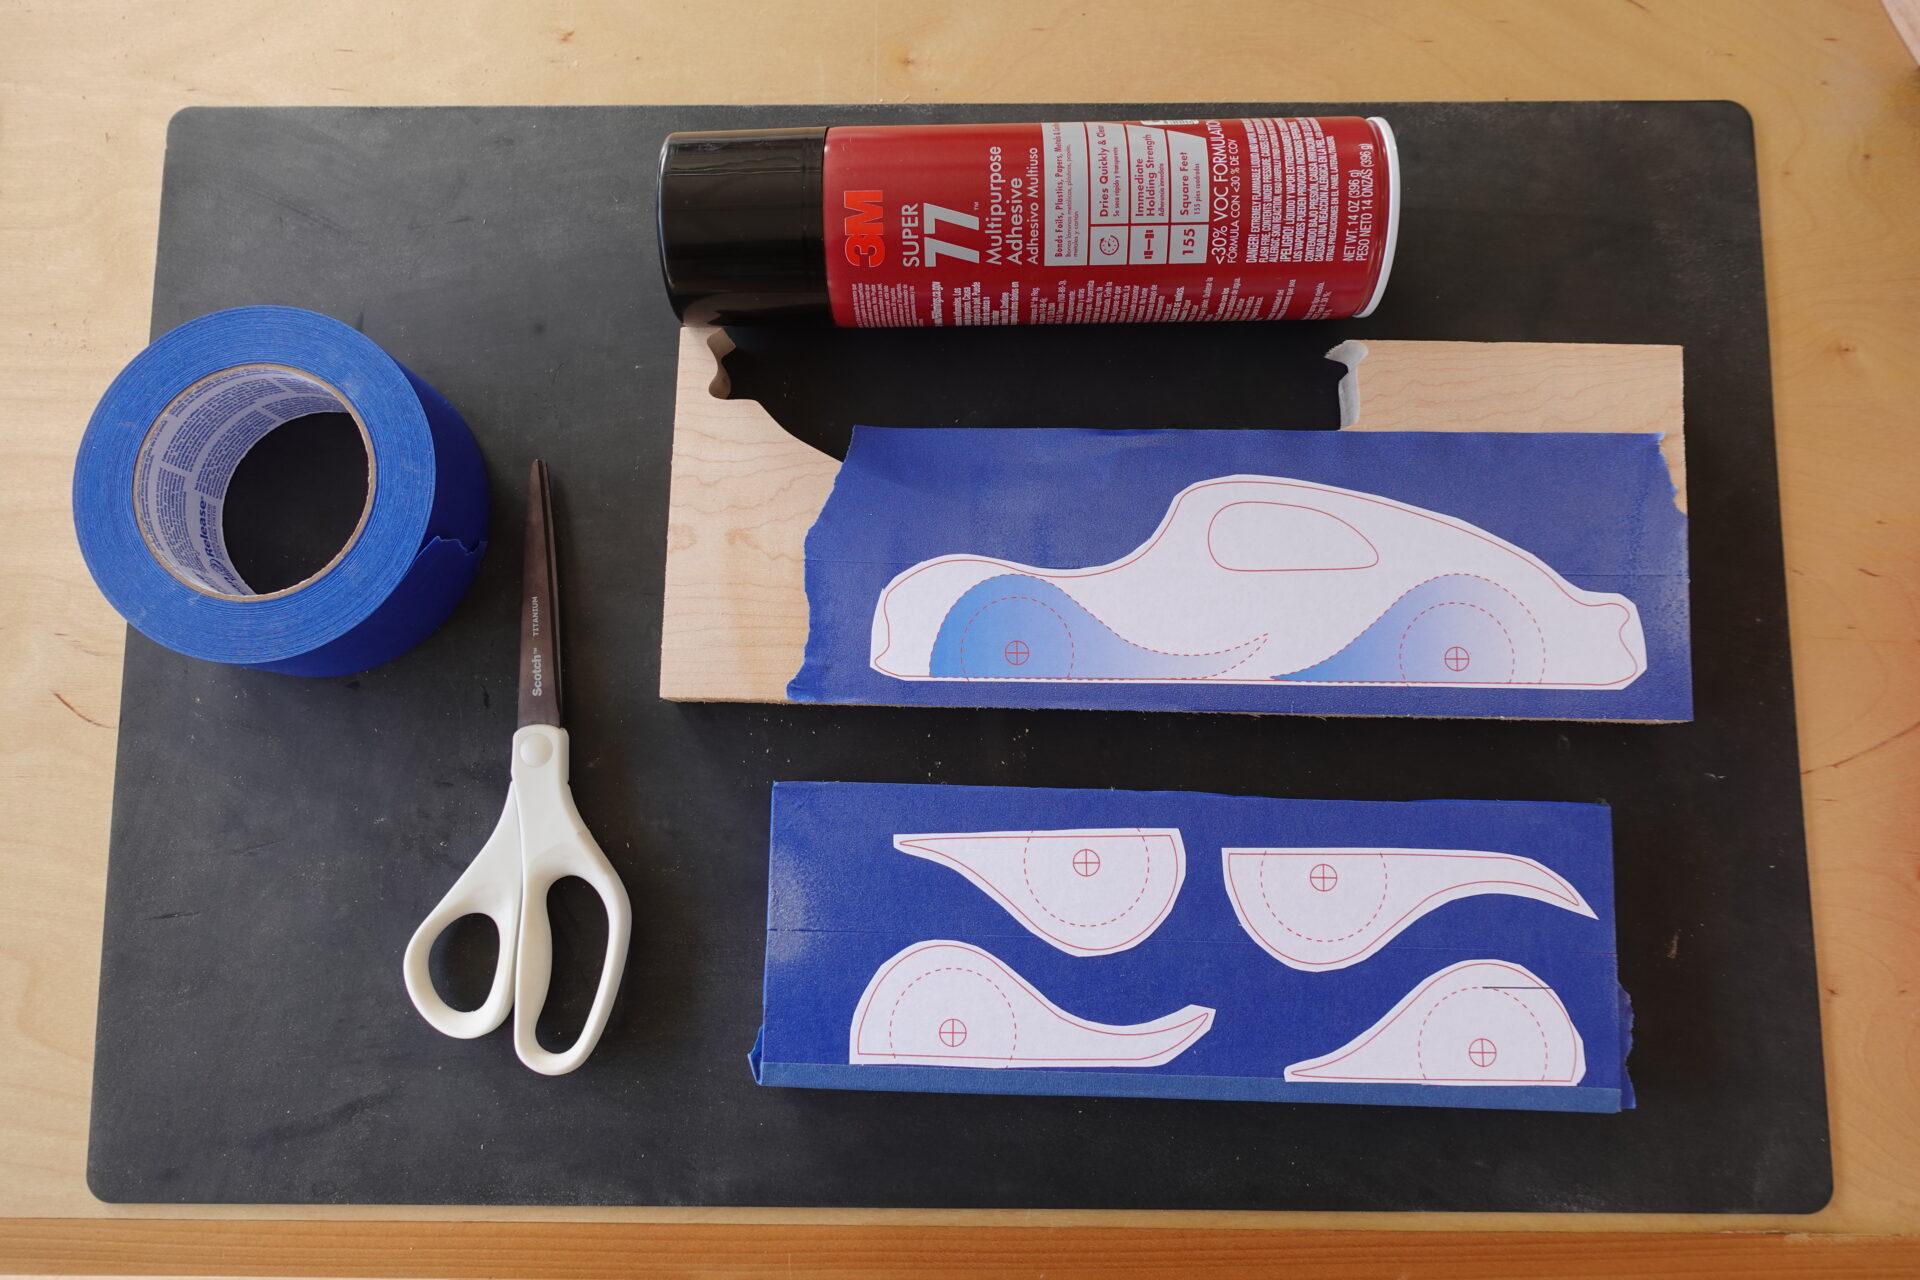
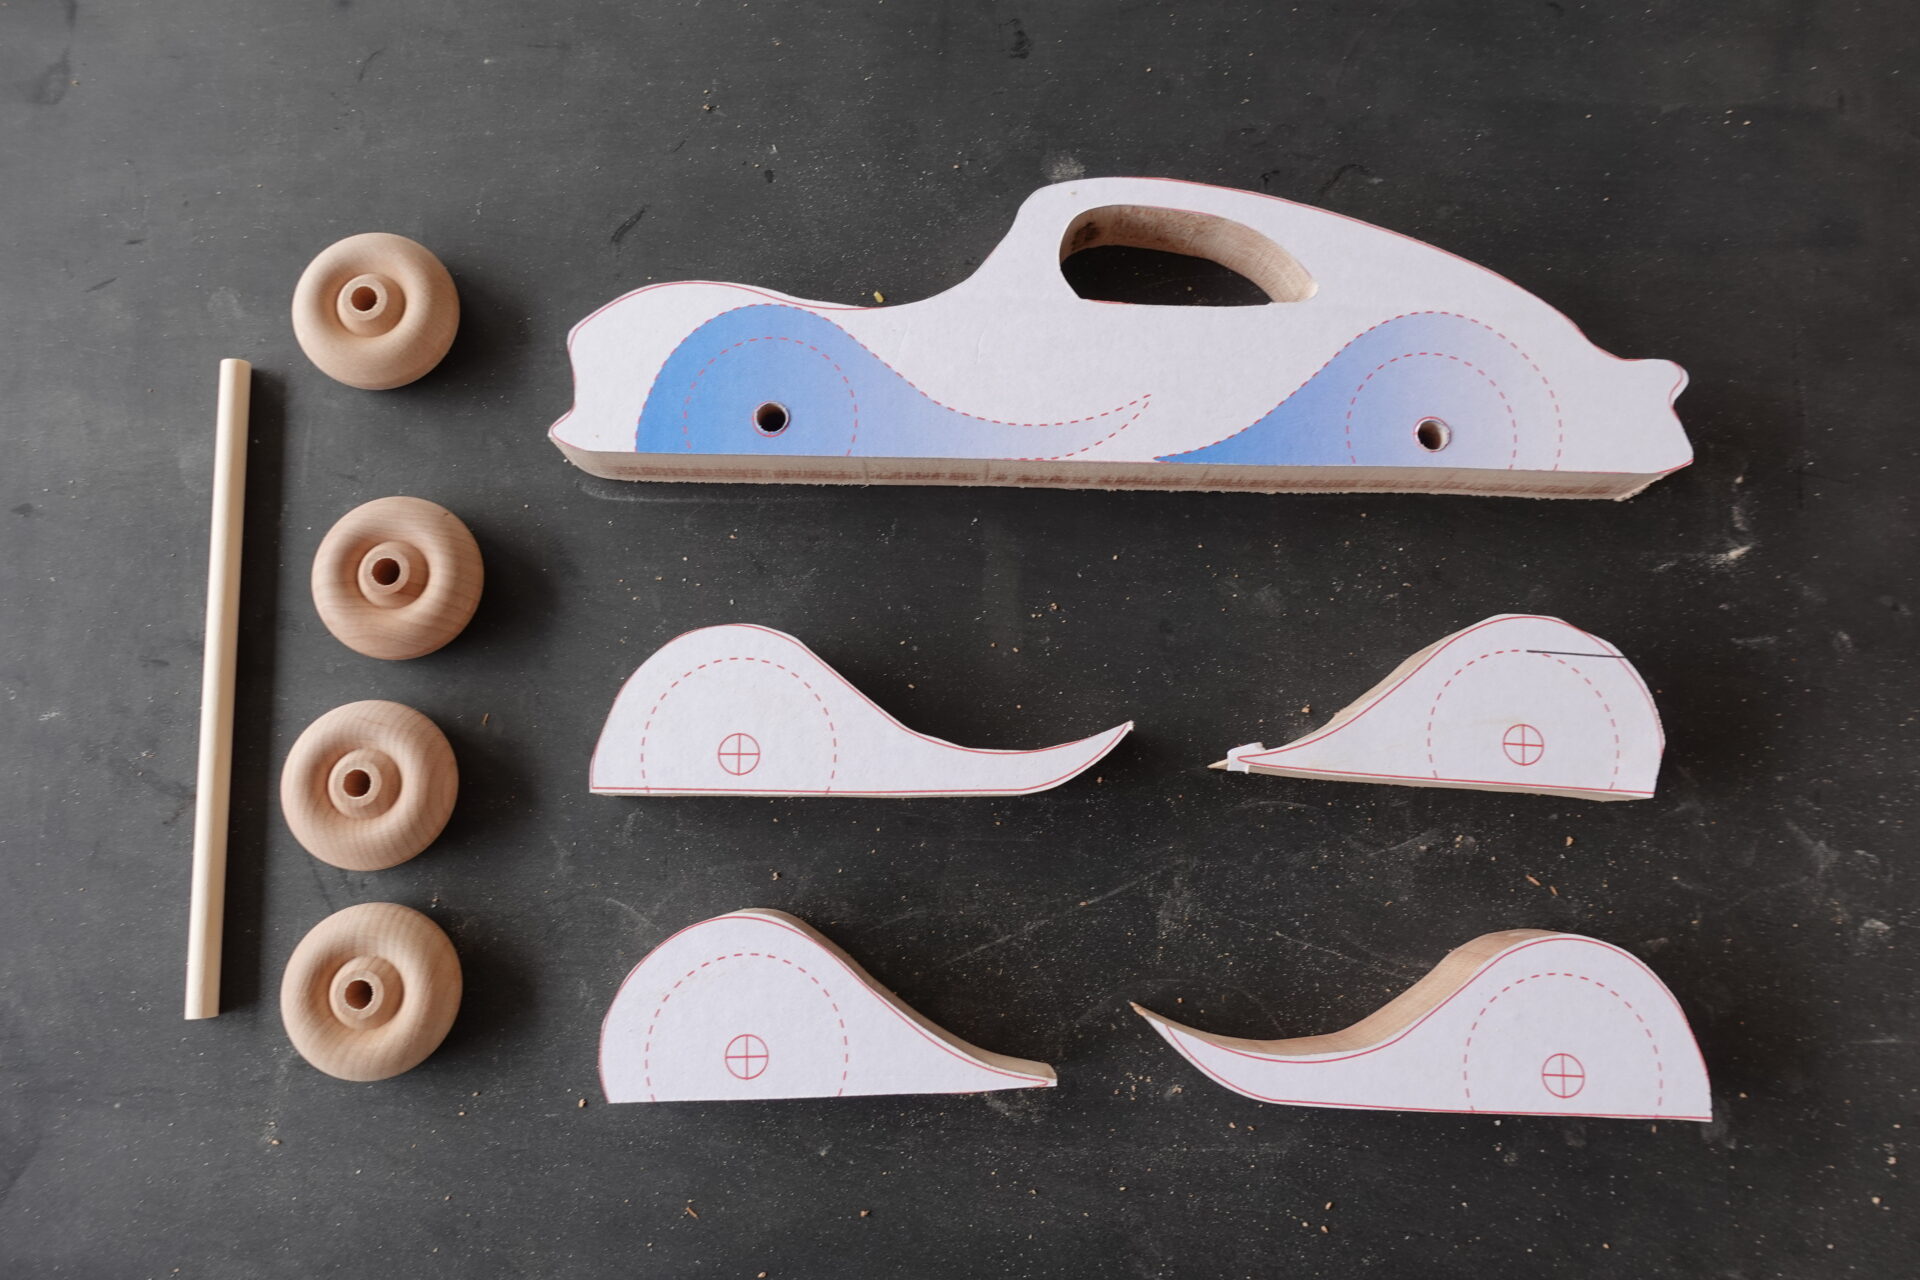
Print the plans on 8-1/2 x 11 letter paper. Then cut out the parts with a scissors as shown above. Next, apply masking tape over the wood and use spray adhesive (3M Super 77) to attach the paper plans to the masking tape. (This will make it much easier to remove in later steps). I chose maple for the body and cherry for the contrasting other parts.
STEP 2:
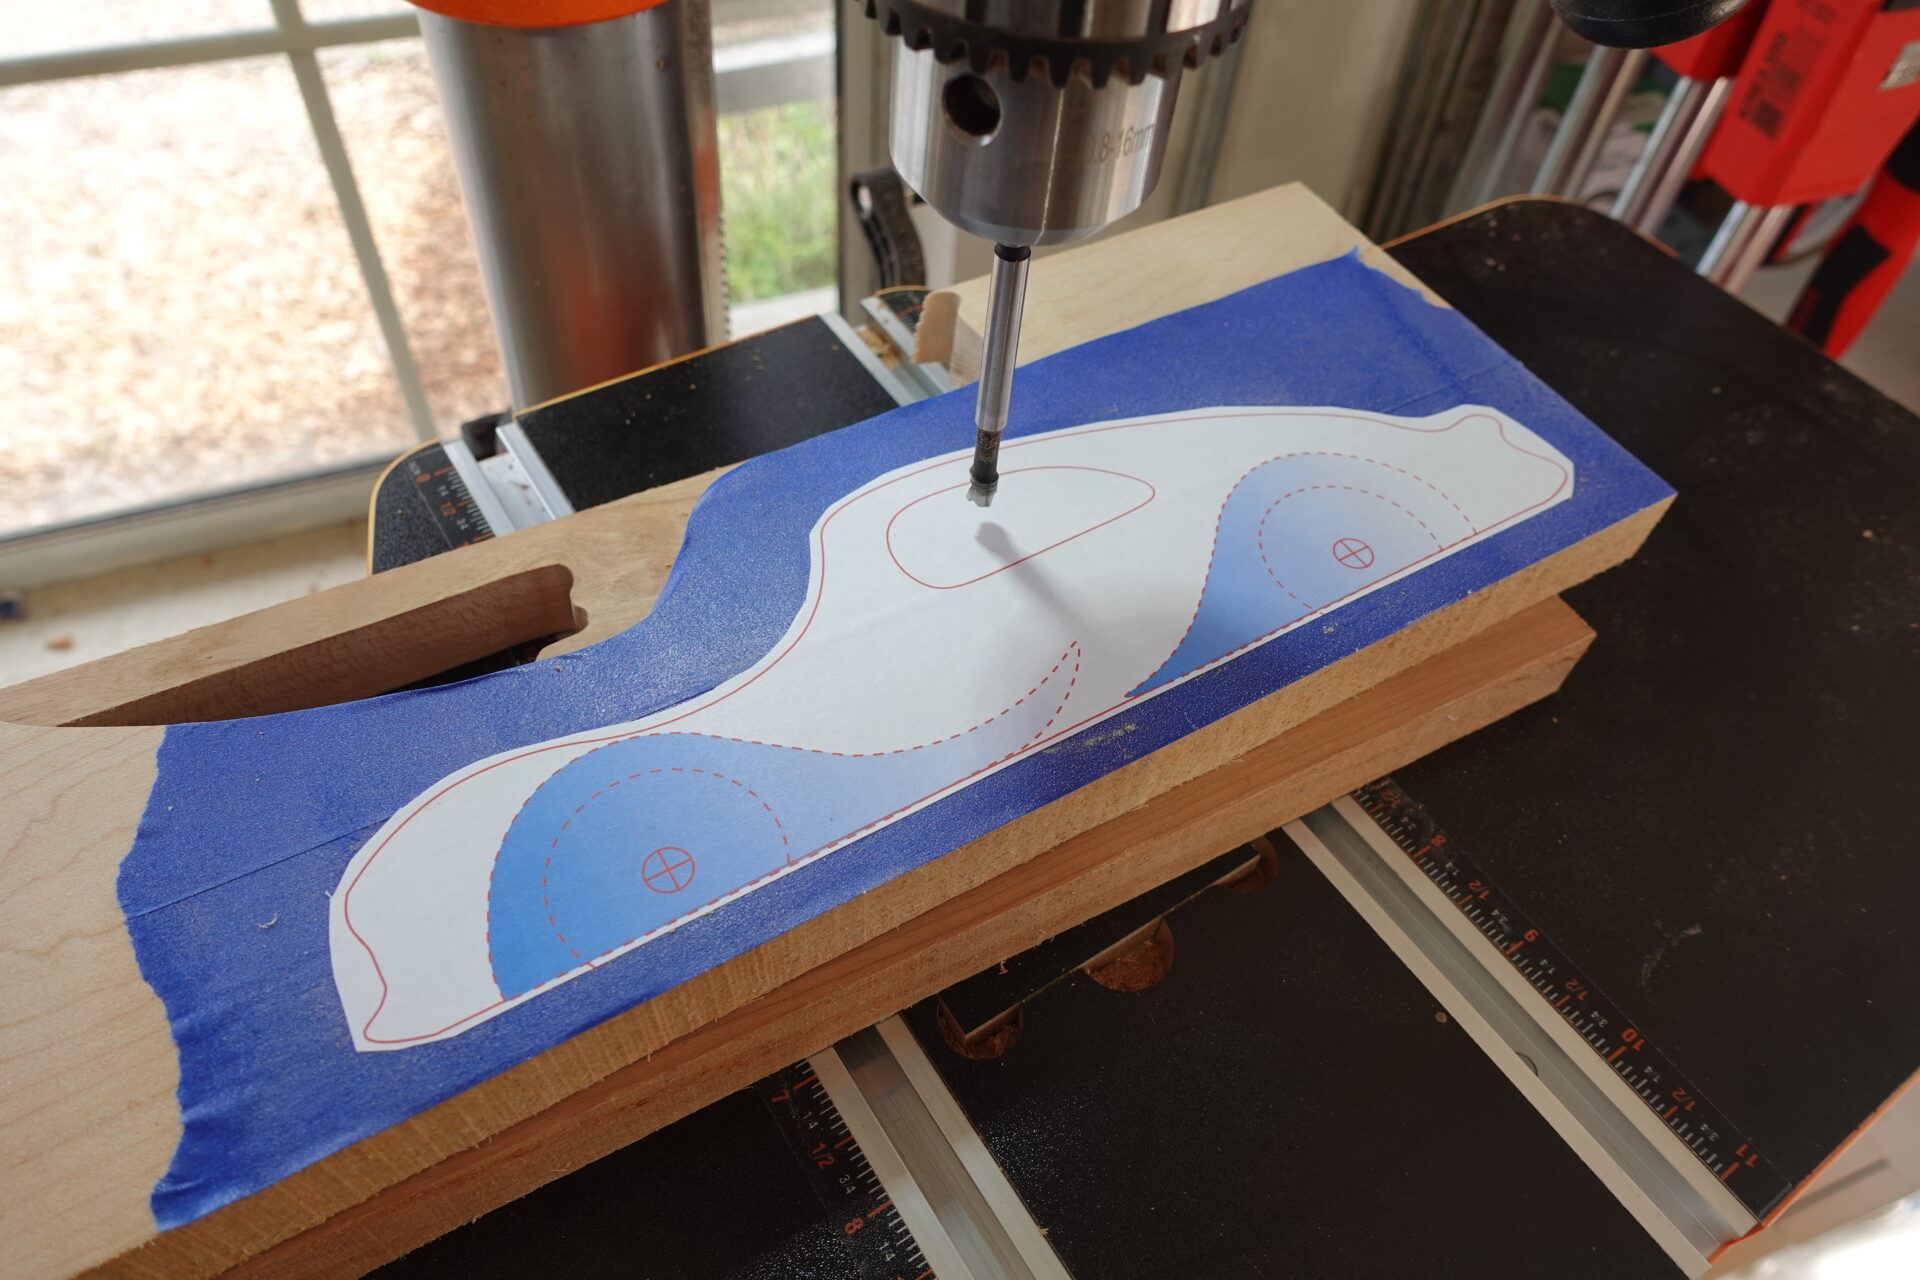
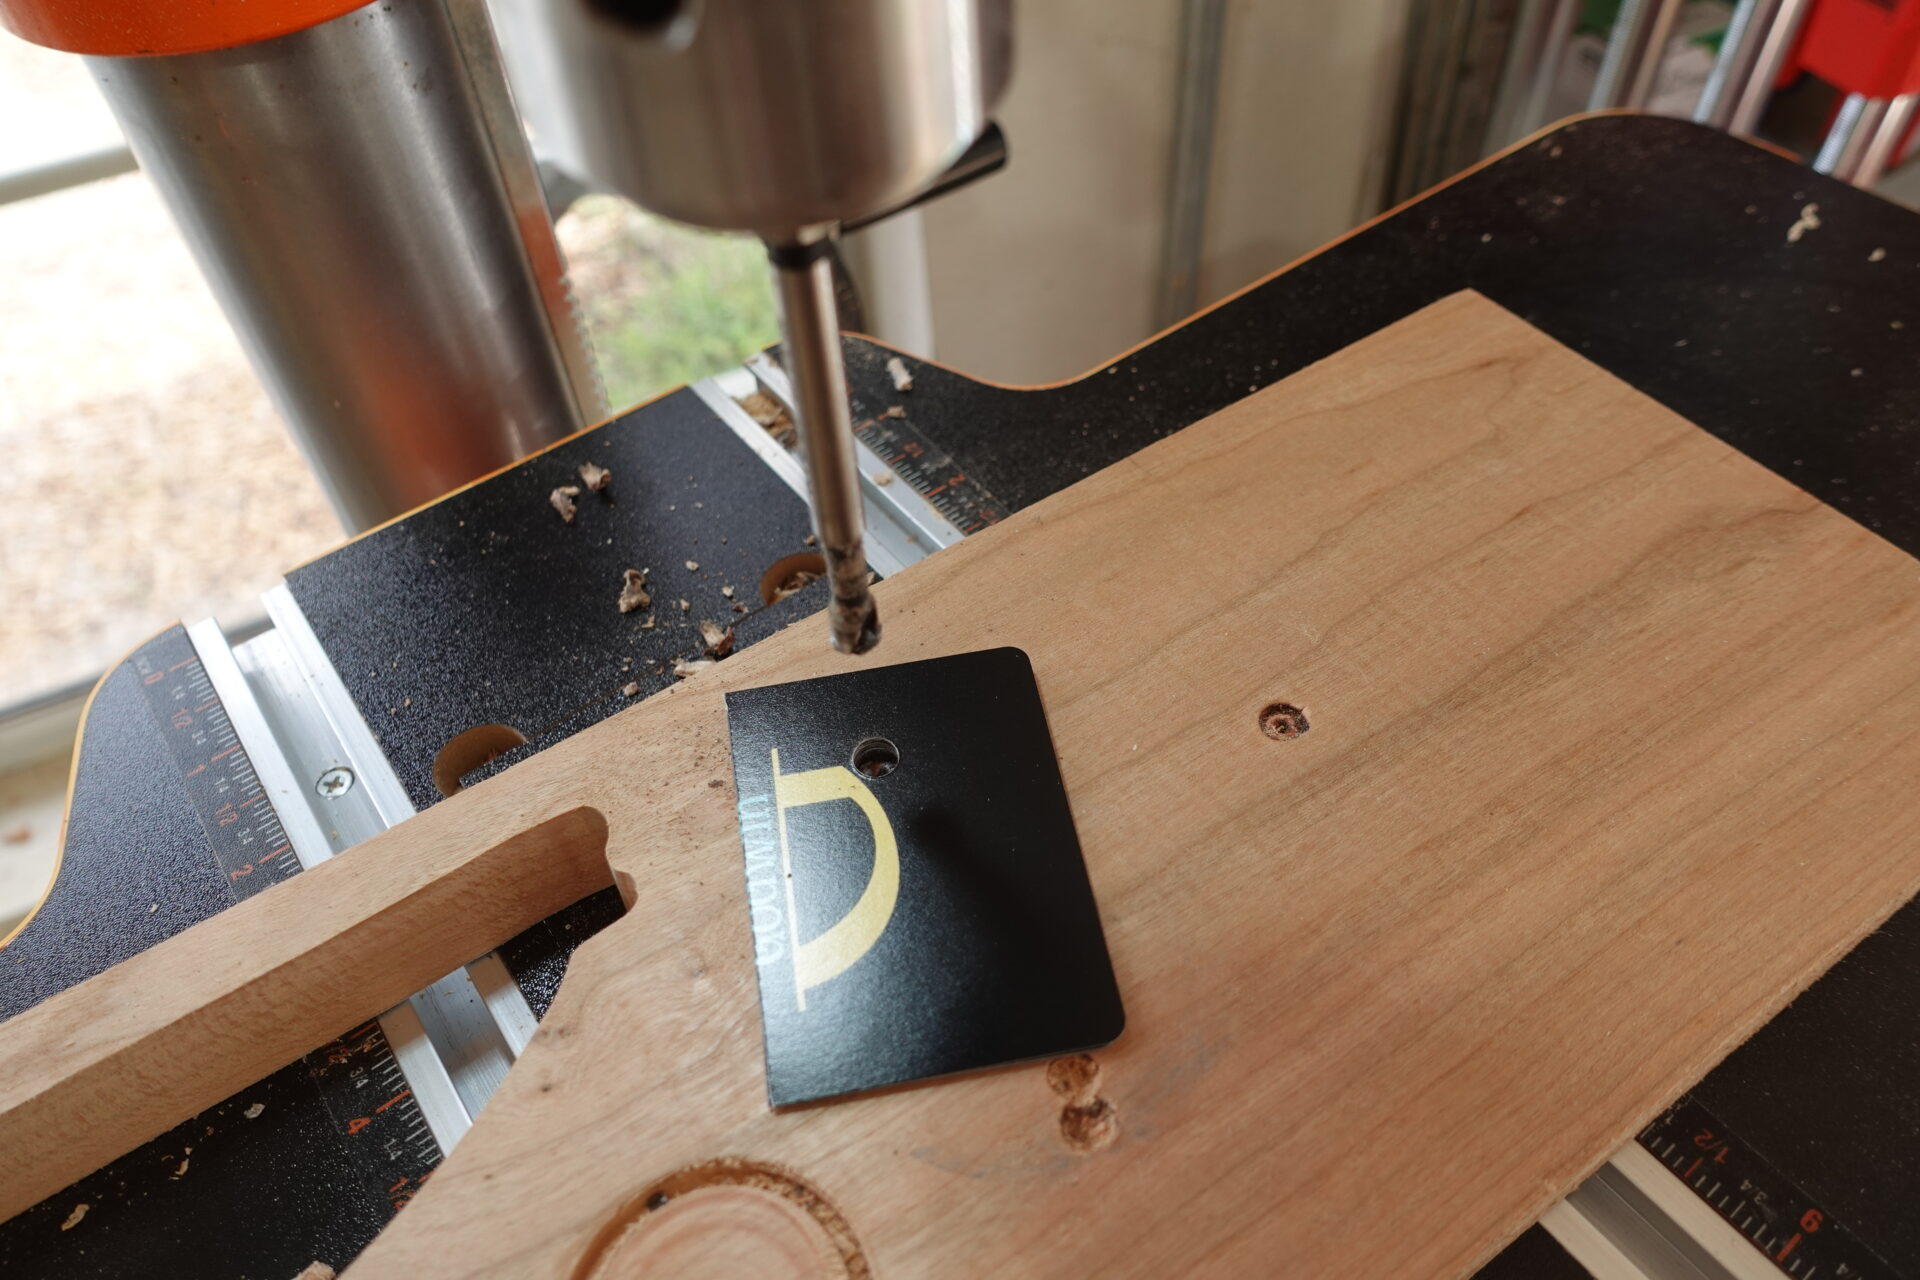
Drill hole for window using a 1/4 inch Forstner bit.
STEP 3:
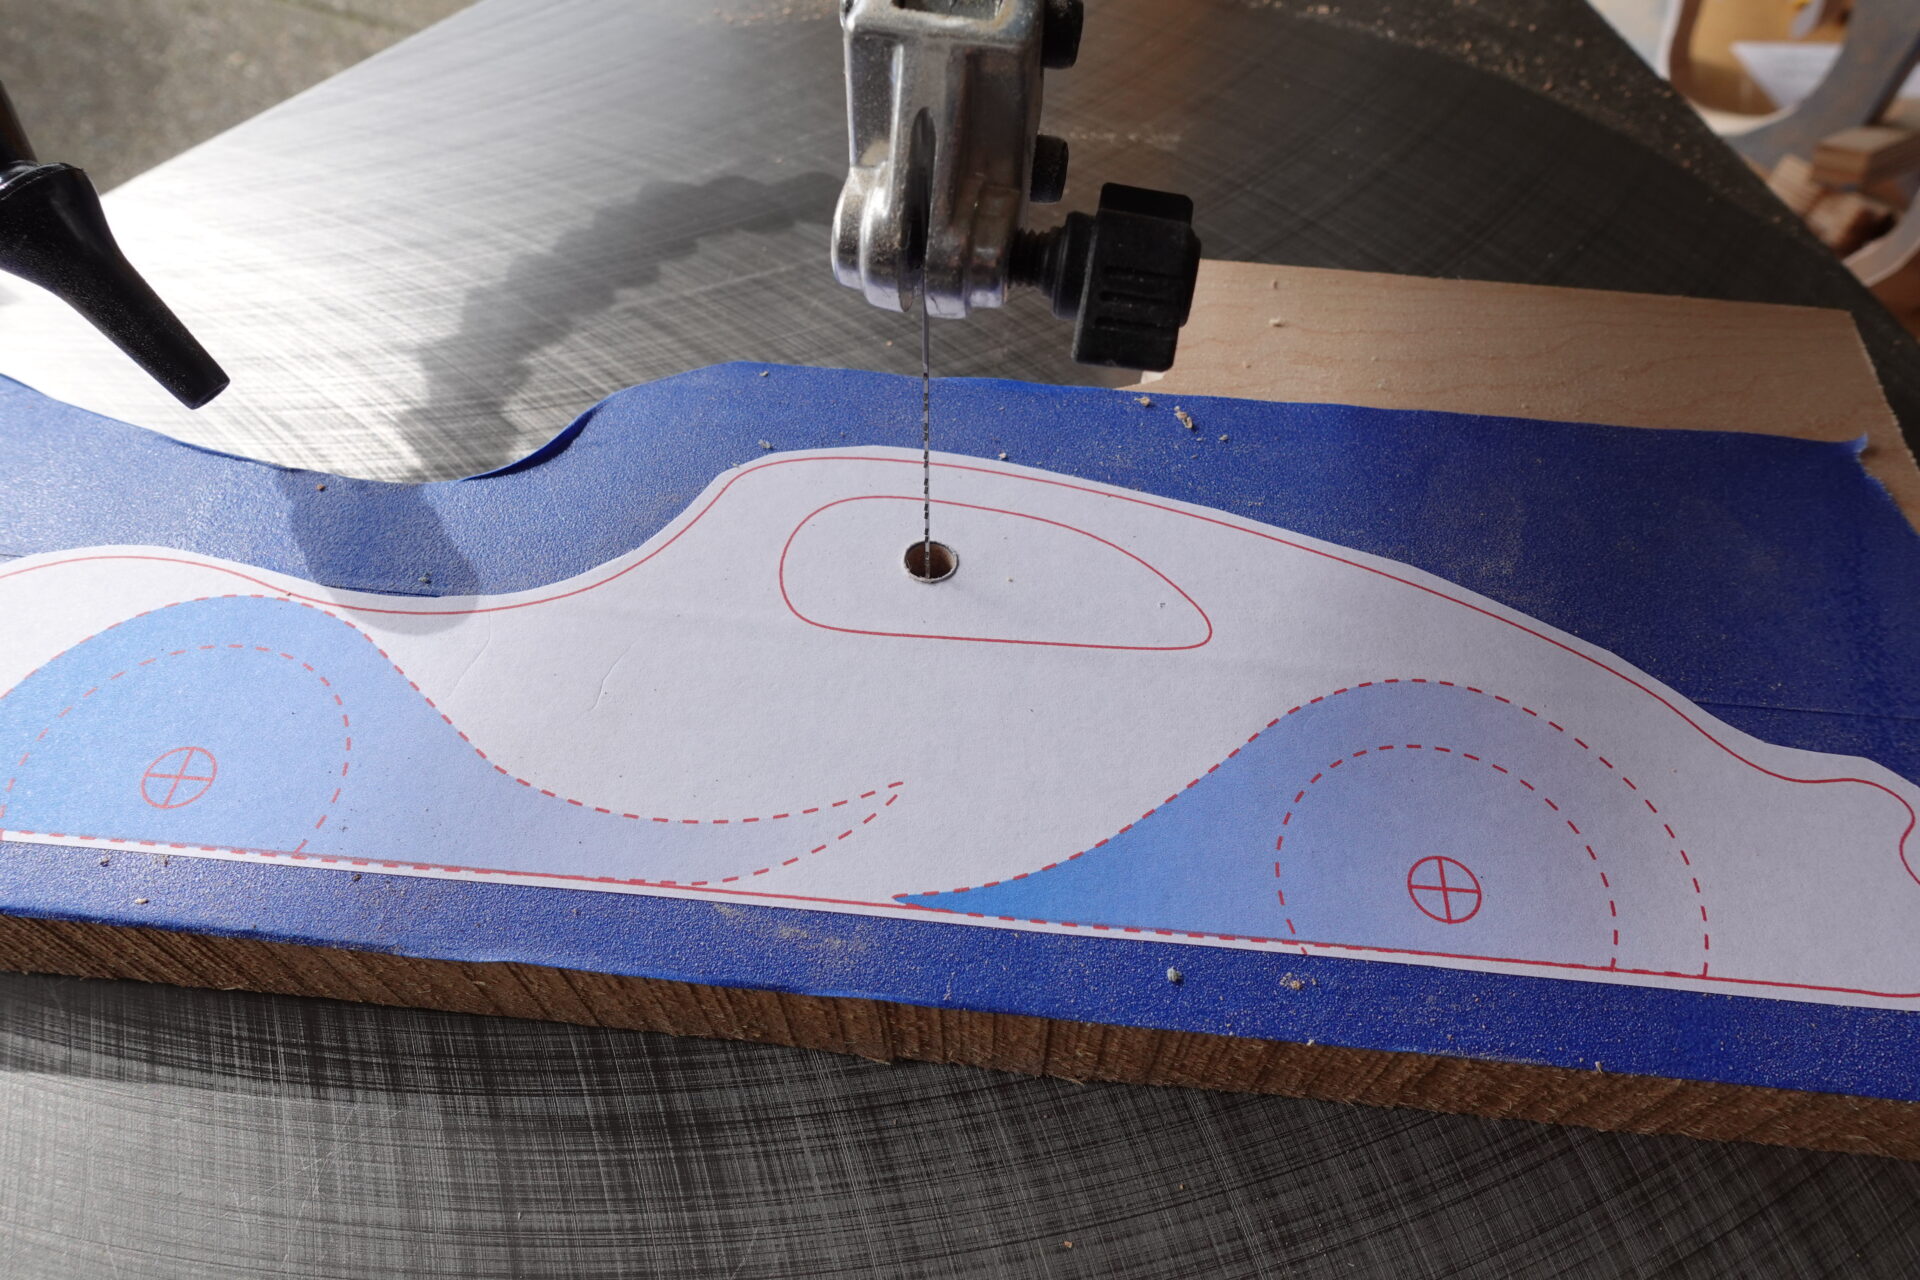
Feed the blade through the hole and cut out window using a scroll saw.
STEP 4:
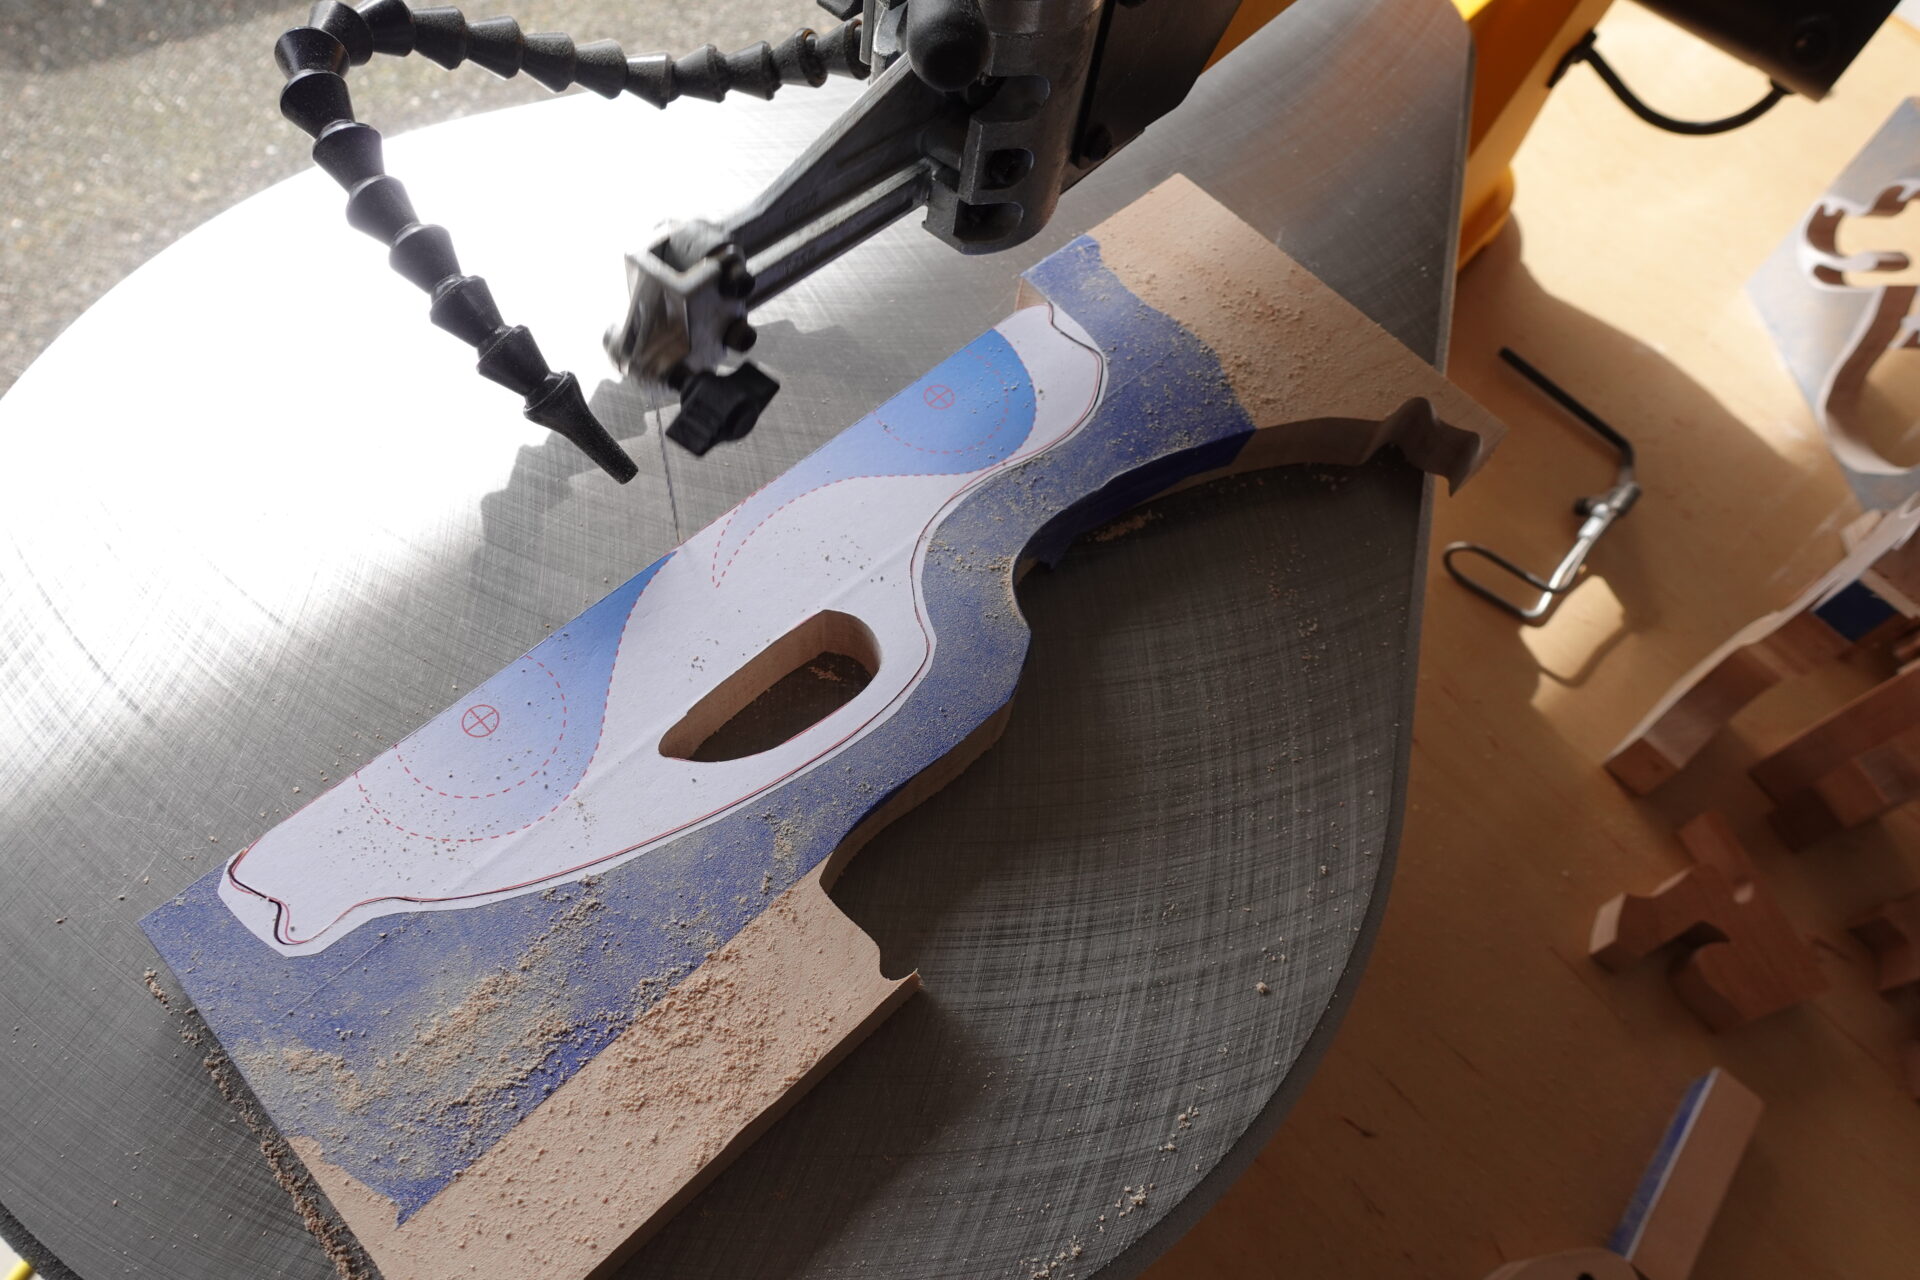
Cut out the remaining pieces using a scroll saw. Note: Do not cut out the dotted lines.
STEP 5:
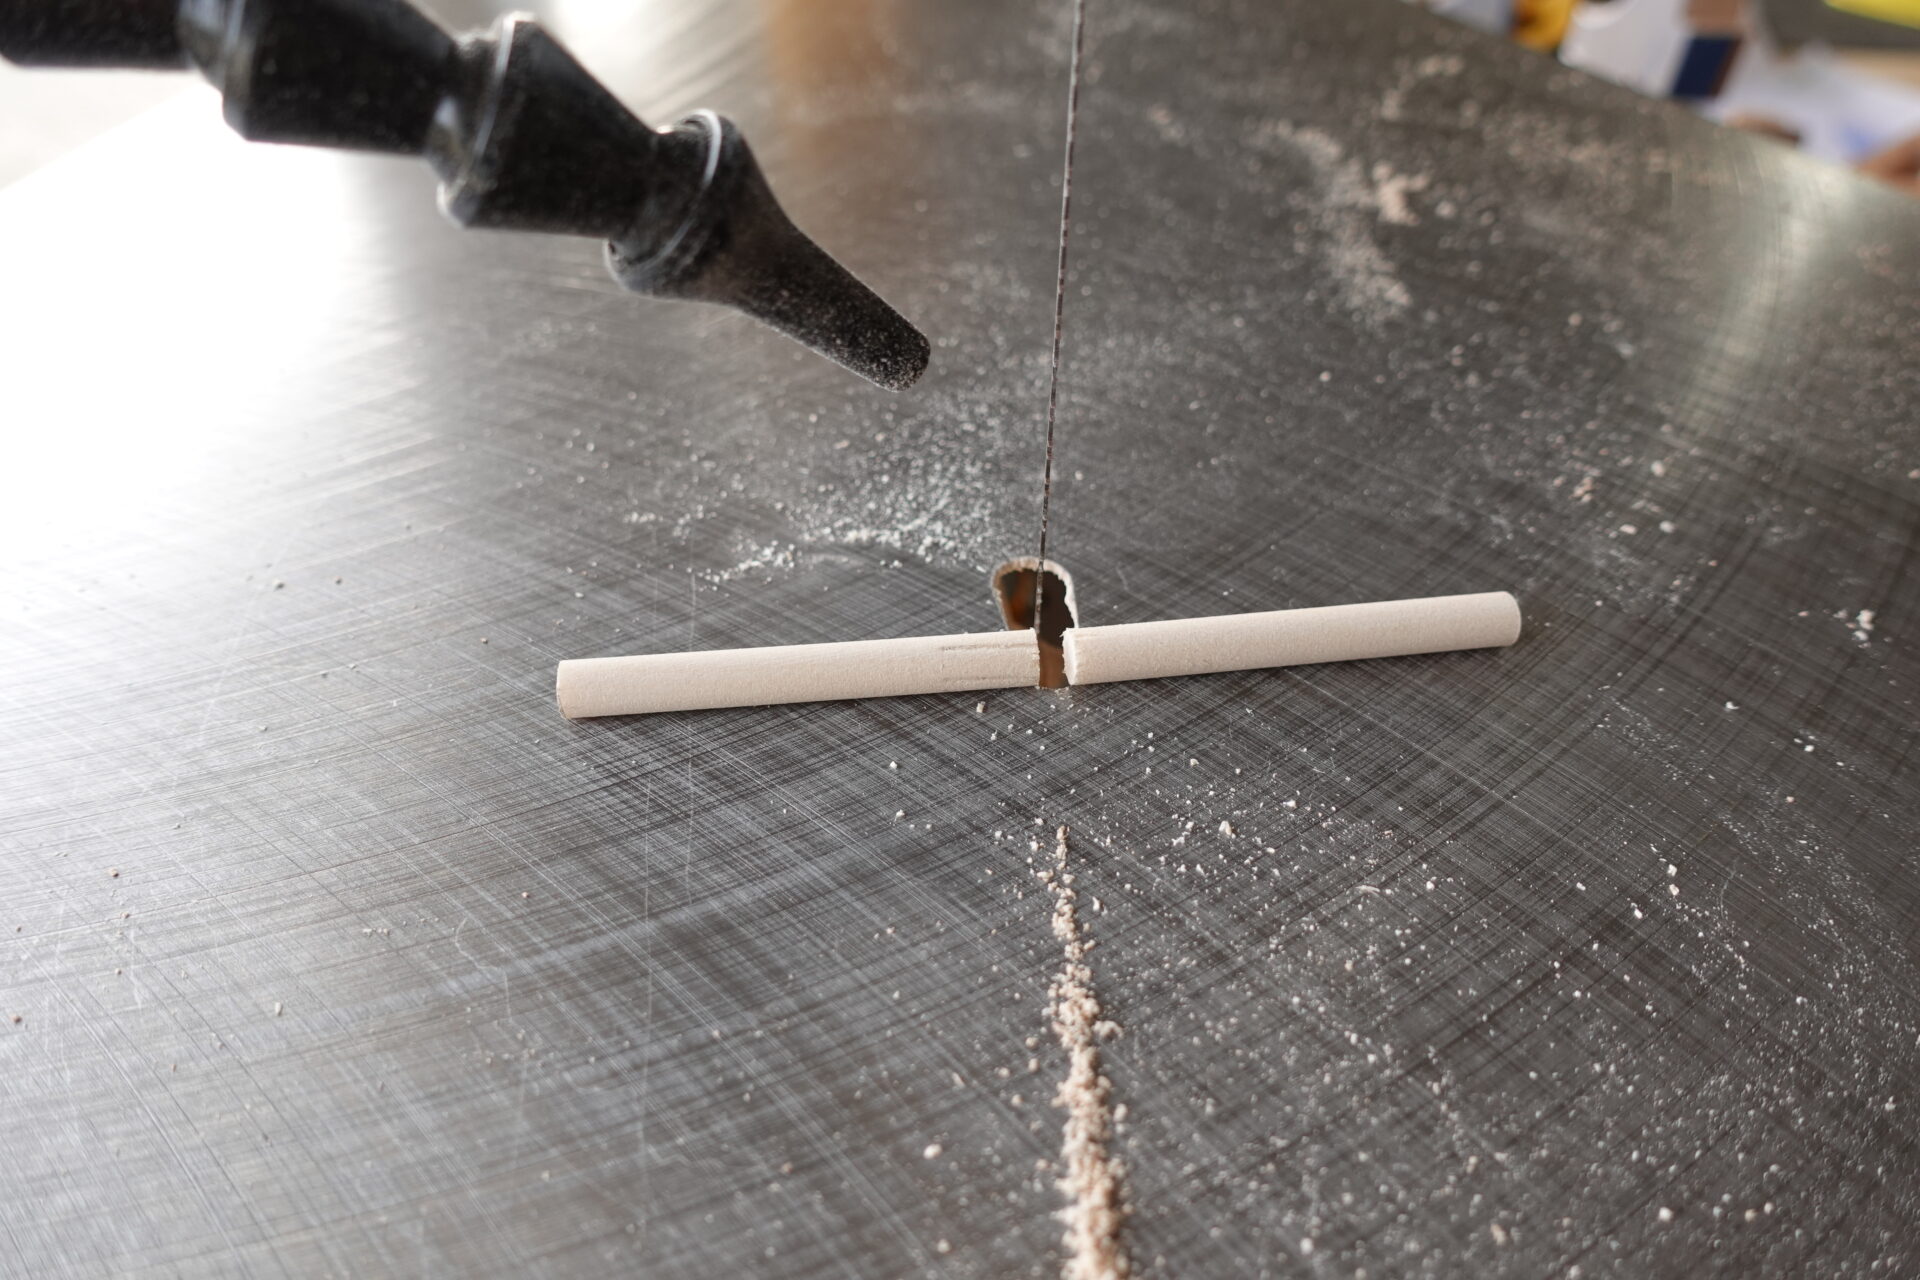
Drill 1/4 inch holes for the two wheels. We will be using purchased wheels for this project, but you can also make your own wheels included in the plans. Just be sure to be careful! Take a look at this blog post on a near accident.
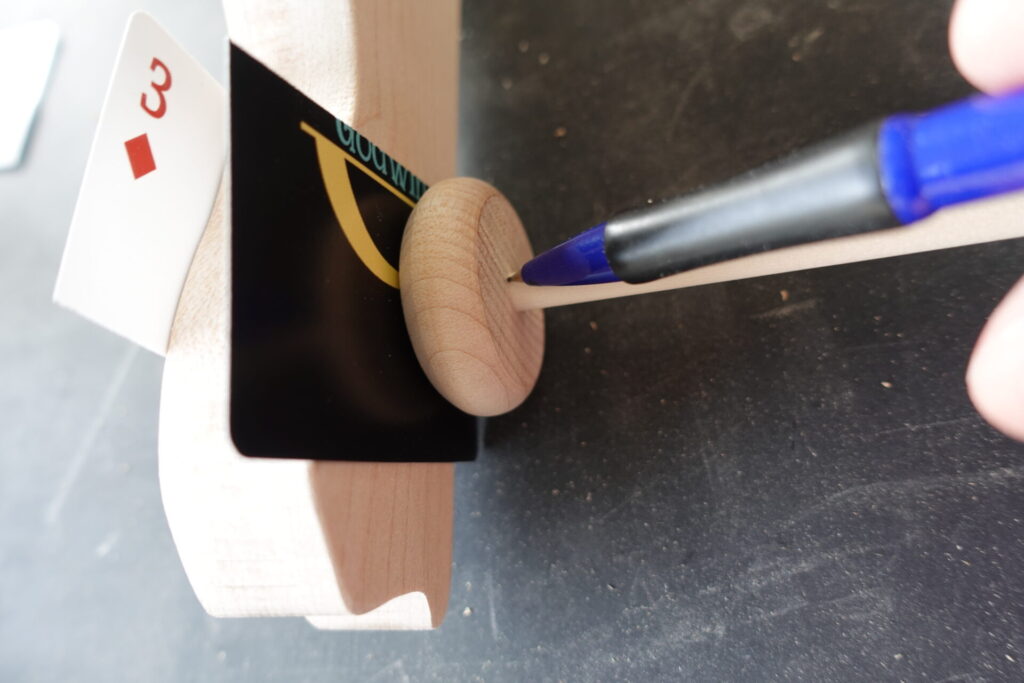
STEP 6:
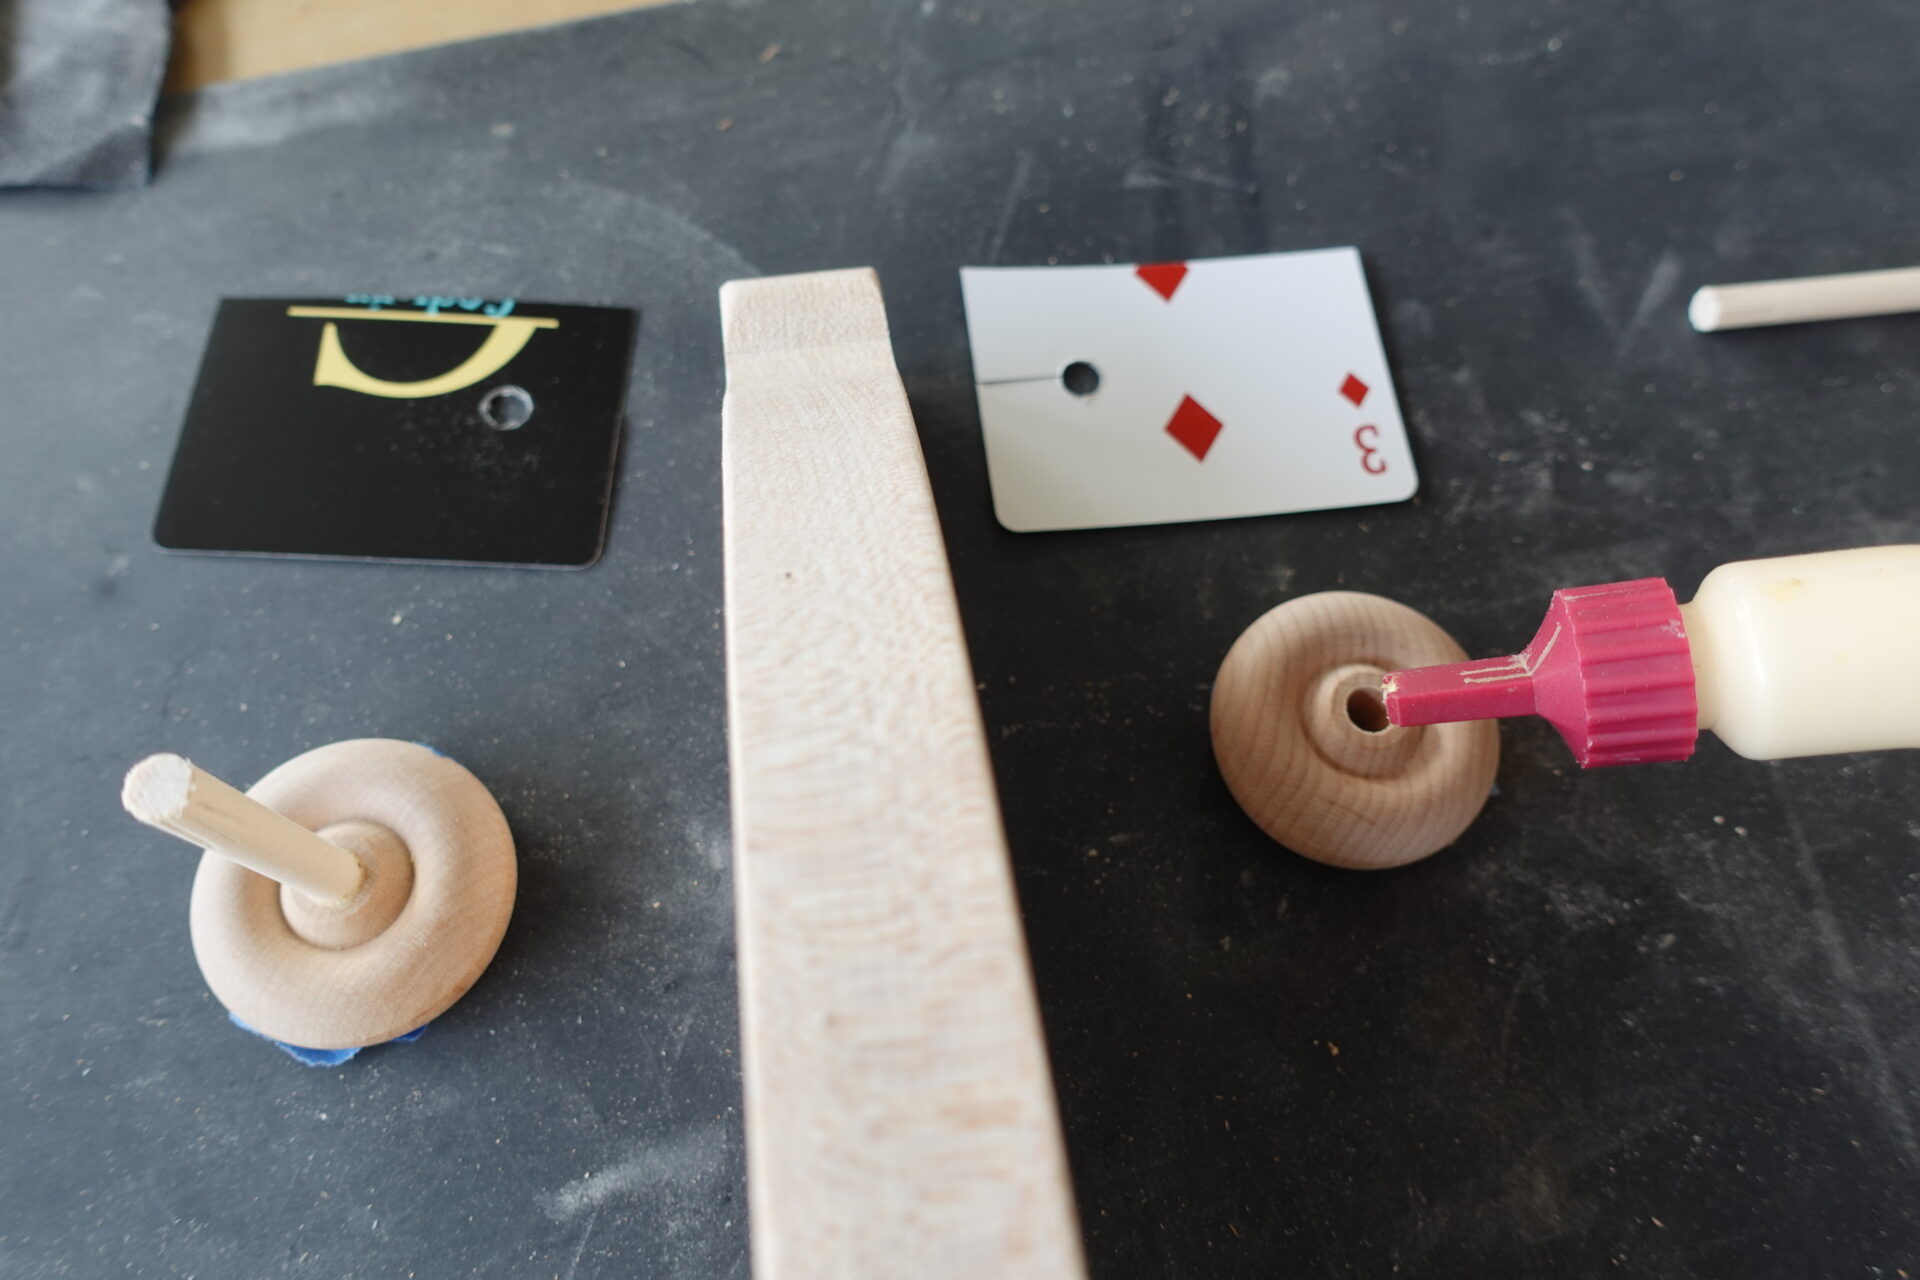
Cut 1/4 inch holes in playing cards. These will be used as spacers between the wheels and toy body to ensure the wheels can spin freely.
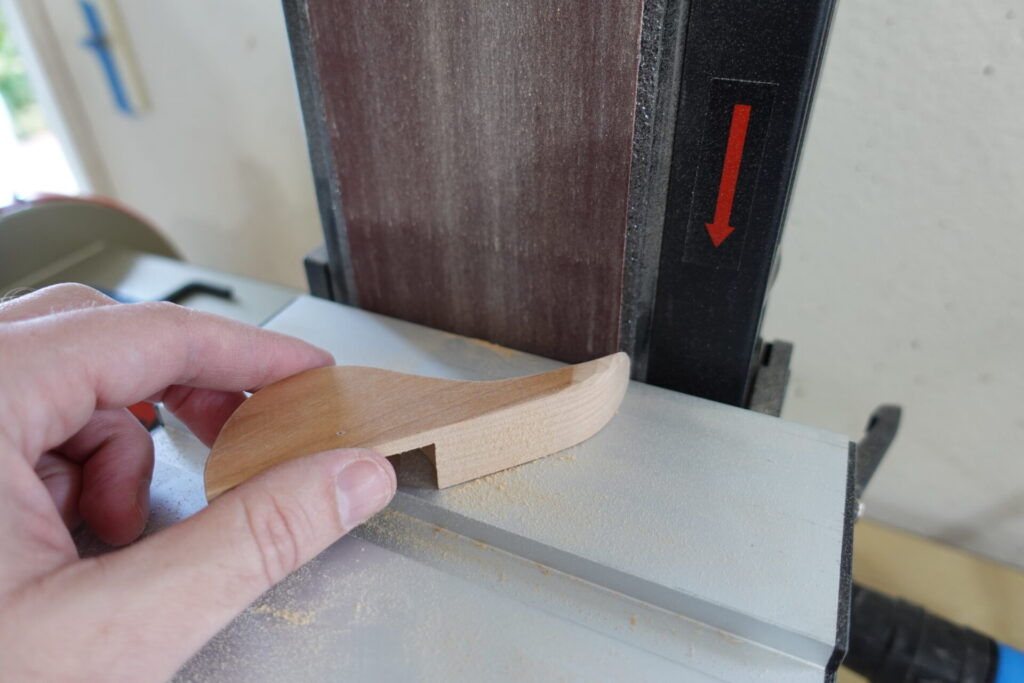
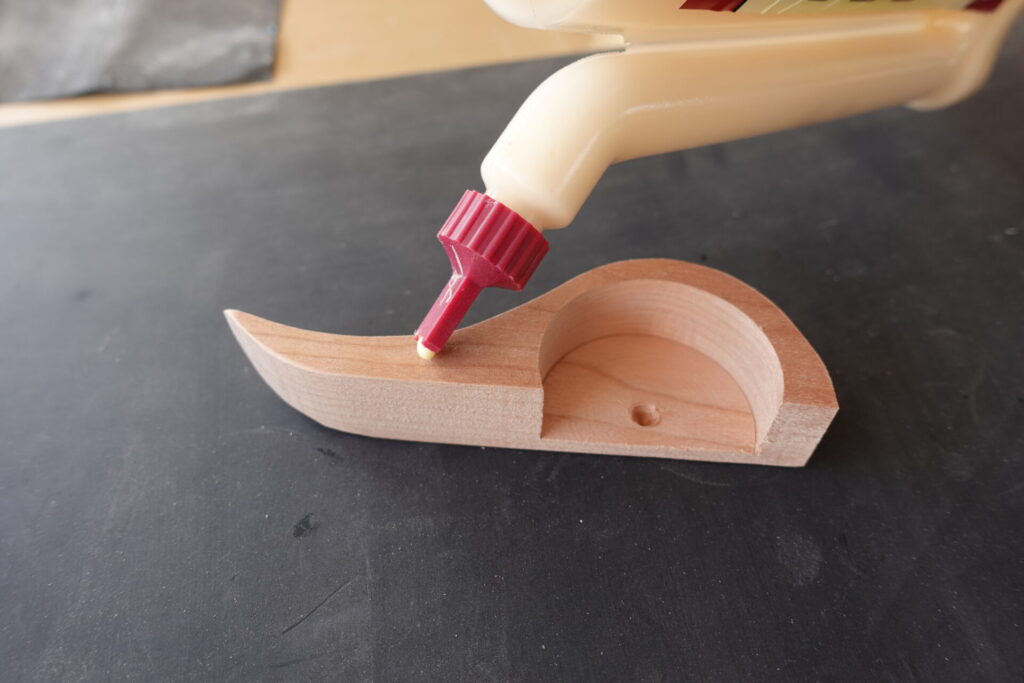
STEP 7:
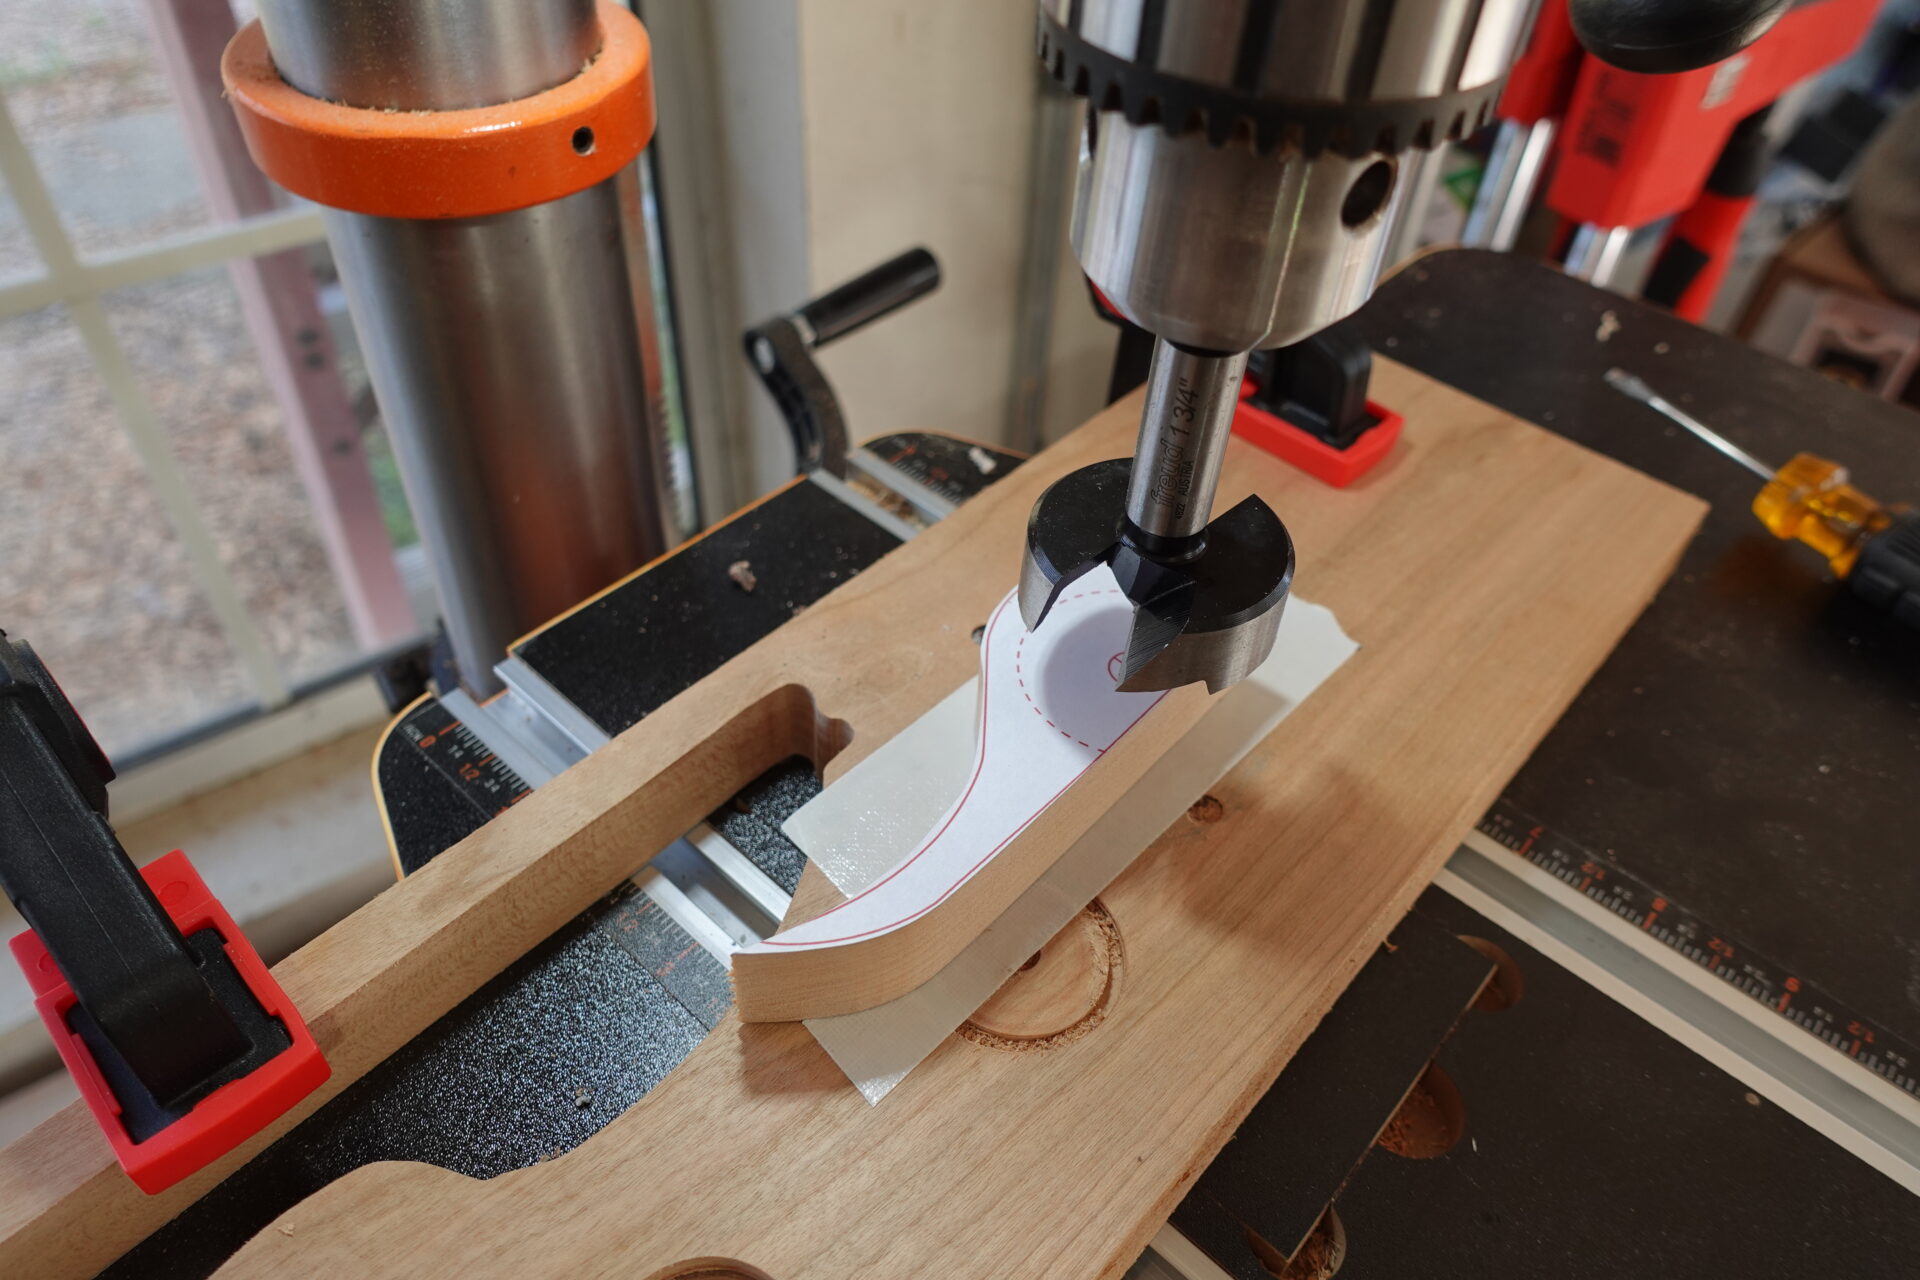
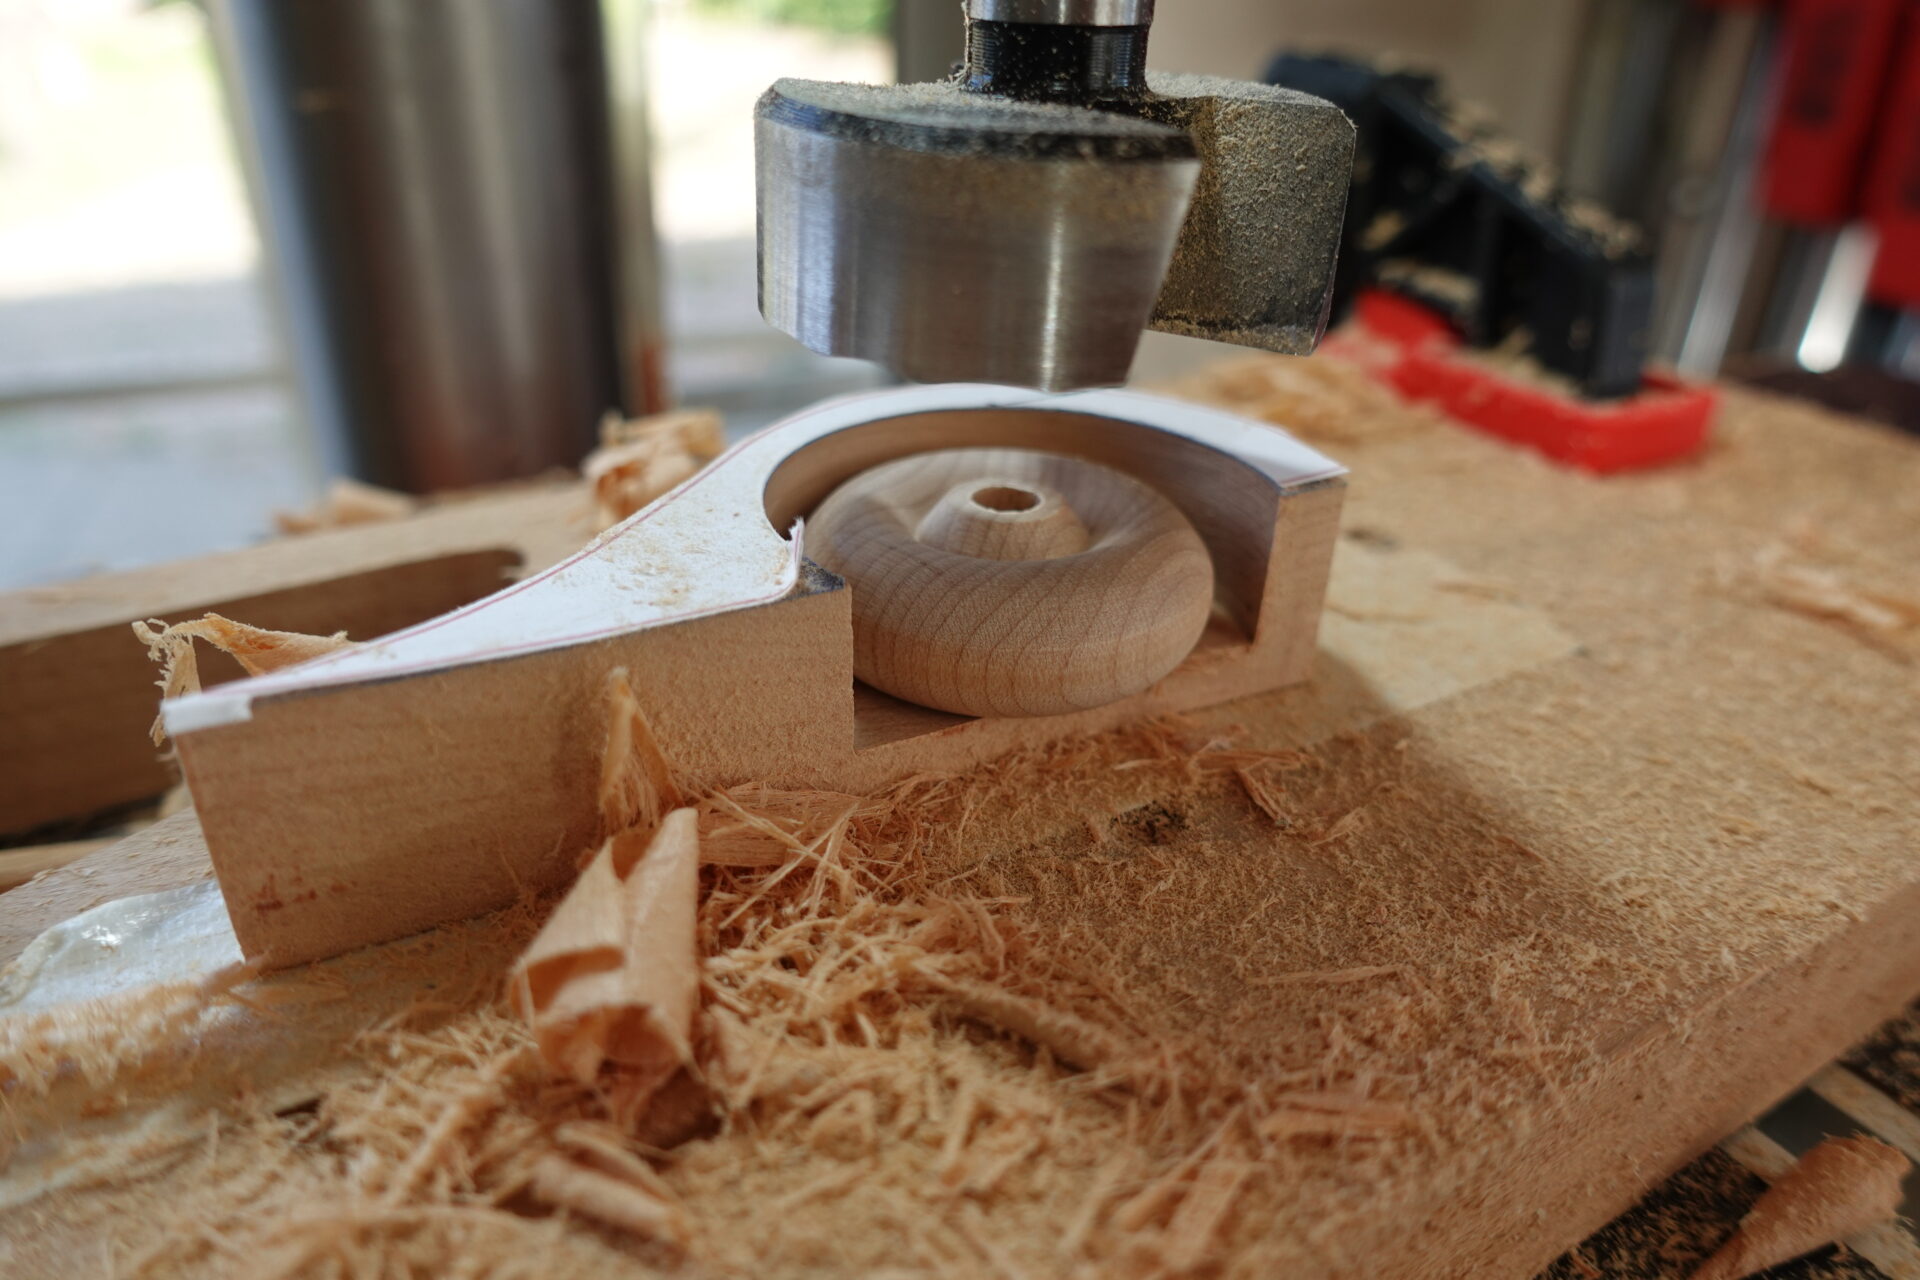
Use our trusty 1-3/4 inch Forstner bit to cut an opening slightly larger than the wheel itself. In the photo above, notice we are using double-sided tape. This helps to keep the small piece in place while making the cuts.
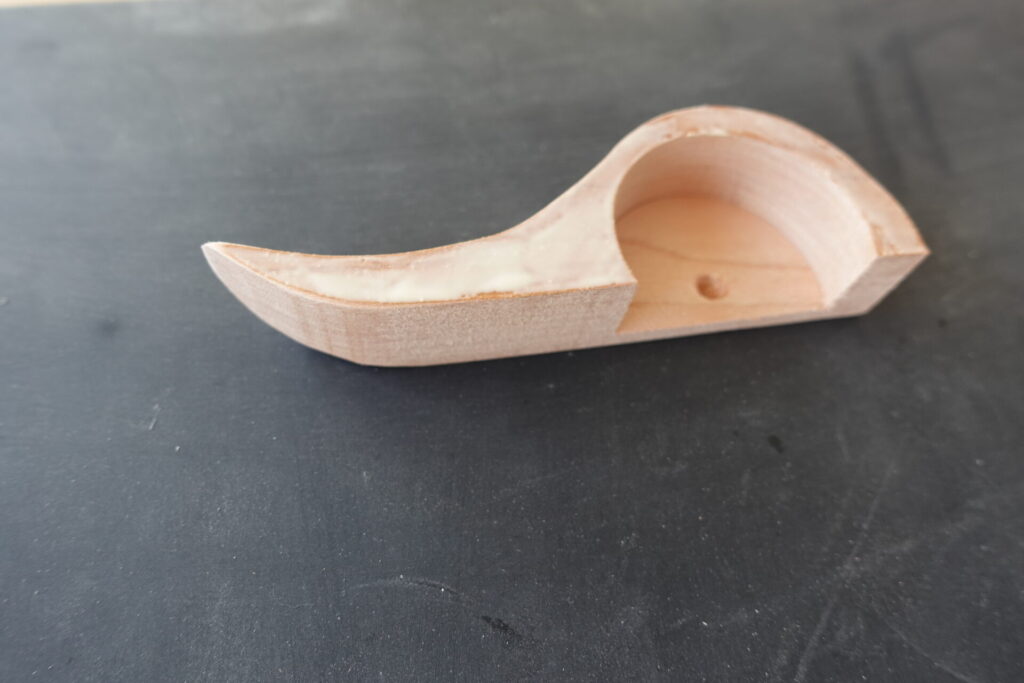
STEP 8:
After boring out the wheel covers, test the wheels to see if they can fit properly inside. There should be about 1/8 inch room so the wheels can spin freely.

STEP 9:
Sand all parts with 180 and 220 grit sandpaper especially around the edges.
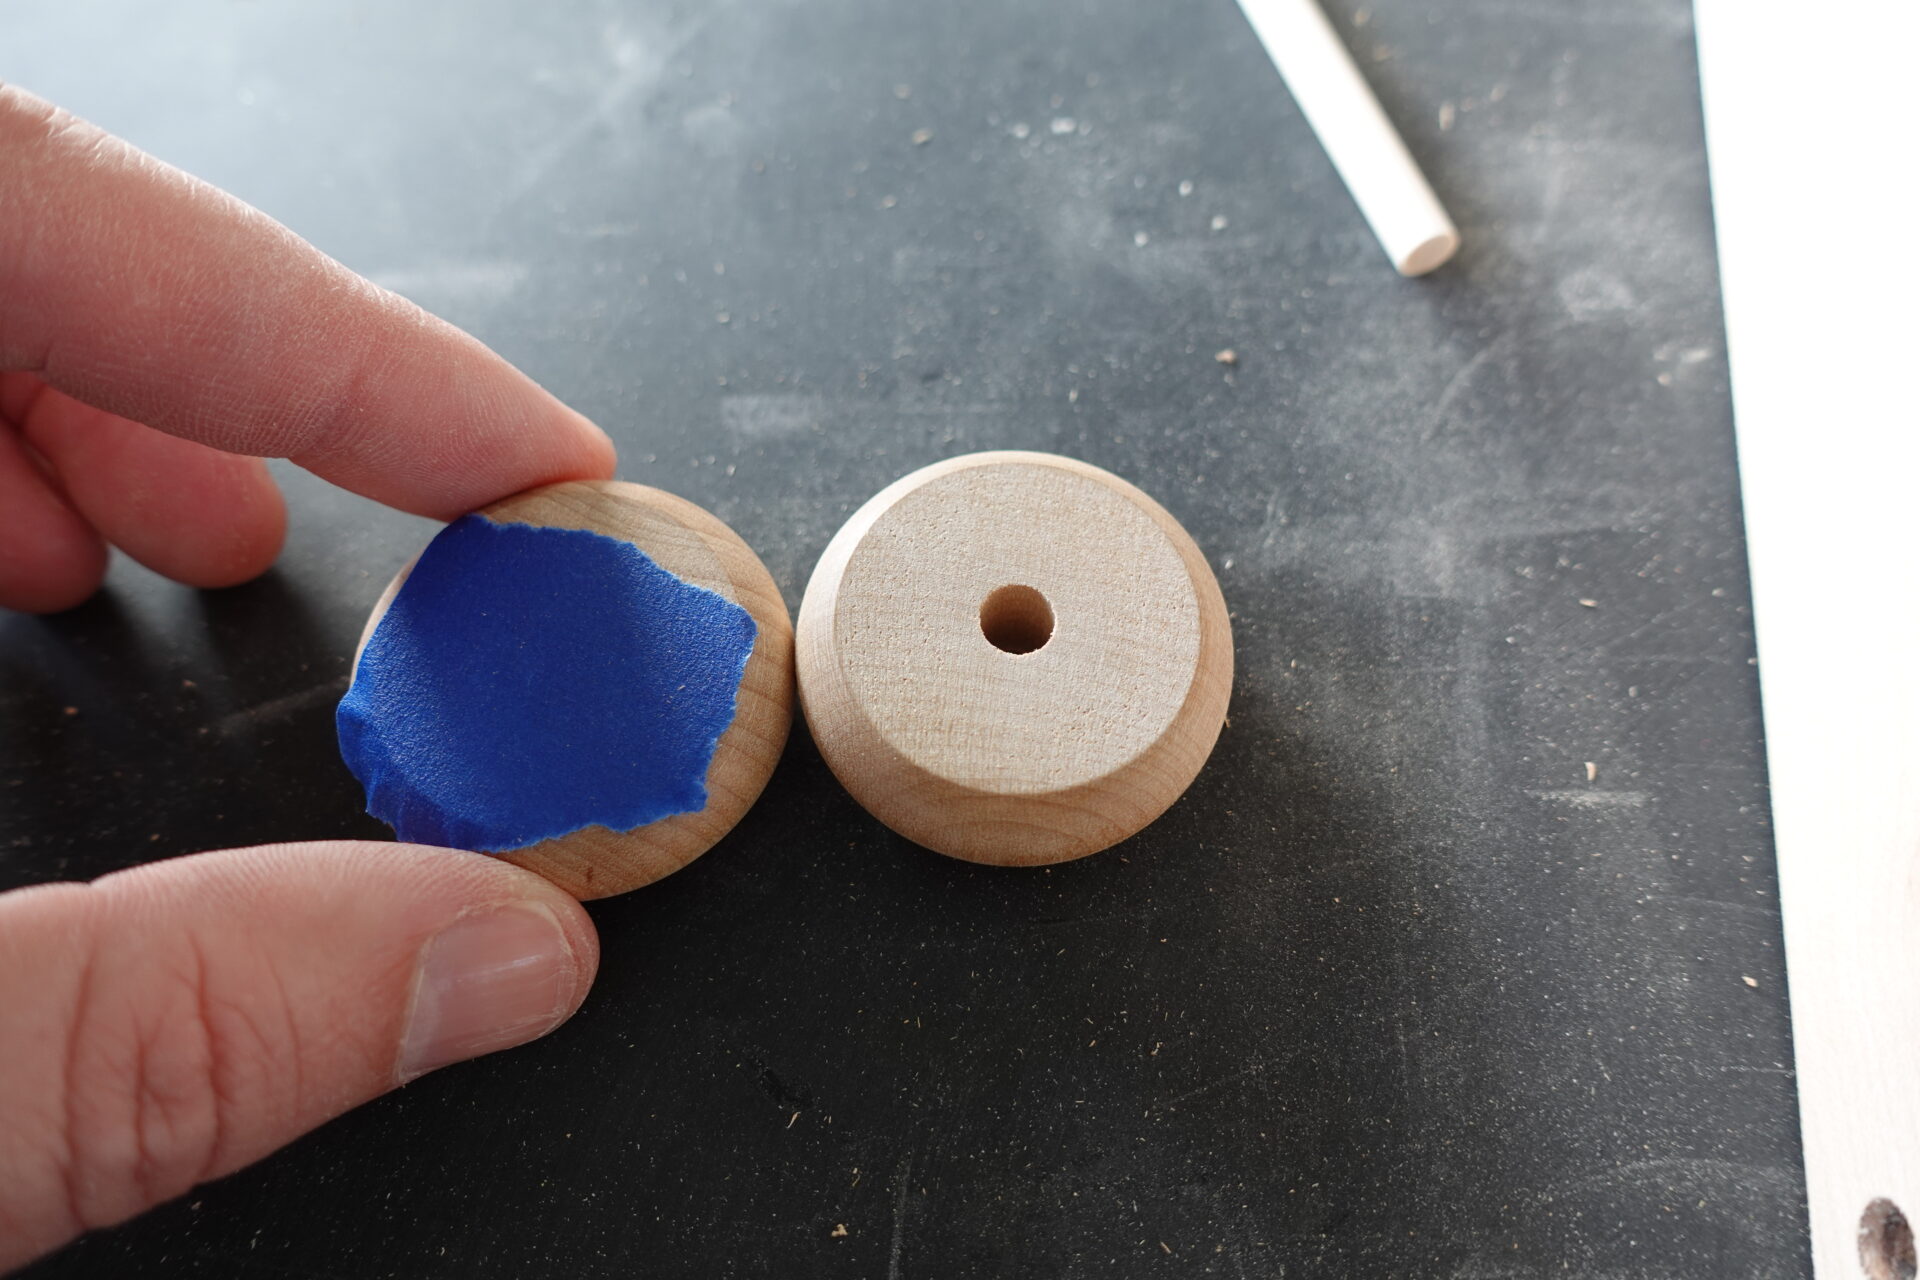
STEP 10:
Next we will start the wheel assembly by adding masking tape to the ends of the wheels (the flat side) to prevent glue from spilling out. Then we’ll assemble the wheels by adding the playing cards in between the wheels and marking the end of the dowel.
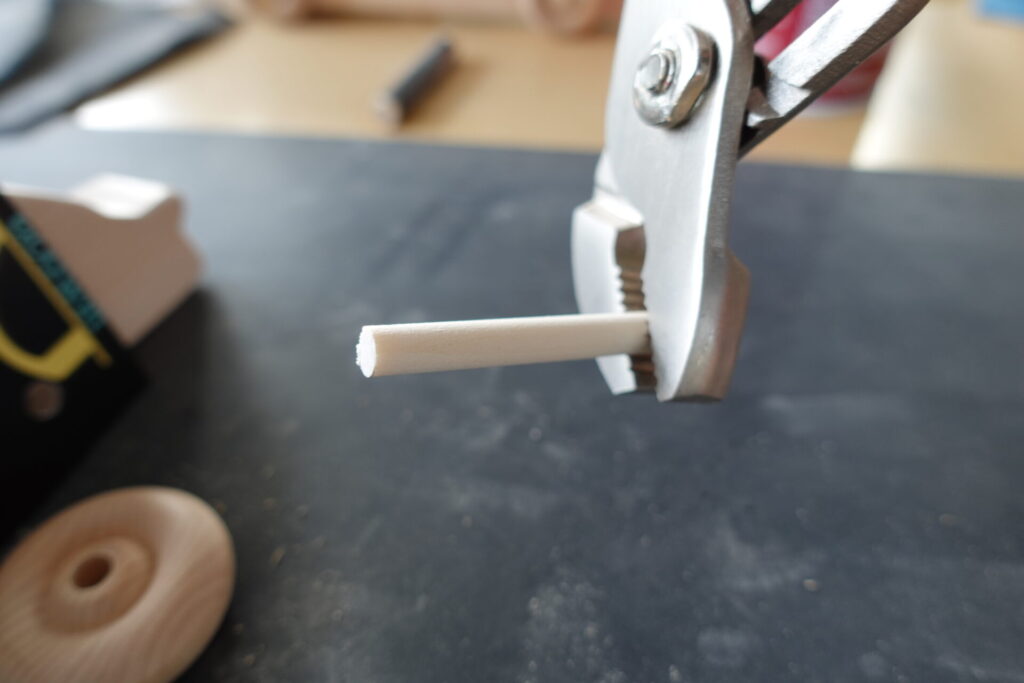
STEP 11:
Cut the dowel to length and crimp the ends using pliers. This will help prevent glue from spilling out the ends.
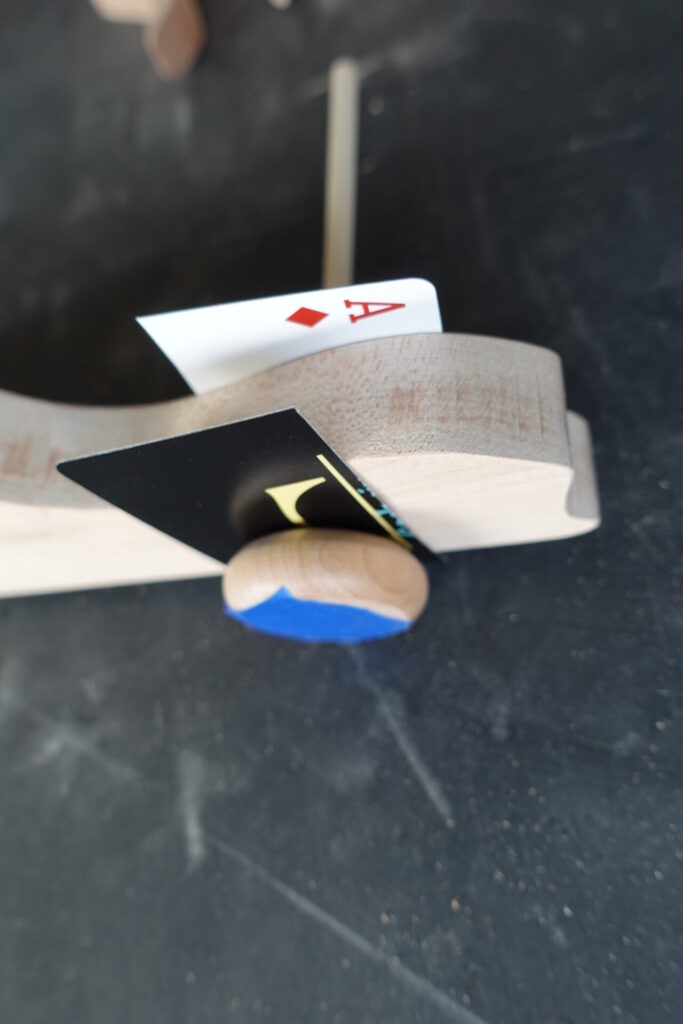
STEP 12:
Next add glue to the inside of the wheels and wipe off any excess. Then add the playing cards to give some separation between the wheels and the body.
Wait 24 Hours for Glue to Dry…
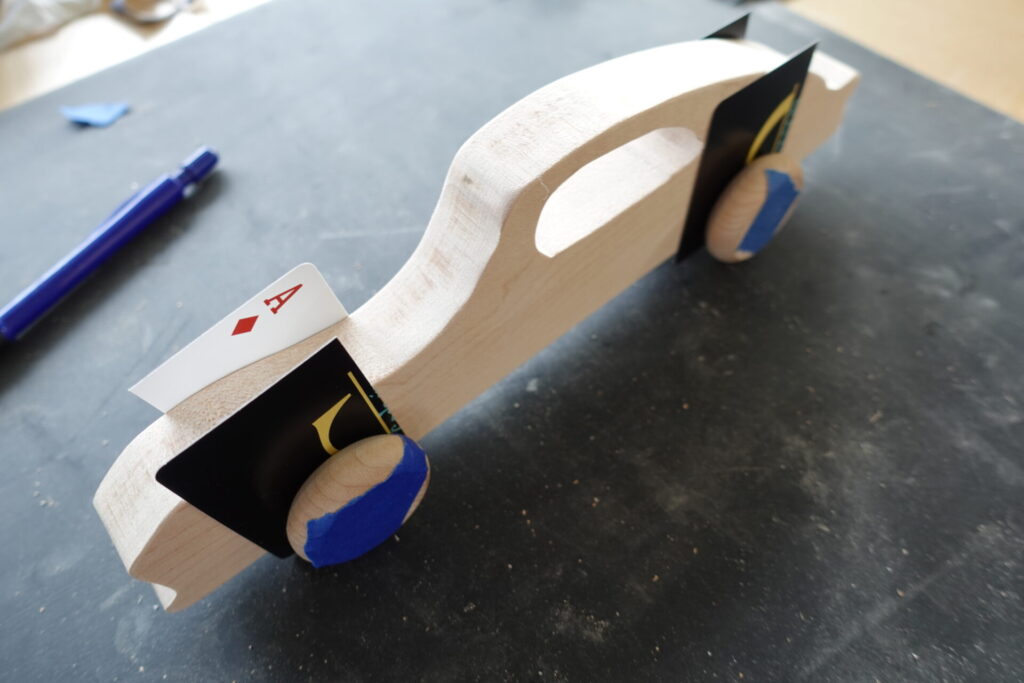
STEP 13:
At this point, we have a working a car, and you could call it day at this point. Or continue by adding the wheel covers by adding glue to the edges of the wheel covers.
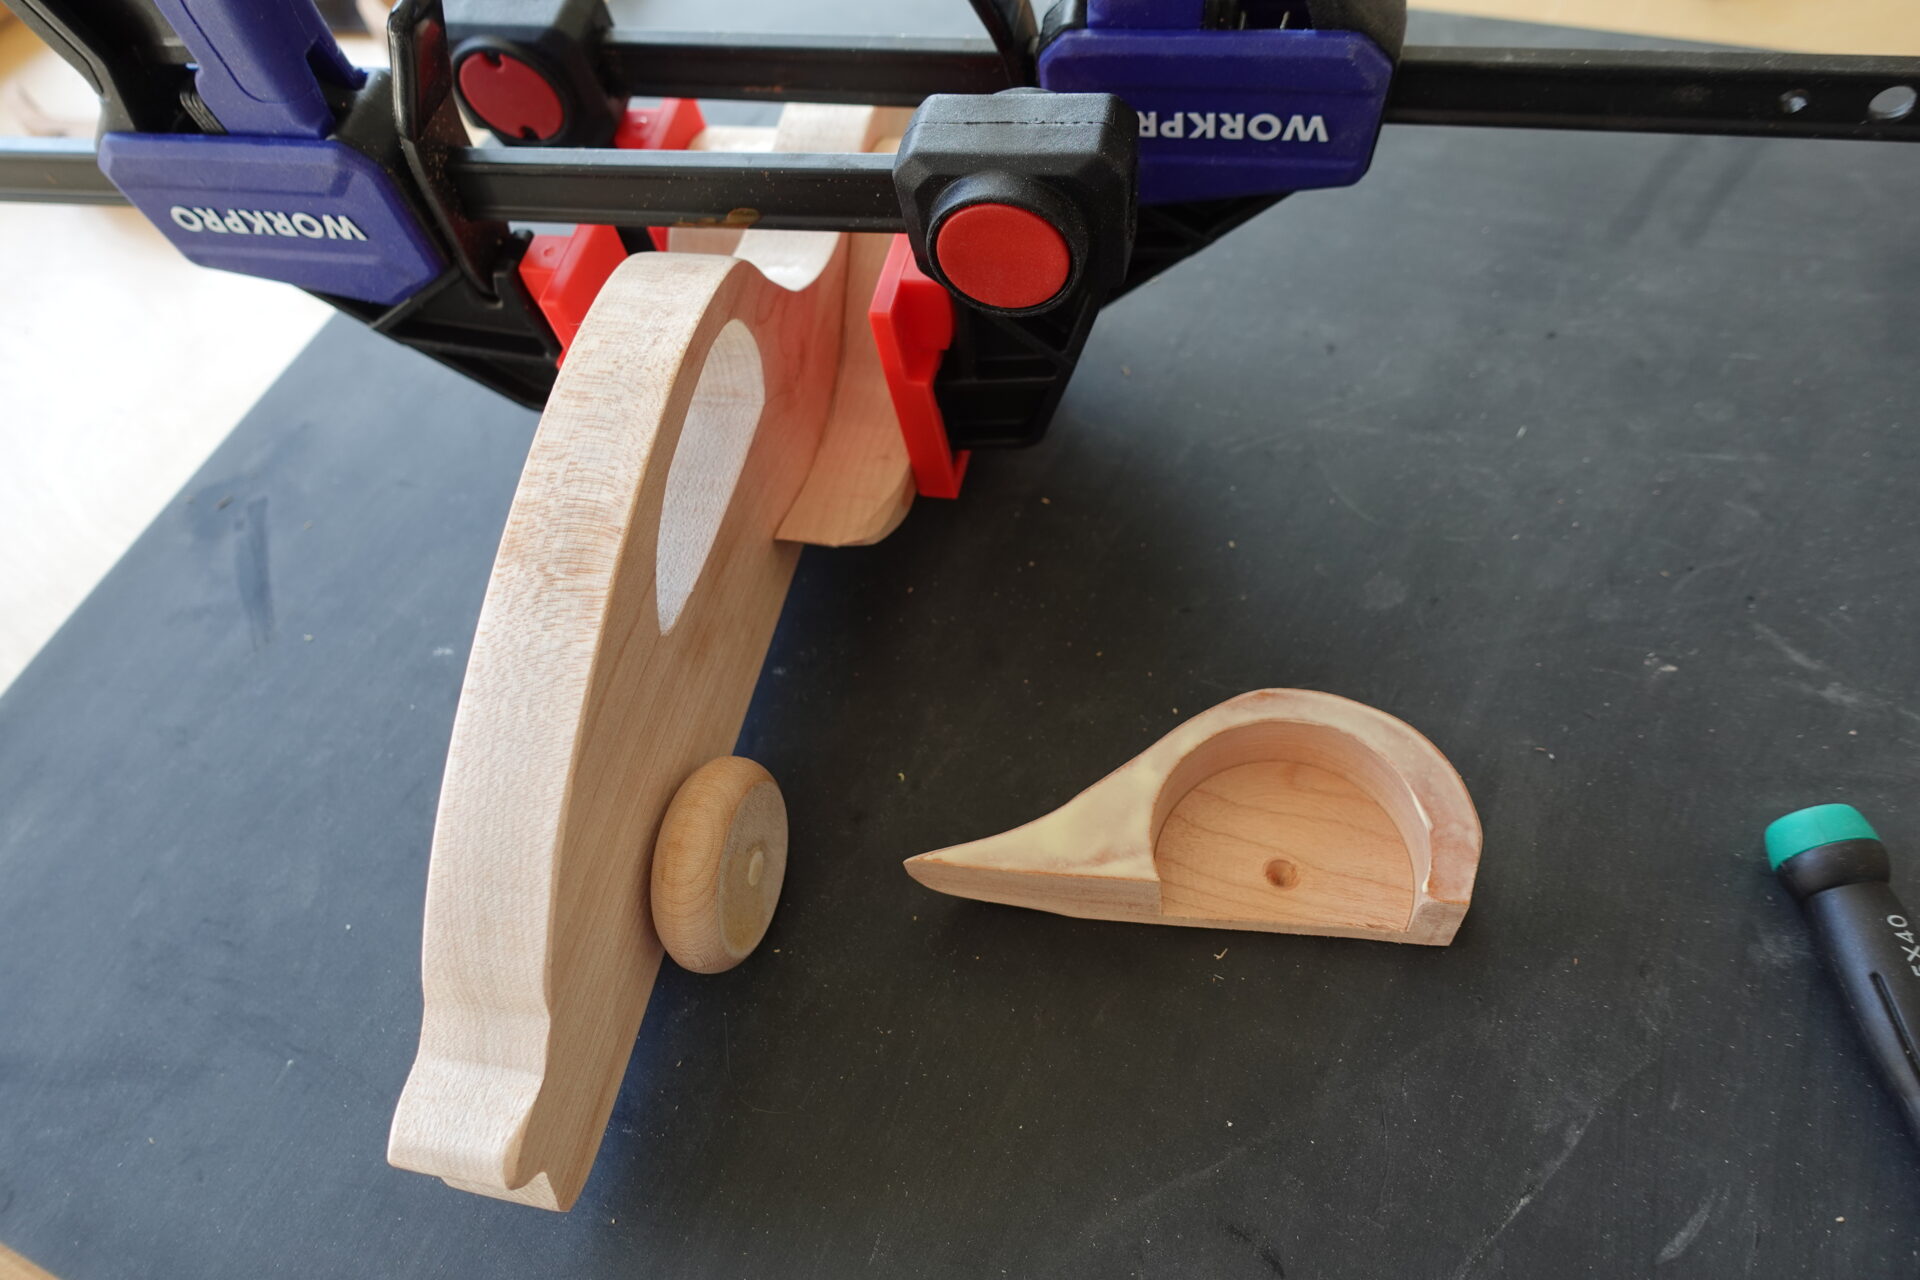
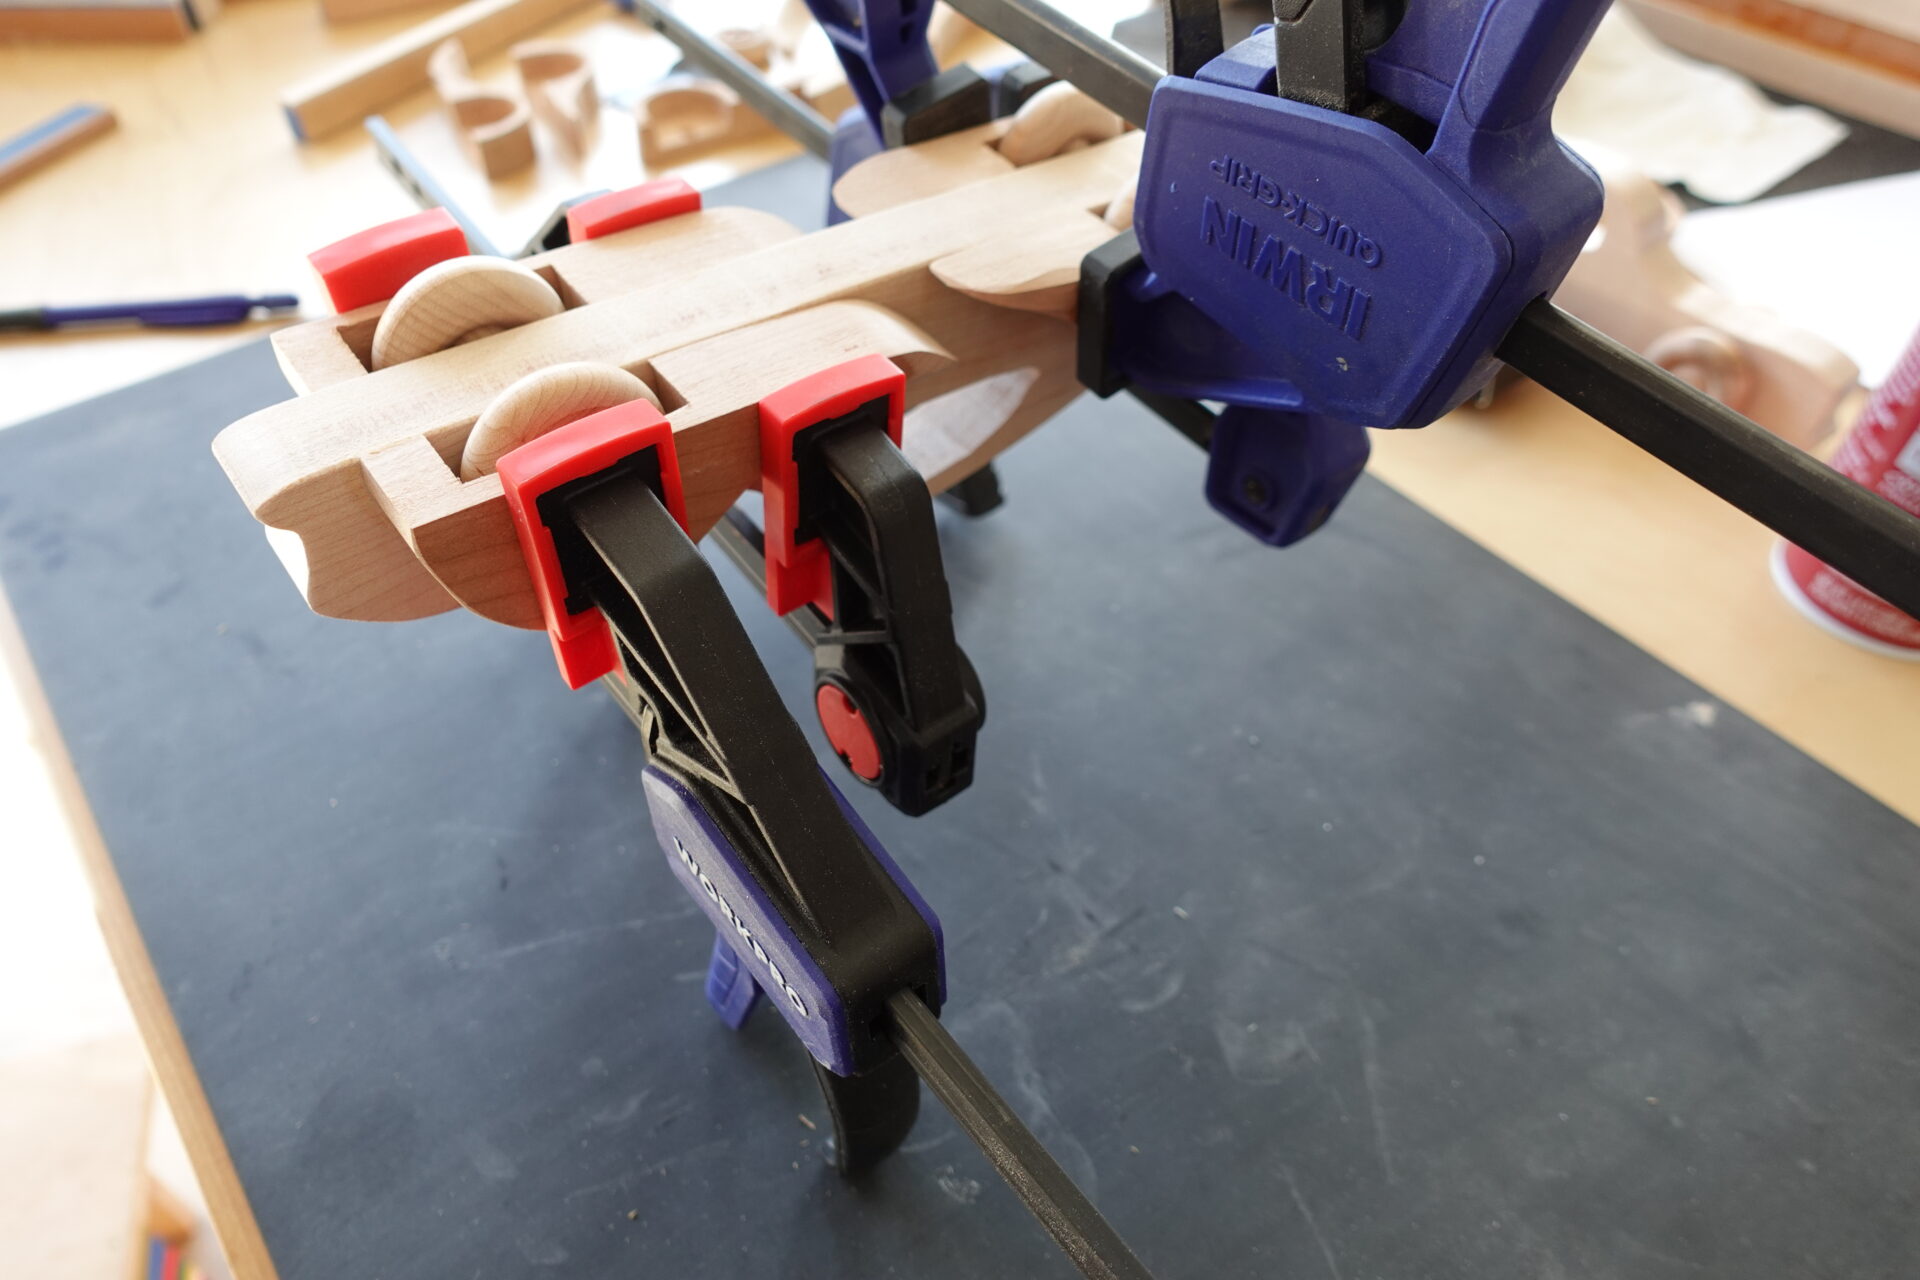
STEP 14:
After the glue is in place for the wheel covers, we’ll clamp in place
Wait 24 Hours for Glue to Dry…
STEP 15:
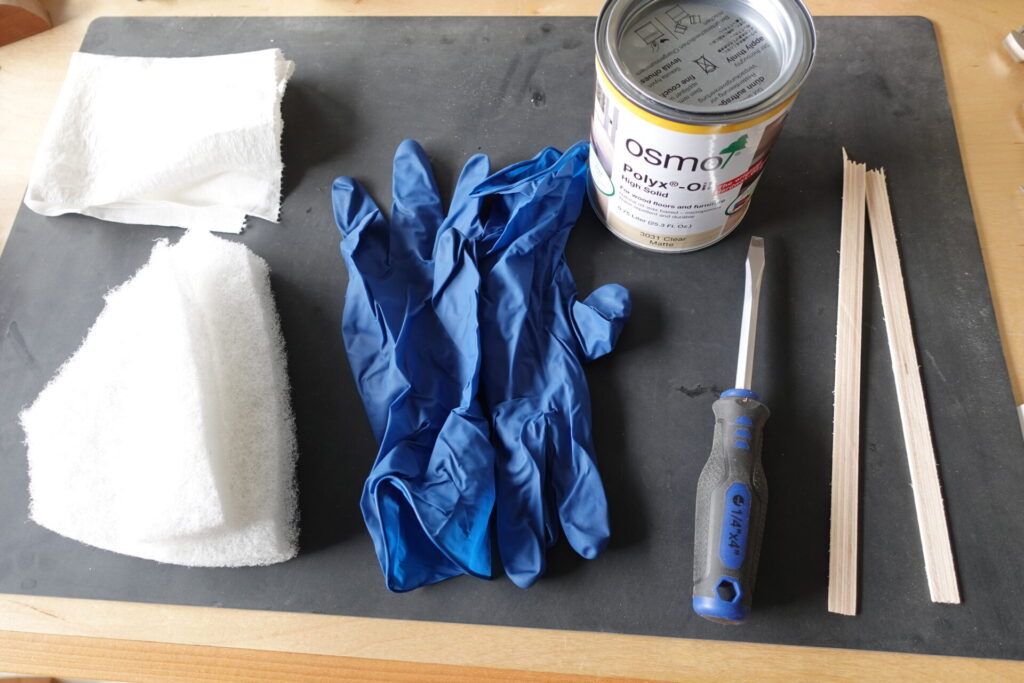
(Optional): Sand again and remove all dust before applying Osmo Hard Wax Oil (+ Our Product Review) which is safe for children’s toys. Use gloves and non-abrasive pads to work the oil into the surface of the wood. Let sit for about 15 minutes and wipe the excess with a paper towels. IMPORTANT: Safely dispose of wet rags, gloves, and pads which can be flammable.
How do you make the wheels? What kind of speeds can this car achieve? Have you considered a turbine engine mounted on top? And maybe some wings. 😃
For this final build, I purchased the wheels and would probably recommend it. But in another prototype, I attempted to make the wheels using a hole dozer attached to a drill press. That worked well until I needed to cut the small cylinders in half. There is blog post about the misadventure here: https://timbertopia.com/wood-shop-mistakes-avoid-this-miter-saw-danger/
The other problem is rounding the edges of the wheels. The parts are so small it’s risky to use with a router and round over bit. So I’m thinking of fabricating a concave hourglass on the lathe with sandpaper on the outside that can be used on the drill press. More tinkering needed…
I’m sure kids (and adults) would love additional features of propulsion and flight capabilities. At the moment, though, it only goes as fast as a six year old can shove it.
Thanks for reading! -John