Follow this step-by-step guide to build a practical and durable wooden toy motorcycle that will last generations.
Key Project Details
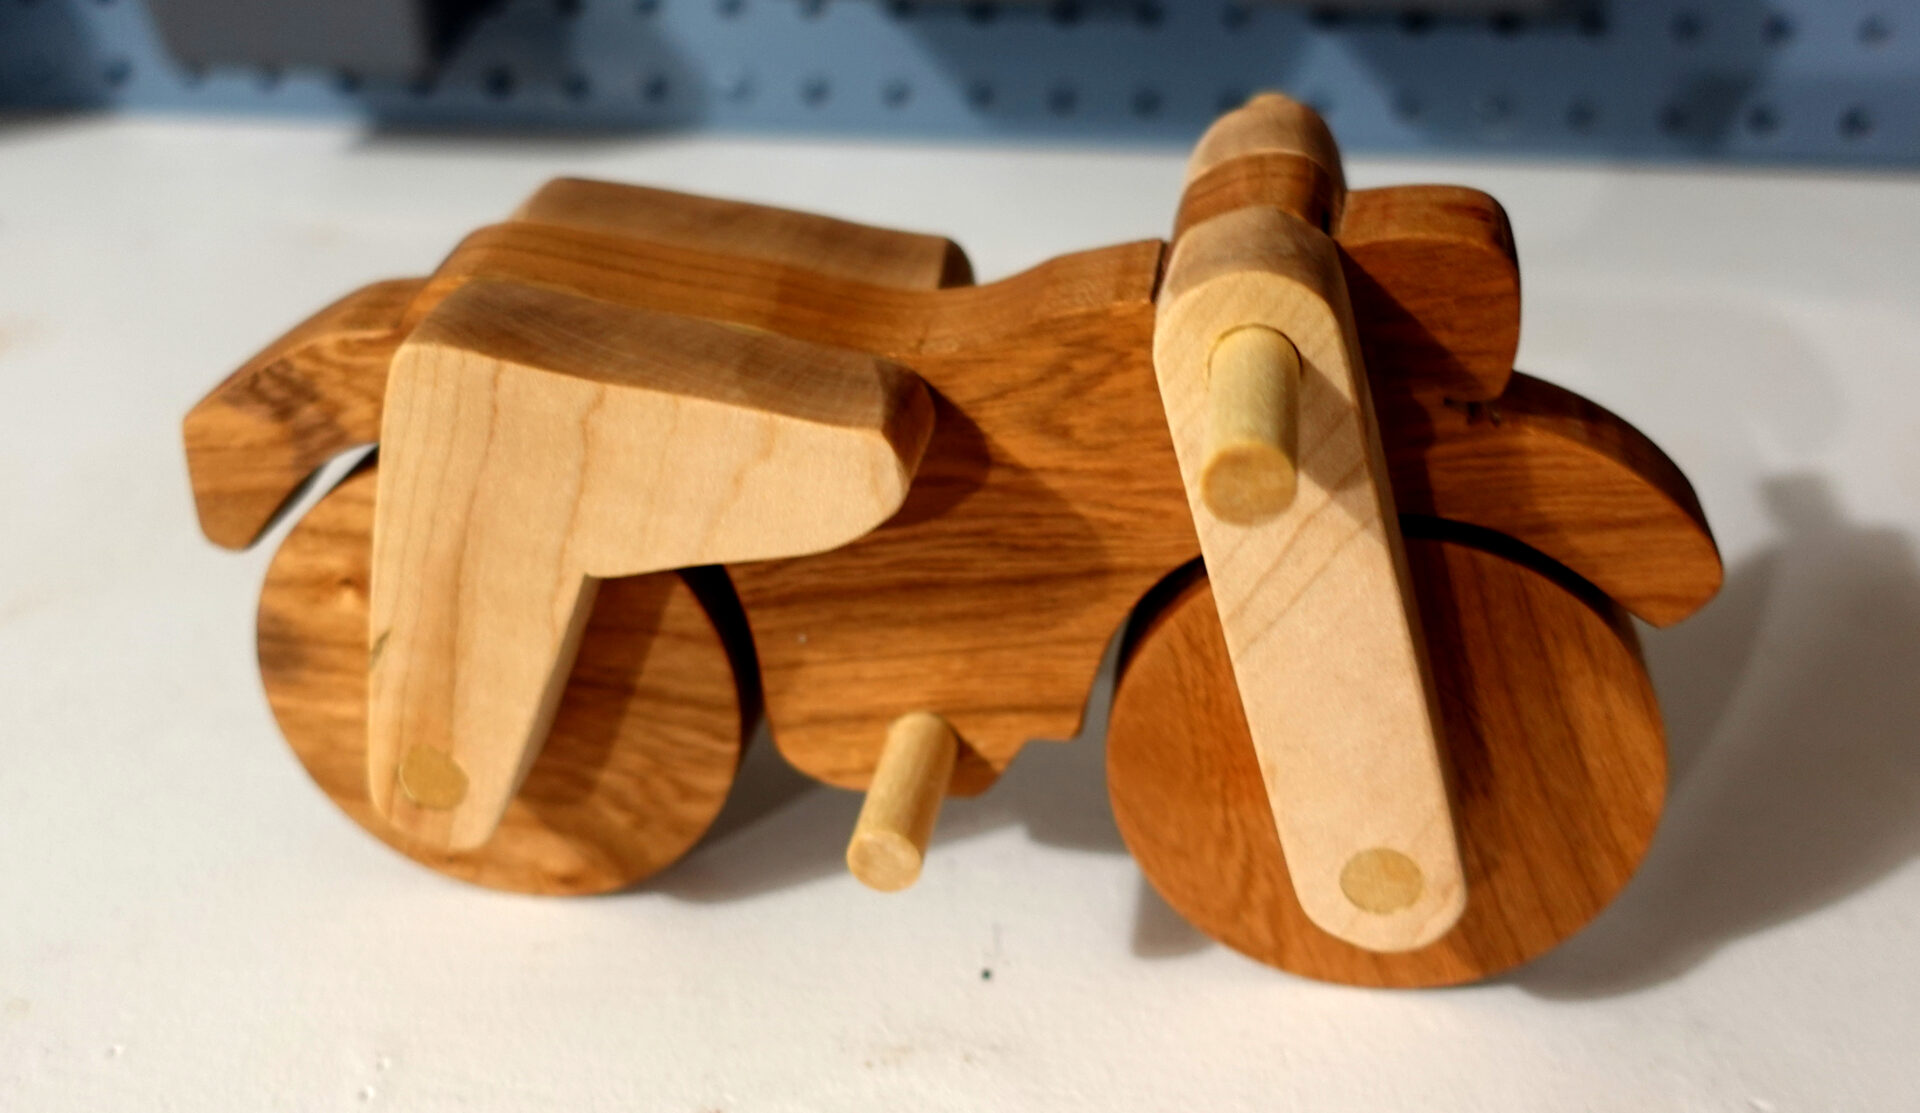
What’s better than a handmade wood toy that will last for years to come? This motorcycle from Forest Street Designs features large wheels to stand on its own, two tones of wood– cherry and maple, solid construction for rough play, and provides endless play value with rolling wheels. It’s a classic to build and treasure.
| Time to Build | 2 Days |
| Difficulty | 2 of 5 |
| Dimensions | 7″ x 4″ x 1.5″ (LxWxH) |
| Materials Needed | 3/4 inch Cherry (wheels and body) 3/4 inch Maple (forks and saddle) 3/8 inch Dowels 3/8 inch forstner bit Wood Glue (Tite Bond II) 3M Super 77 (spray adhesive) Masking tape Mineral Spirits (Optional) |
| Tools Needed: | Scroll Saw Drill (Cordless or Drill Press) Hole Dozer (to cut wheels) Clamps Hand Saw Belt Sander (or equivalent) Sand paper Chisel (optional) |
| Lessons Learned: | Thoroughly sand the wheels so they can spin freely Belt sander does a mediocre job smoothing round edges Mineral spirits work wonders to remove excess adhesive |
Download Free Plans from Forest Street Designs:

Step-by-Step Build Instructions


STEP 3: Use a scroll saw to cut the remaining pieces.


STEP 4: A belt sander (or equivalent sander) can be used to smooth the edges and refine to the correct dimensions. IMPORTANT: Be sure to sand the wheels really well on each side so the wheels will spin freely once the axle is glued in place. (As you’ll see below, I did not sand enough)


Wait 24 Hours for Glue to Dry…


STEP 15: Remove all dust and apply Osmo Polyx-Oil which is safe for children’s toys. Use gloves and non-abrasive pads to work the oil into the surface of the wood. Let sit for about 15 minutes and wipe the excess with a paper towels. IMPORTANT: Safely dispose of wet rags, gloves, and pads which can be flammable.
