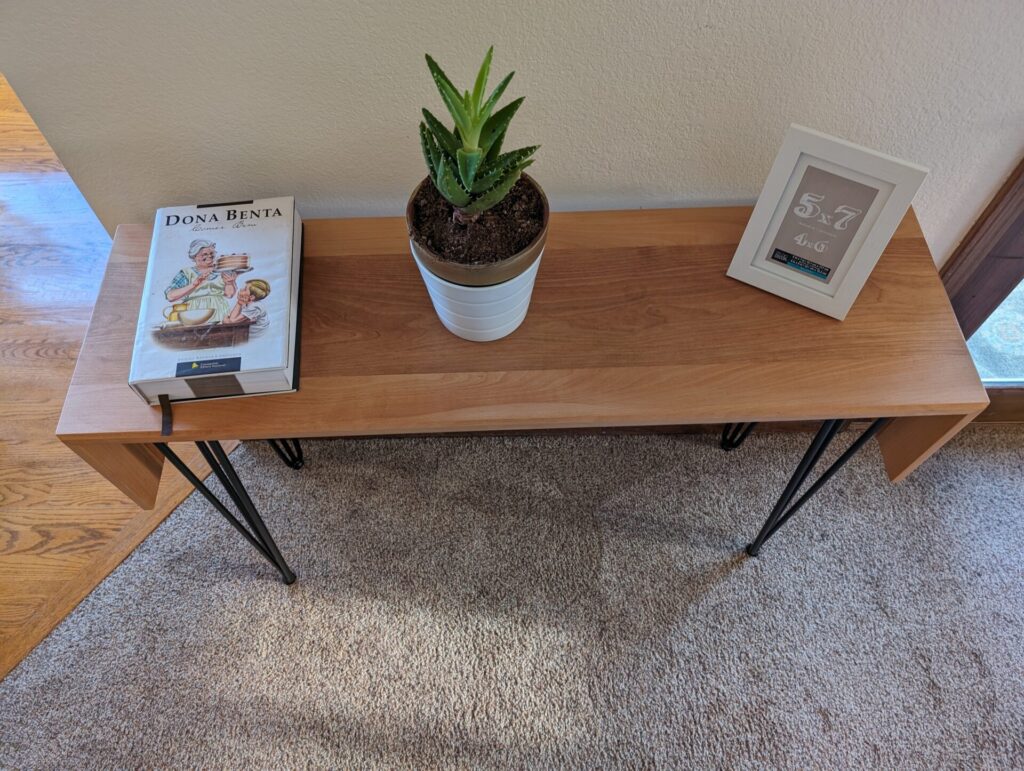
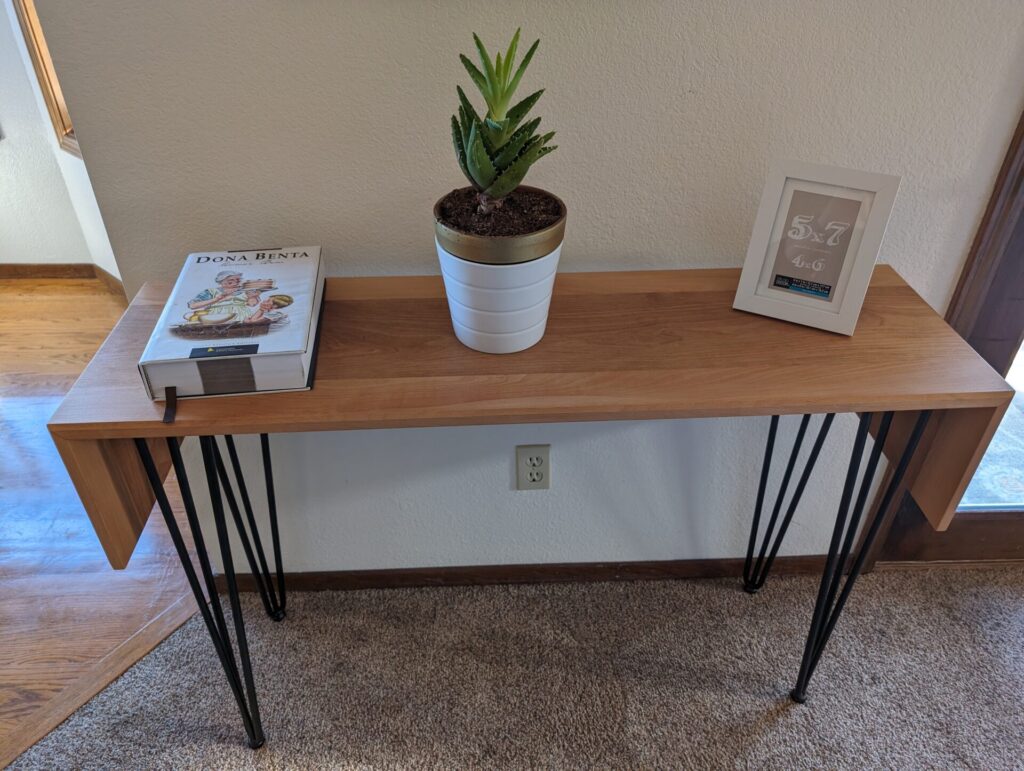
Follow along as we build this unique console table featuring waterfall overhanging edges.

Design & Wood Choice
I wanted to try building a “waterfall” table (one where the grain seamlessly falls over the edges of the table). Usually this is found on live edge tables where the slab top is supported by the waterfall edge that effectively acts like a table leg. Check out Blacktail Studio’s with their Fire & Waterfall Desk. This was my first time attempting the waterfall technique and below you’ll see some of the mistakes I made along with the final product which turned out pretty well.
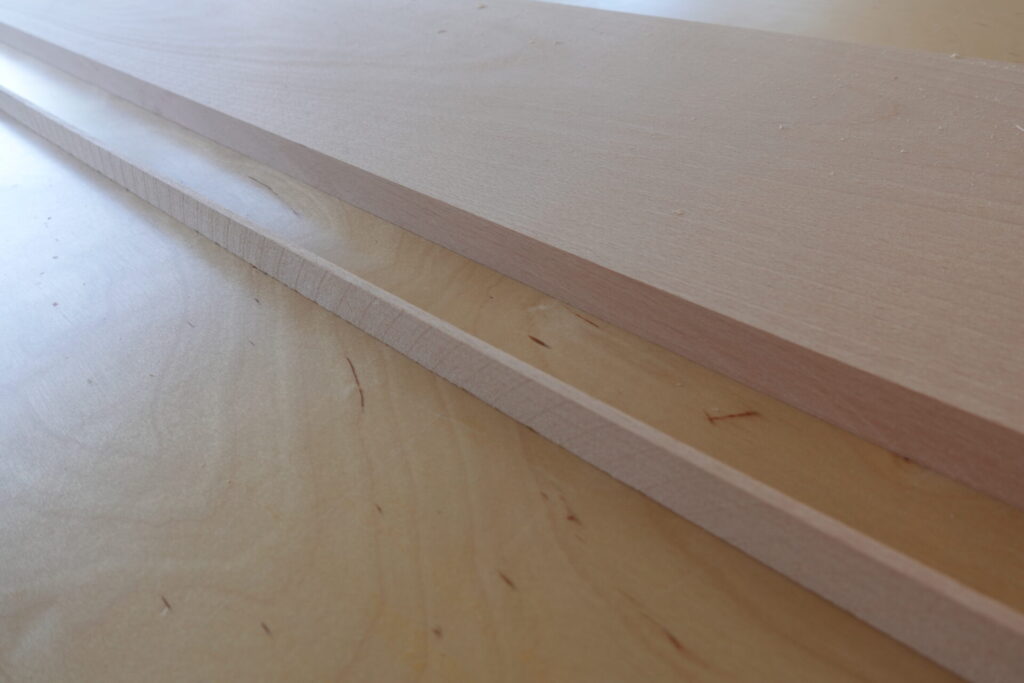
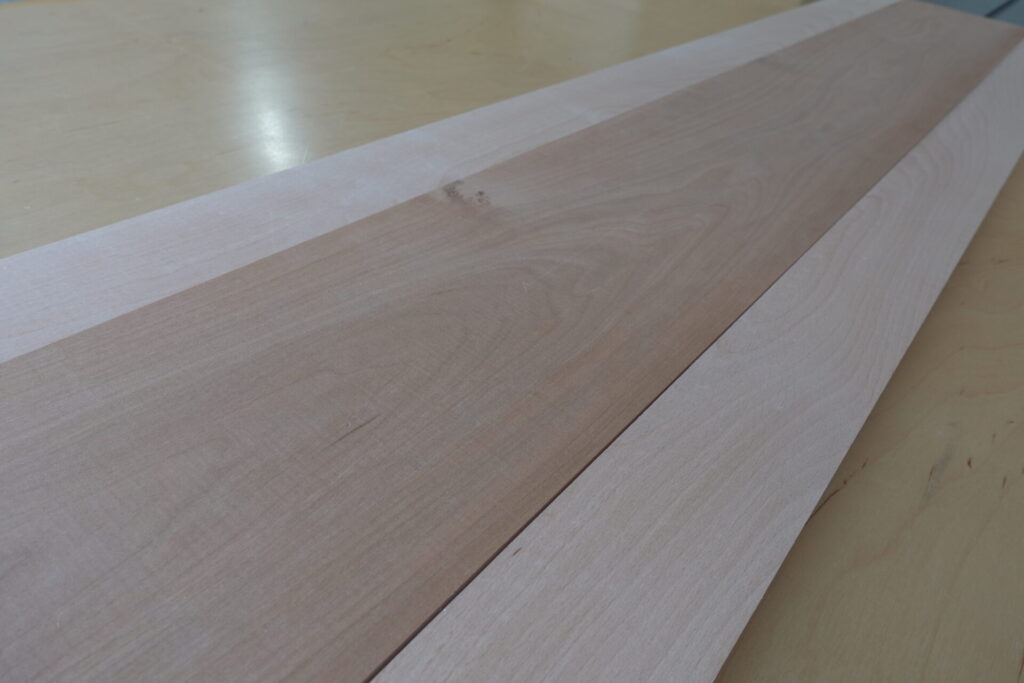
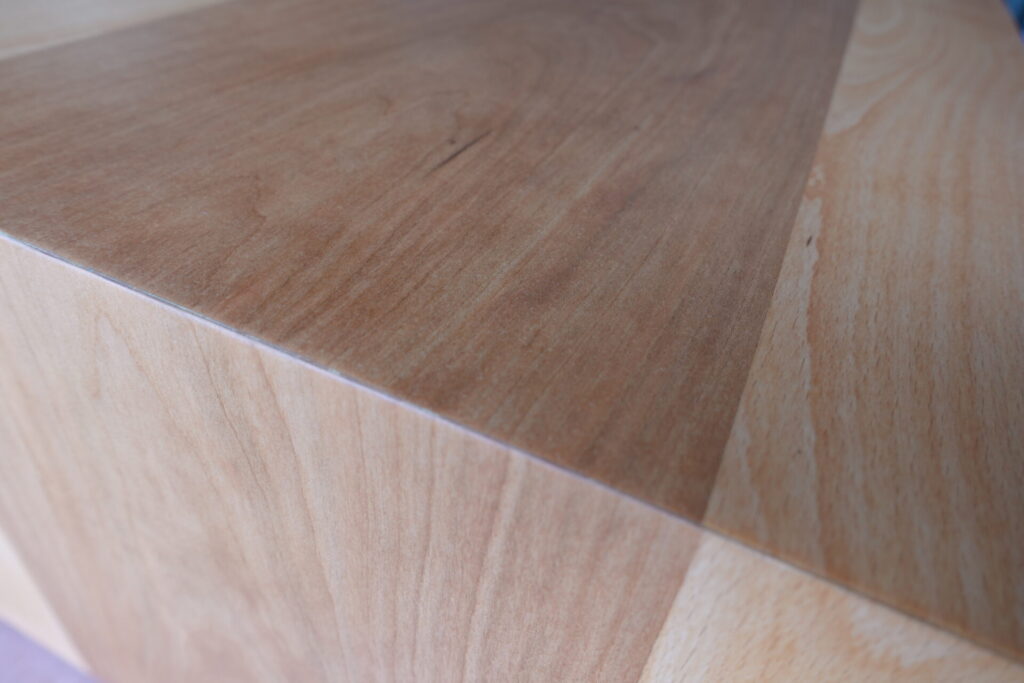
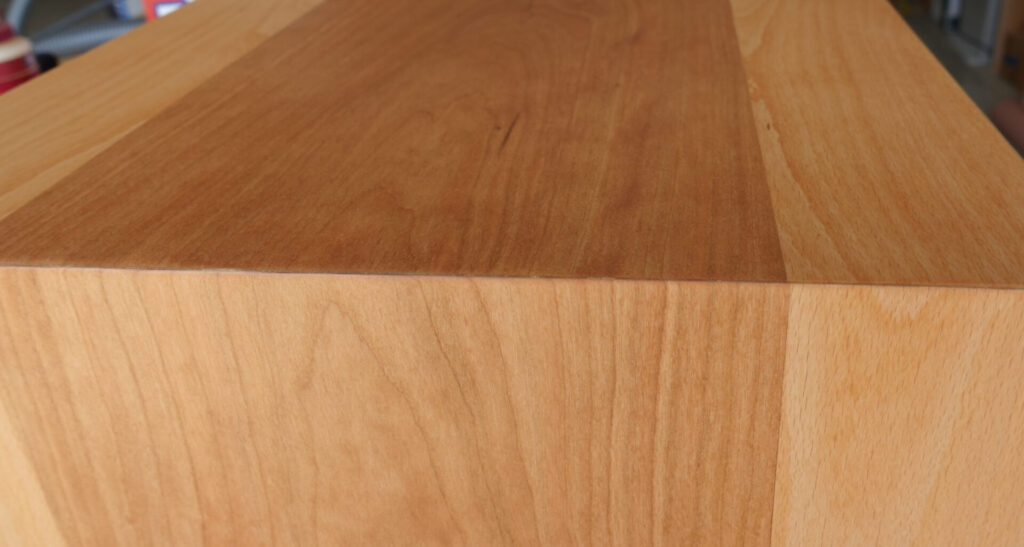
I had a few long pieces of hardwood in my shop and wanted to use them for a sleek and modern table. Since I have a number of different wood species, I decided to combine different species of wood together to create a contrasting aesthetic. So I settled on a design where two thinner strips would surround a wider center board. Then the edges will be cut at a 45 degree edge (miter cut) so the ends fall off the edge but still maintain the wood grain over the edges.
One of the original sketches had a shelf on the bottom, but I decided to nix the shelf in case the waterfall didn’t work as planned. Fortunately, the waterfall worked well, but the shelf will need to wait until the next production.
Dimensions: 47 (L) x 14 (W) x 30.75 (H)
Wood Choice: European Beech for the outside and Cherry for the inside.
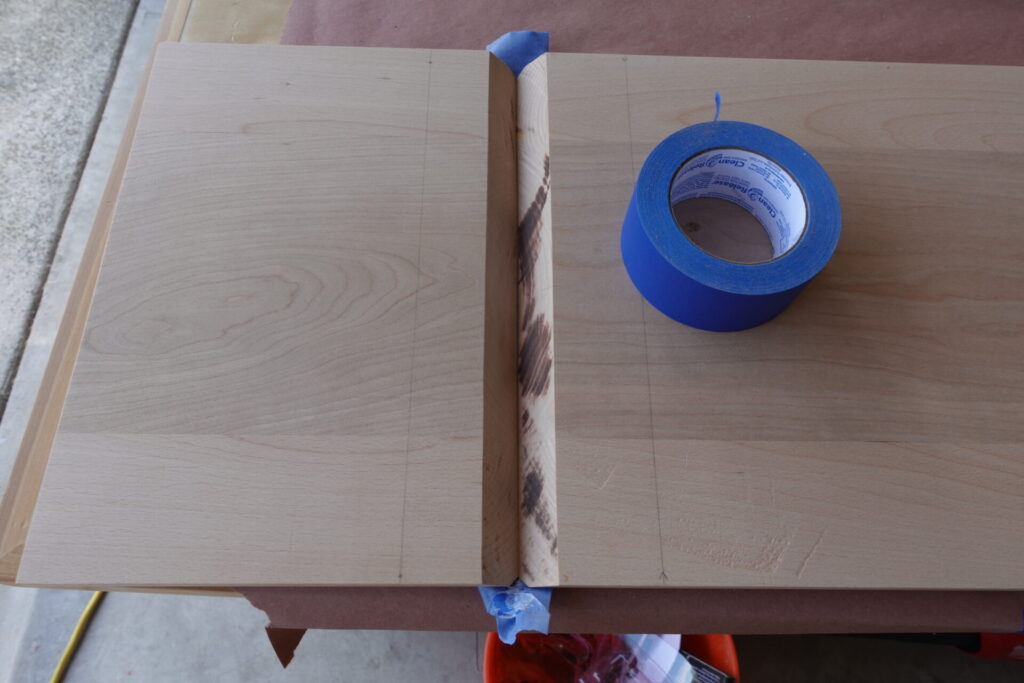
Cutting to Size
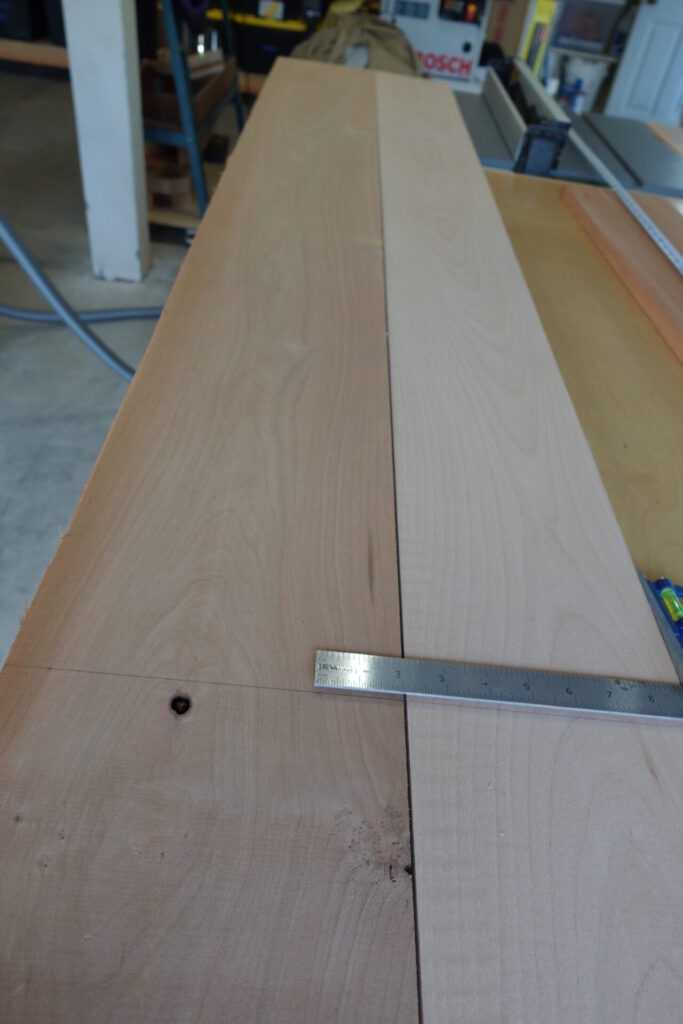
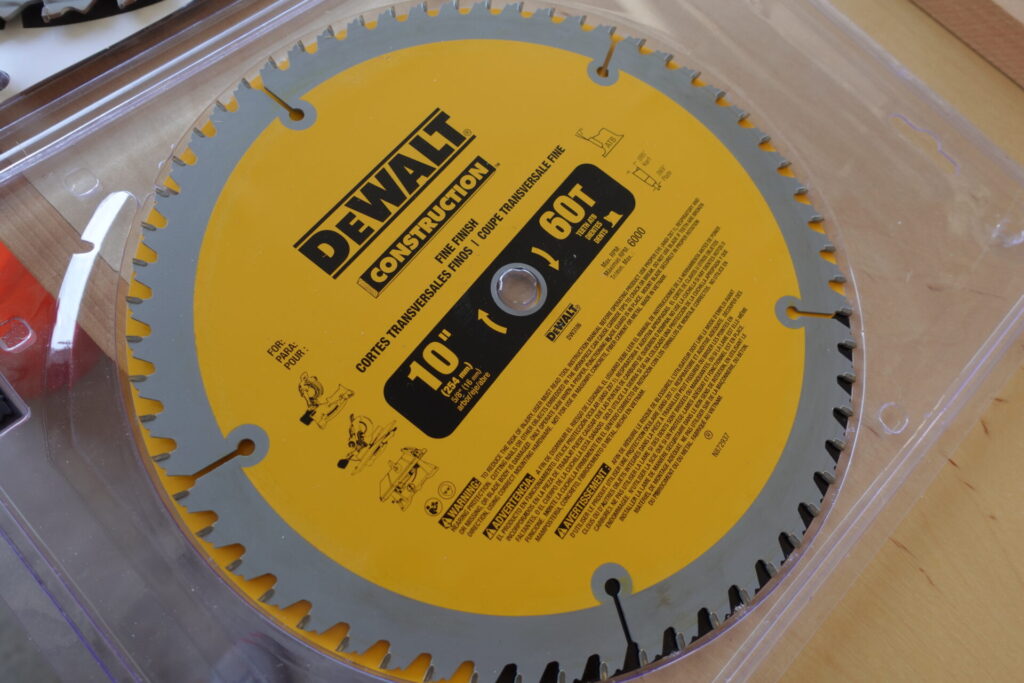
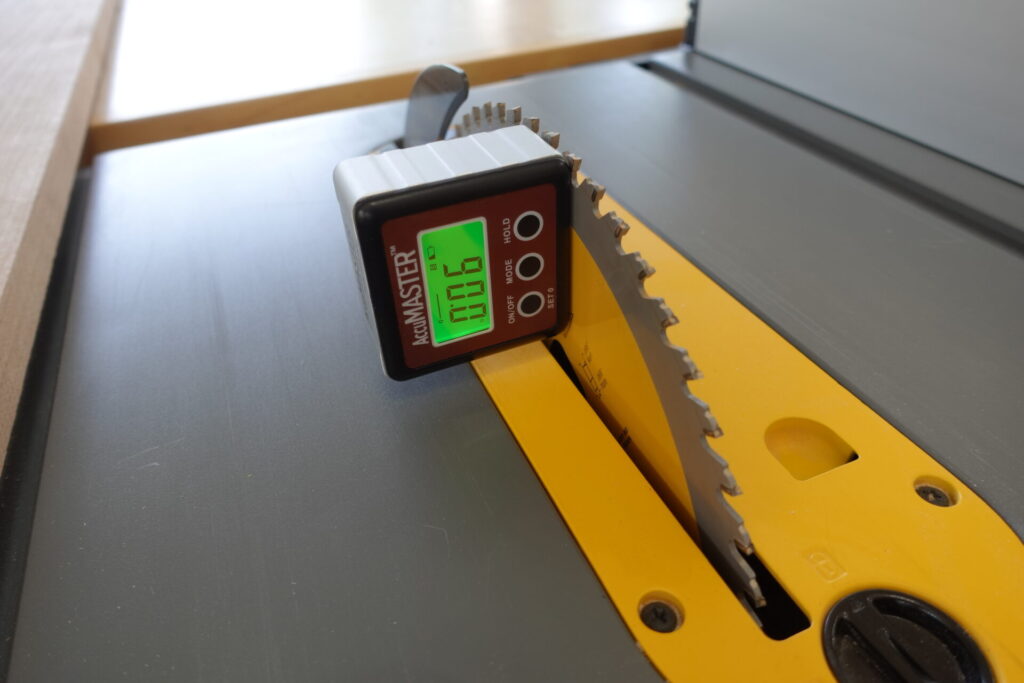

From the photos above, you can see the process I used to rip the boards to size. First I used my jigsaw to cut the boards to rough length and then used my table saw to rip the long edges to size and ensure 90 degree edges all around.
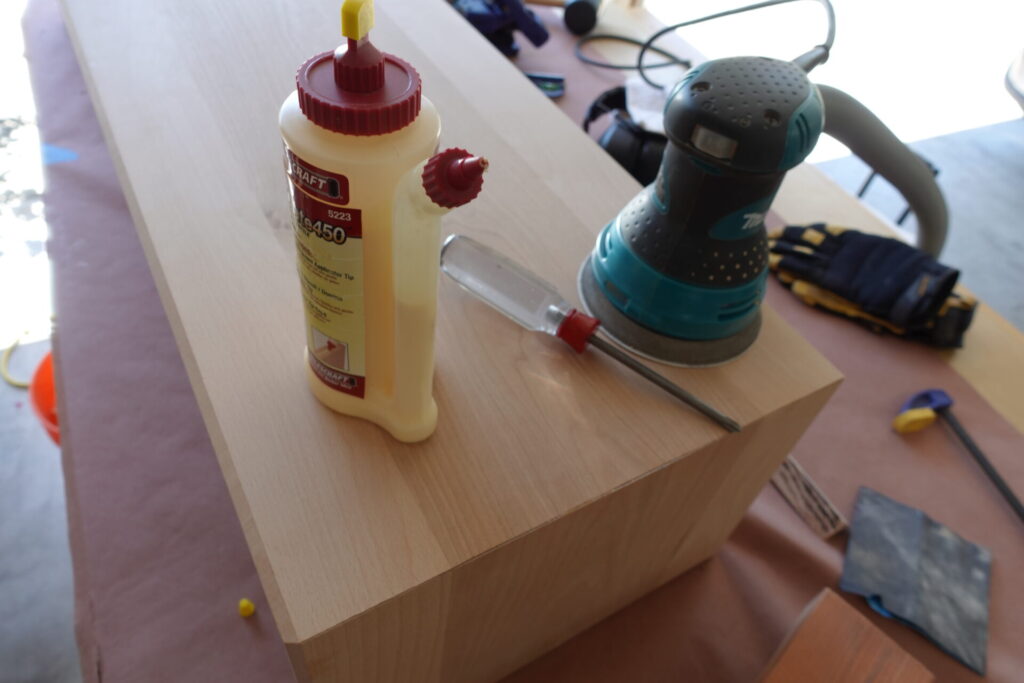
Gluing the Top Together & Lots of Sanding
I found this video helpful to make sure the glue up was properly aligned:
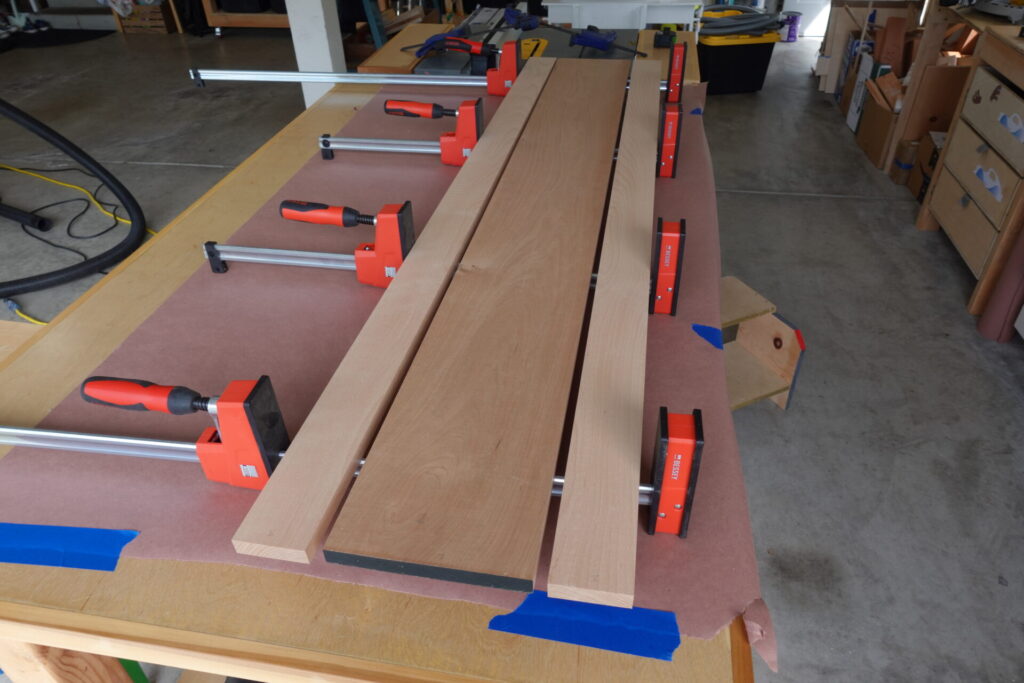
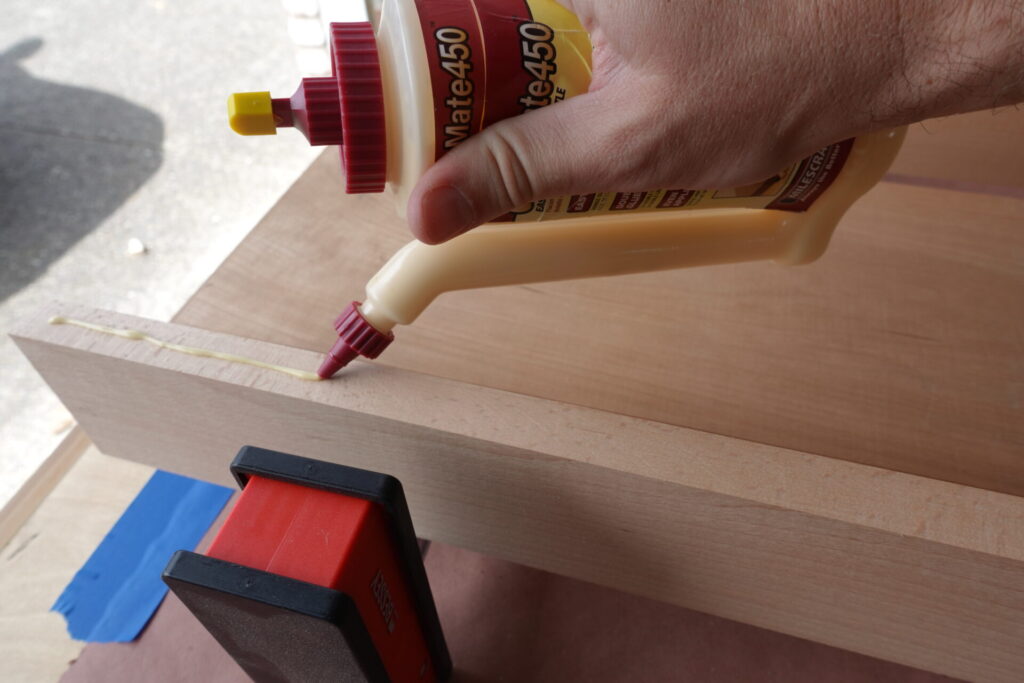
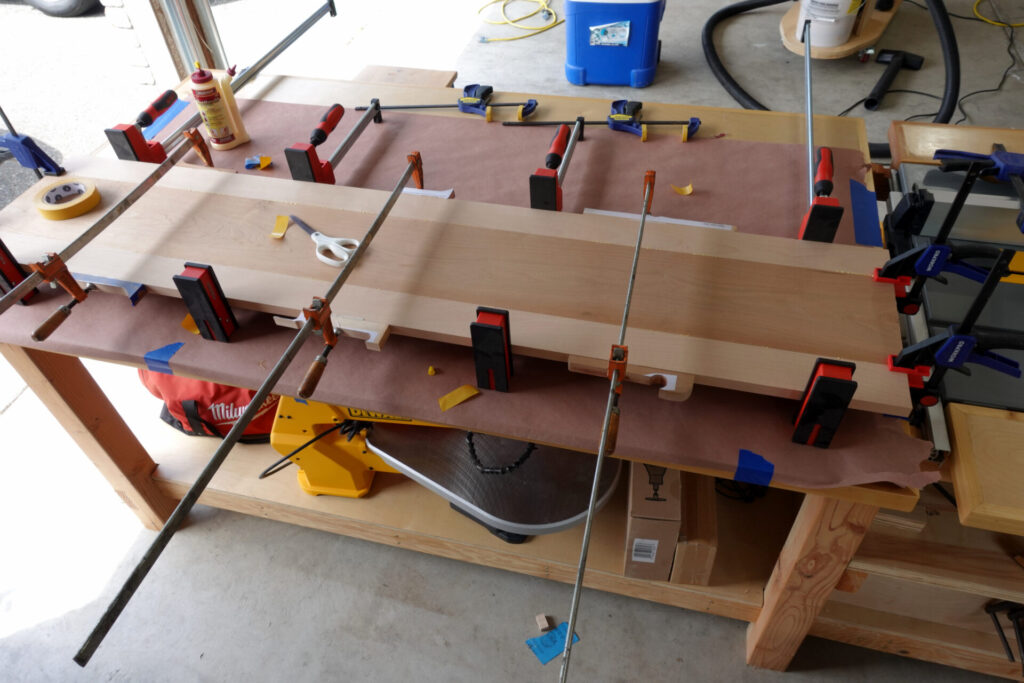
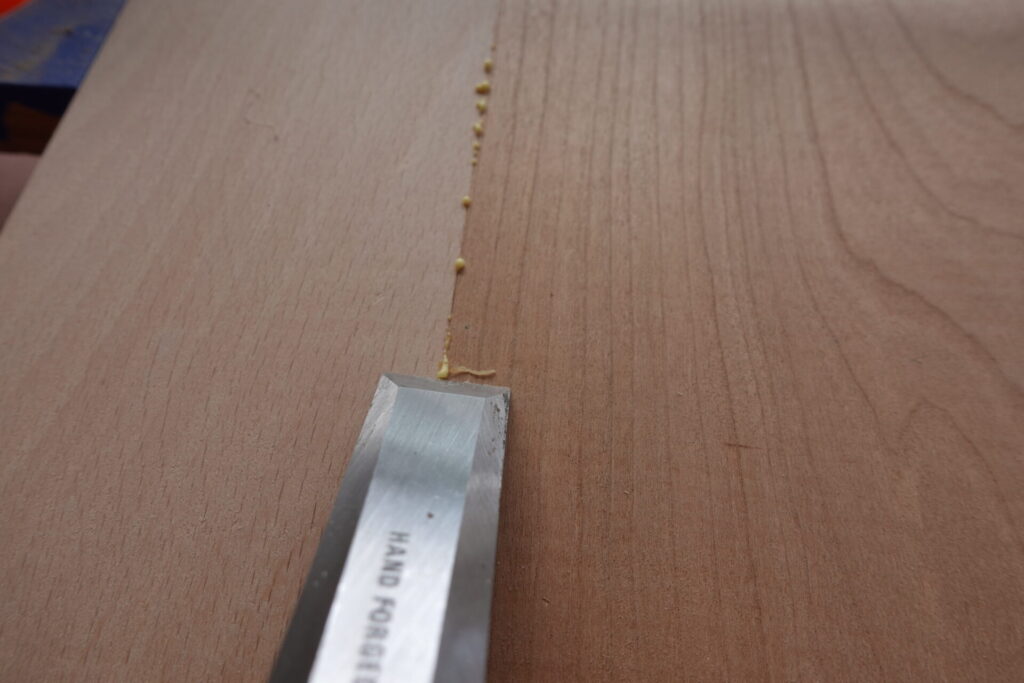
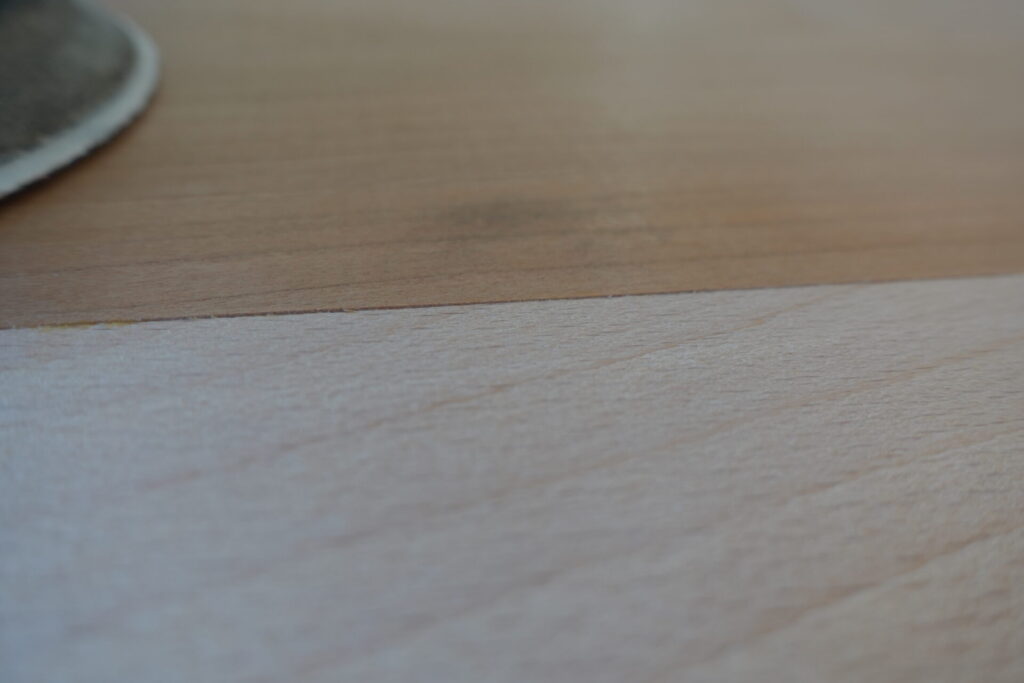

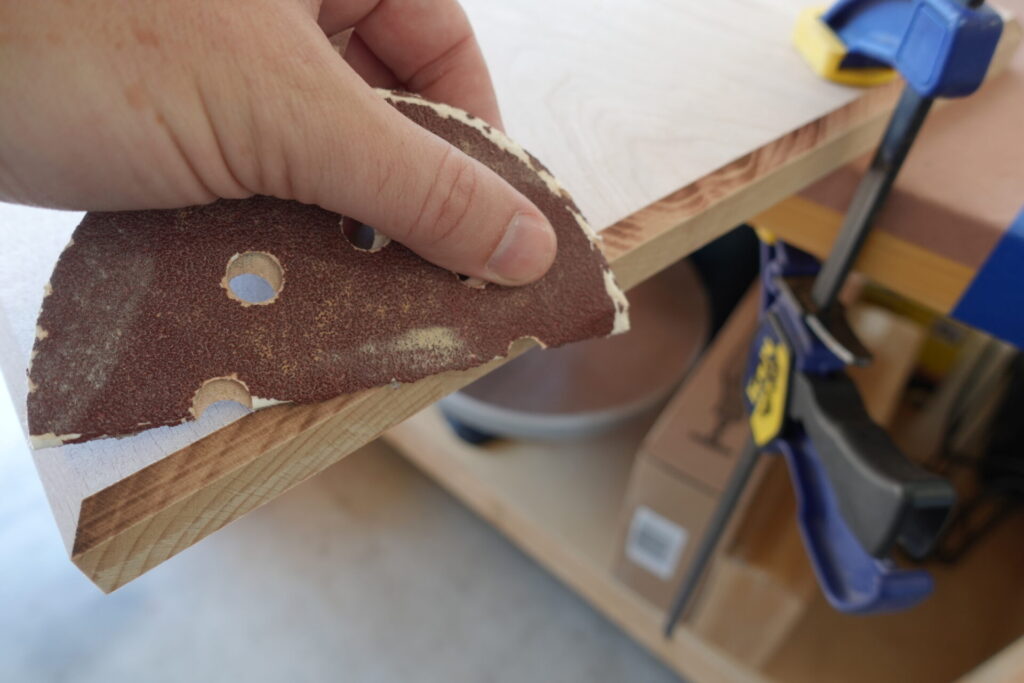
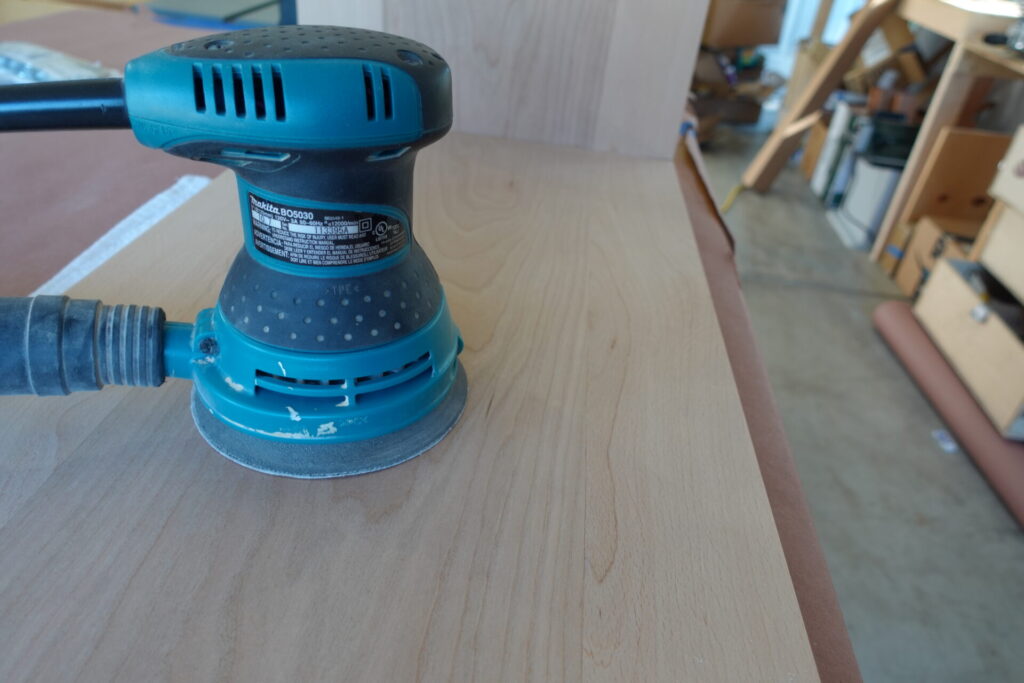
The next step was to glue up all the pieces with Tite Bond II and a bunch of clamps. During the glue up, I tried my best to make sure the seams between the boards were flat as possible because once dry, this piece would be too big for my 13″ Planer. I was really pleased with the Bessy Clamps to help keep the boards flat and prevent cupping. After 24 hours of drying, I cleaned up the excess glue with a chisel and then used the orbital sander to flatten the top. I started with 80 grit and then moved to 100 grit, and then 150 grit, repeating the process for both the top and the bottom.
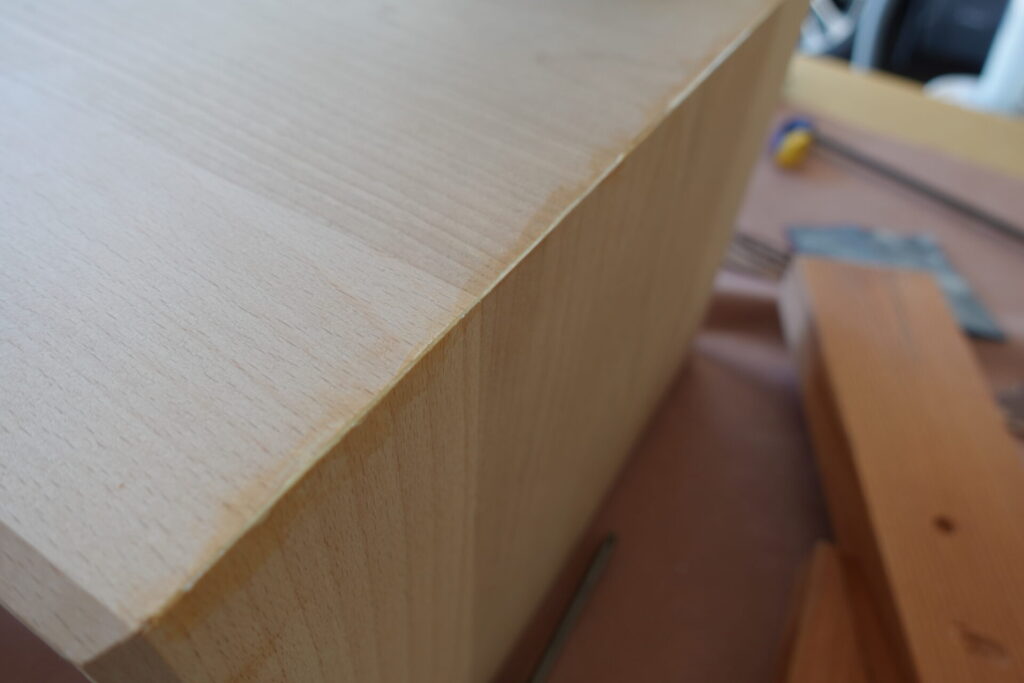
Cutting to Size and Adding a Chamfer
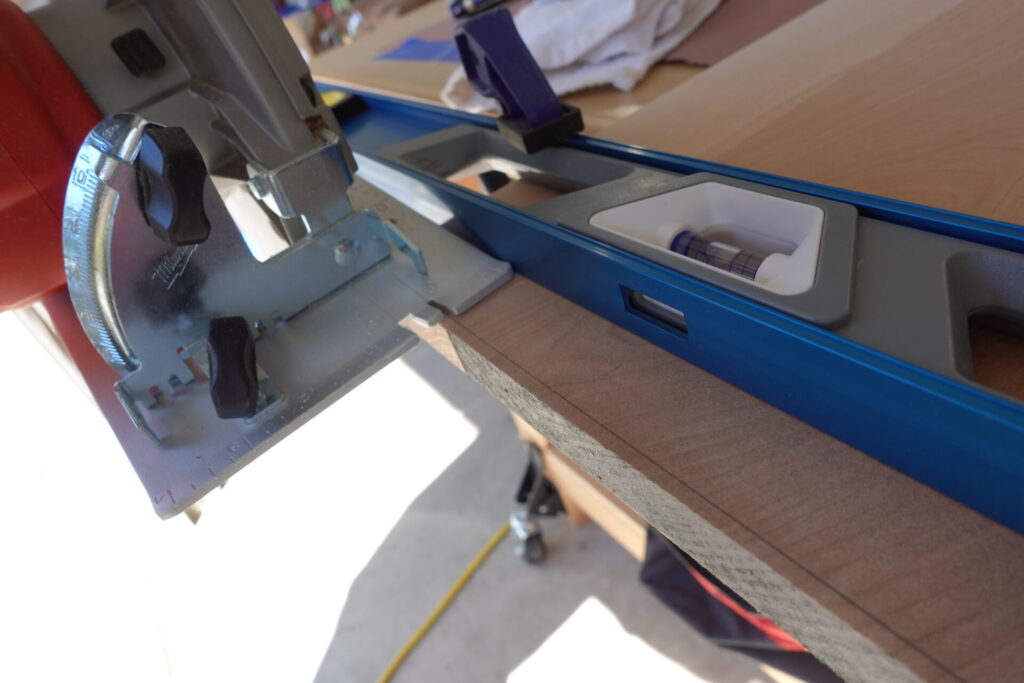
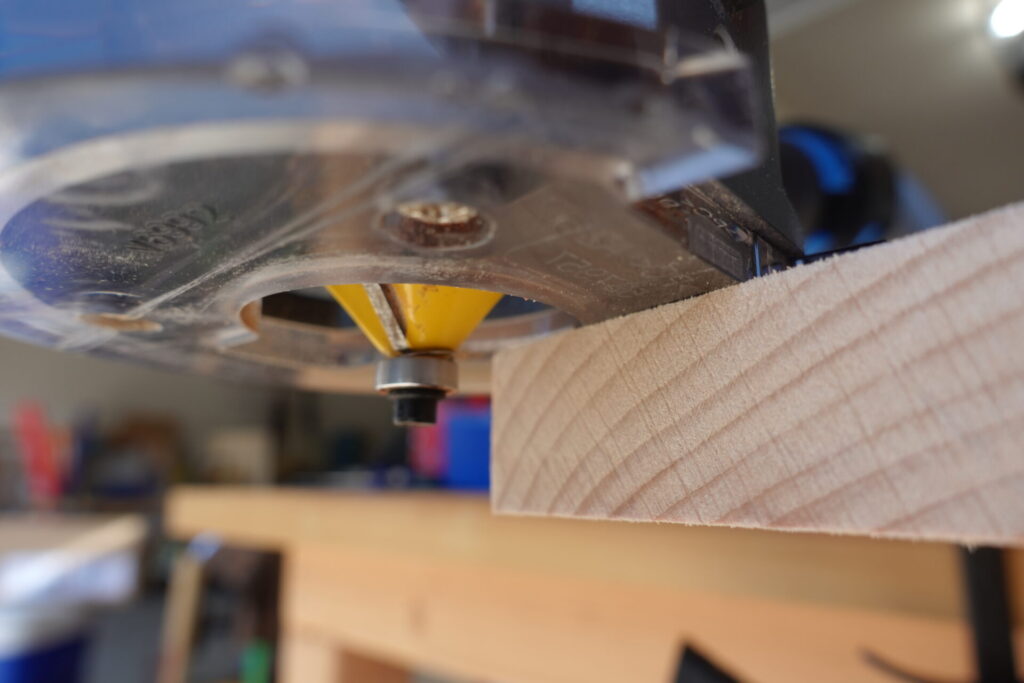
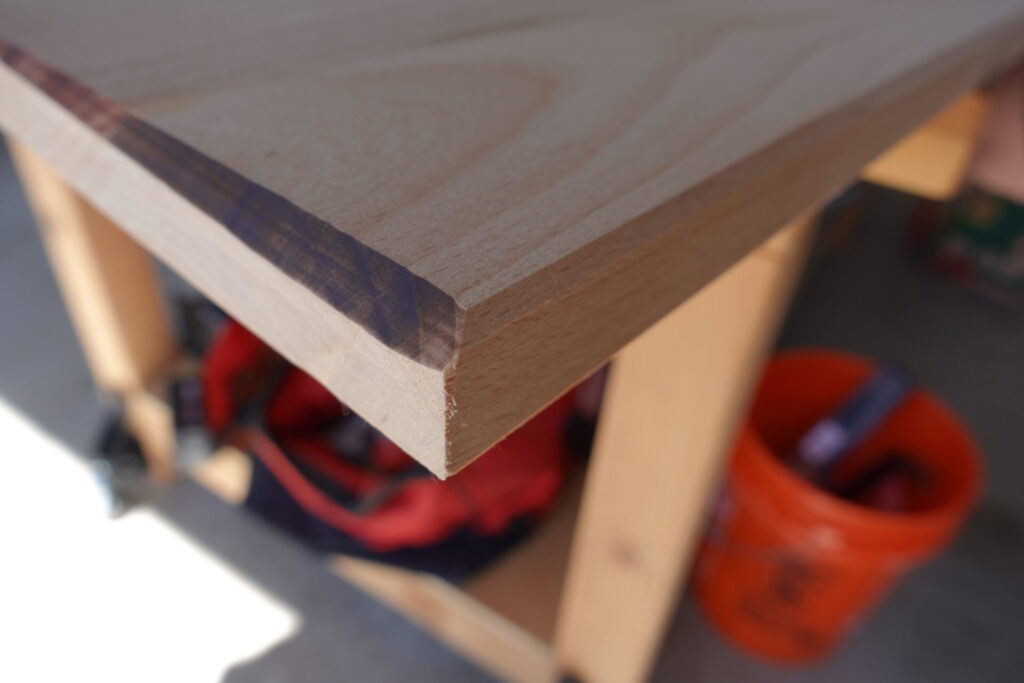
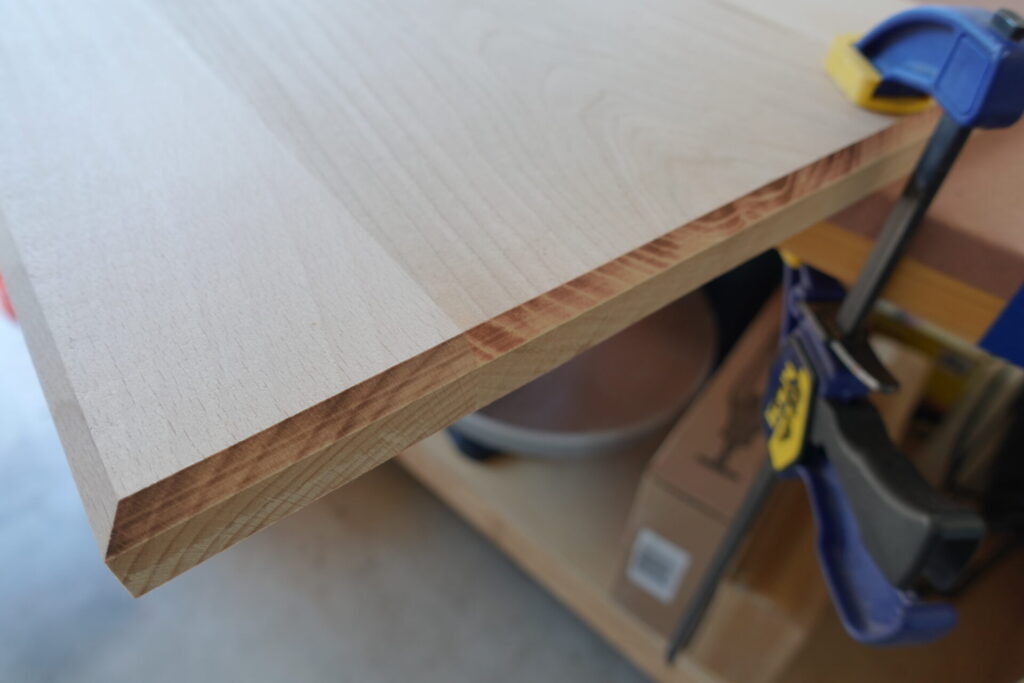
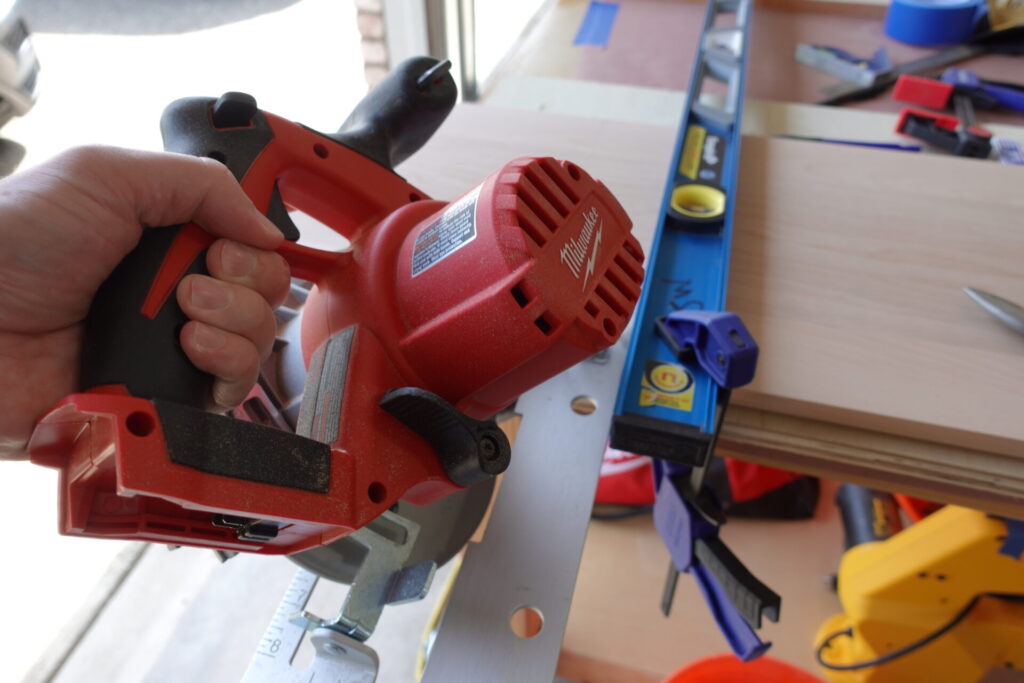
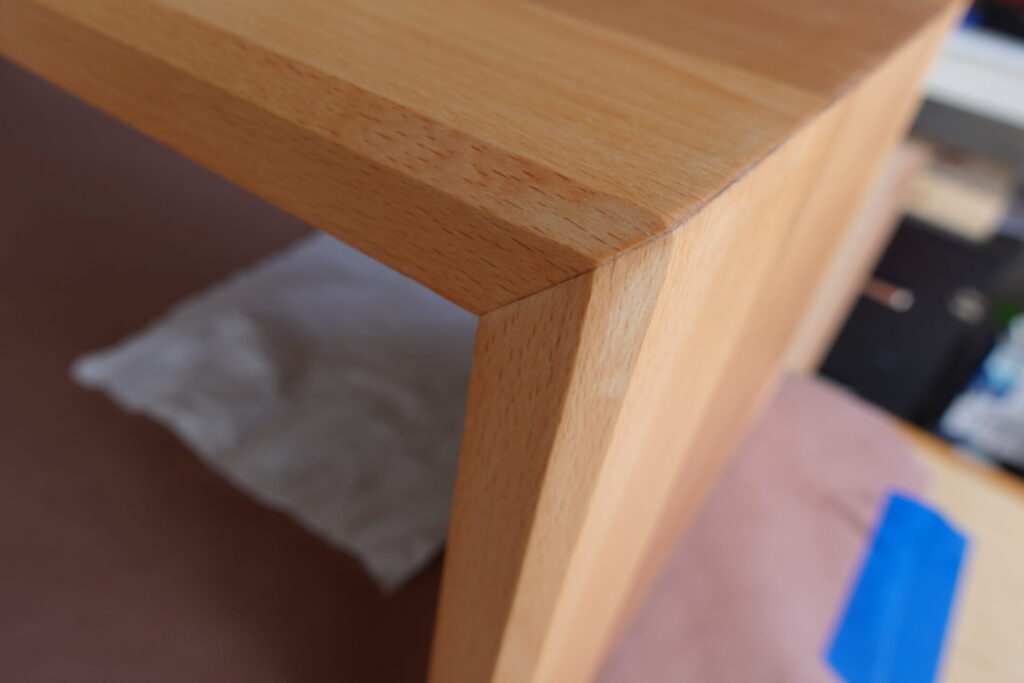
The next step involved cutting the ends to size. I used my level as a straight edge and cut with my cordless circular saw. Then it was onto the edge profile. I chose a 45 degree Chamfer bit around all the edges. I made two passes with the router to get to the desired depth. This proved invaluable because you can see in the pictures above I made two mistakes. First I had the bit spinning too fast causing the black burning color. So I turned down the speed and the issue was fixed. The second mistake was when the router guide didn’t stay flat against the top of the work surface causing a big gauge near the corner (see photo above). Fortunately this was on my first pass, so when I went back with the second pass a little deeper, it was clean and even all the way around.
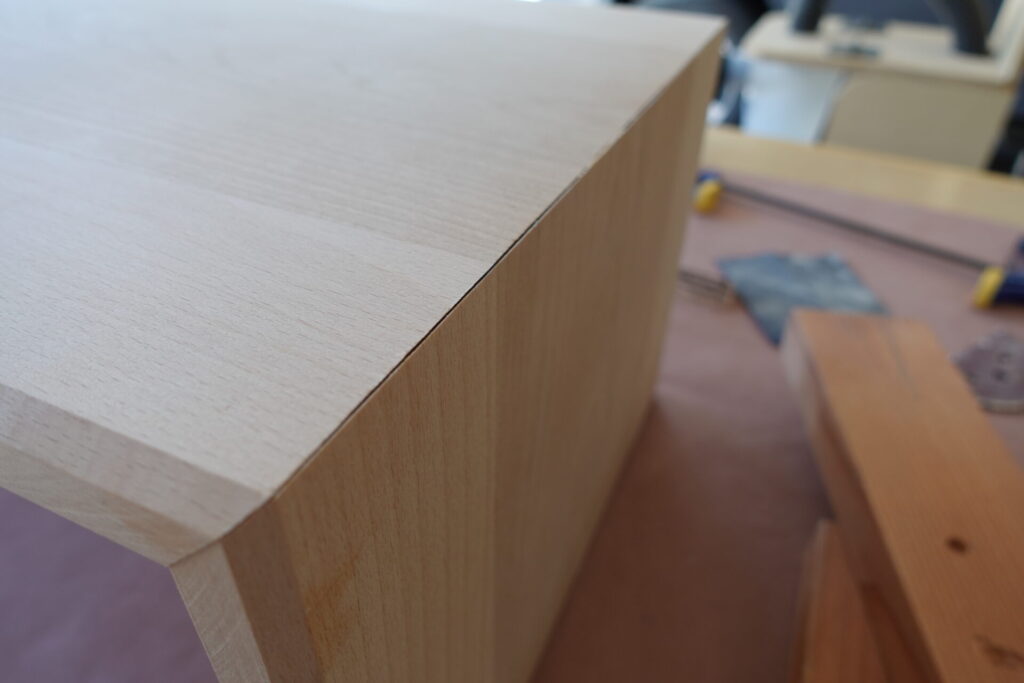
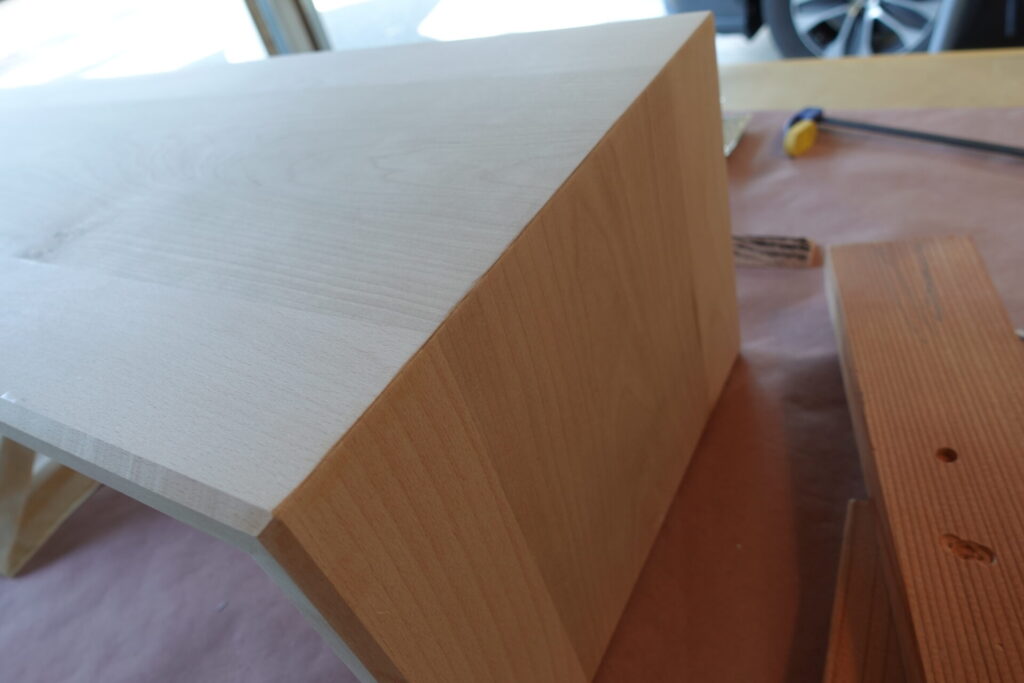
Moment of Truth: Cutting the Waterfall
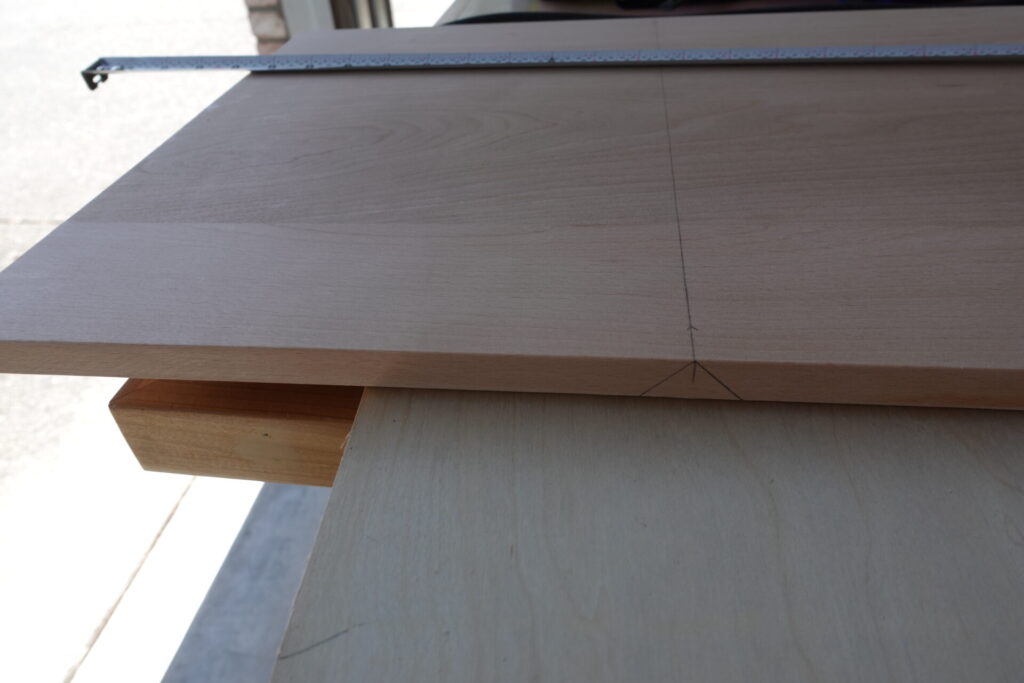
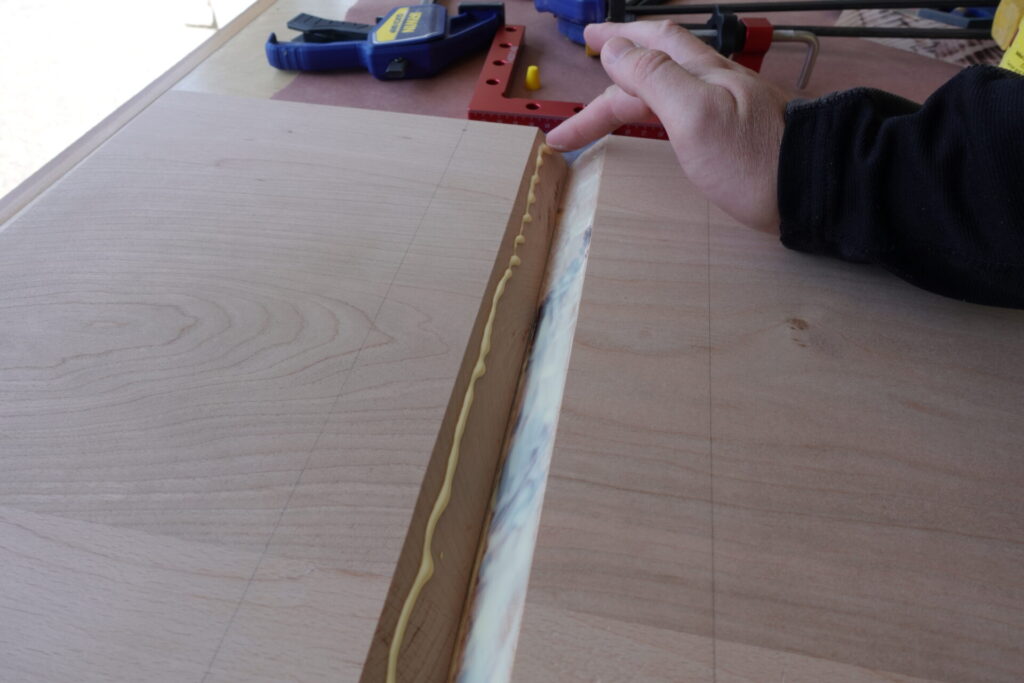
The next step was to cut the waterfall edges. I must admit this was a little dicey because I didn’t have the “proper” tools. Since I don’t have a track saw nor a cross-cut sled, I was forced to use my circular saw and a table saw for the 45 degree miter cuts. Using the cordless circular saw at a 45 degree angle was definitely not the most precise method, but it actually worked pretty well!
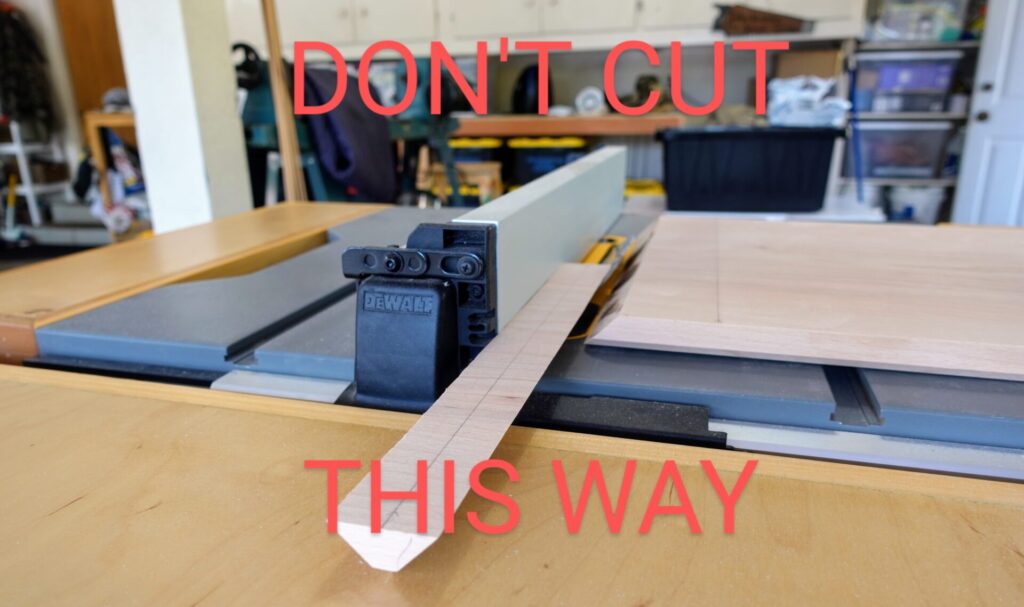
To get the other end of the 45 miter, I headed to the table saw and as you can see above, it was not the best method for safety. The issue here is potentially getting the off-cut stuck between the fence and the blade, which could cause a dangerous kick back scenario. So I definitely wouldn’t recommend this, but I must admit it did work.
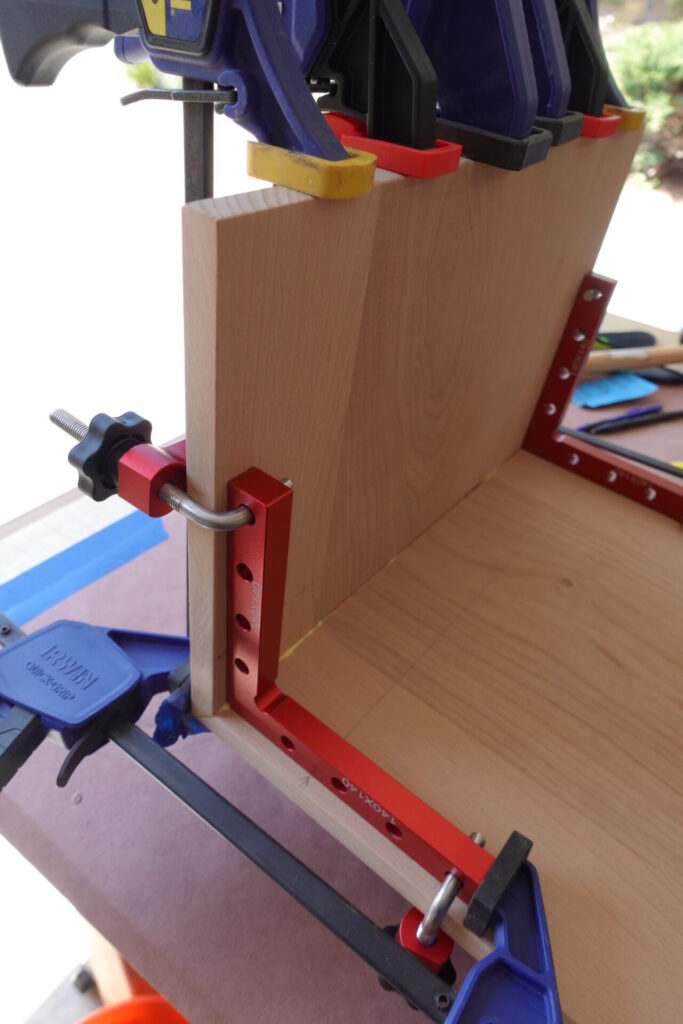
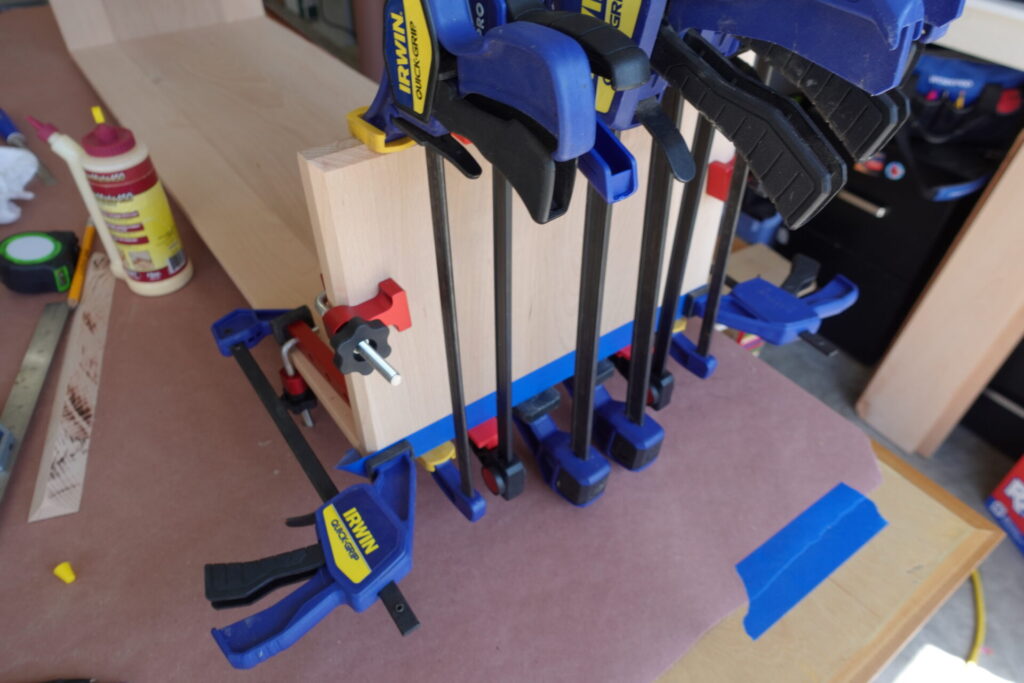
Then it was off to the clamping of the waterfall. Since this waterfall edge is not a structural element in the build, I didn’t worry too much about using dominoes or dowels. I used some specialty 90 degree clamps (in red above) along with masking tape on the underside of the joint. These helped to line up the edge and ensure the 90 degrees profile. After that was in place, it was all about adding a bunch of clamps.
Cleaning the Waterfall Edge & Lots of Sanding
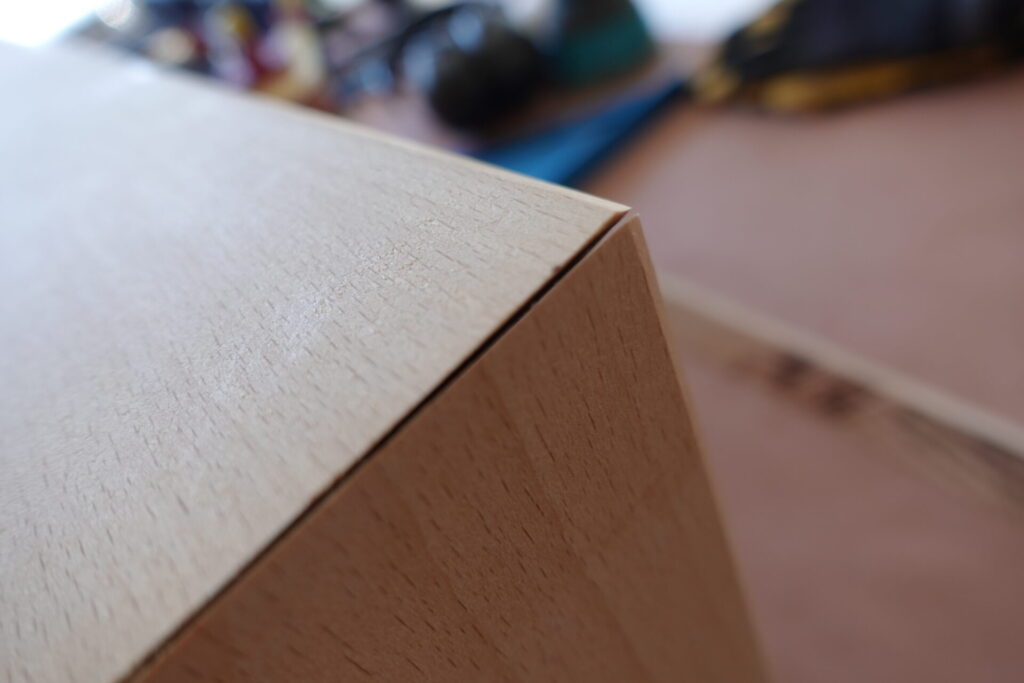
After removing the clamps, there were… well… gaps. I did some research and came up with a solution — using glue and sawdust to work into the joint. Then using the rounded edge of a screwdriver along the seam to work the wood fibers together. I also used the orbital sander to help create some extra dust. After a few passes, I let it dry and it turned out really well.
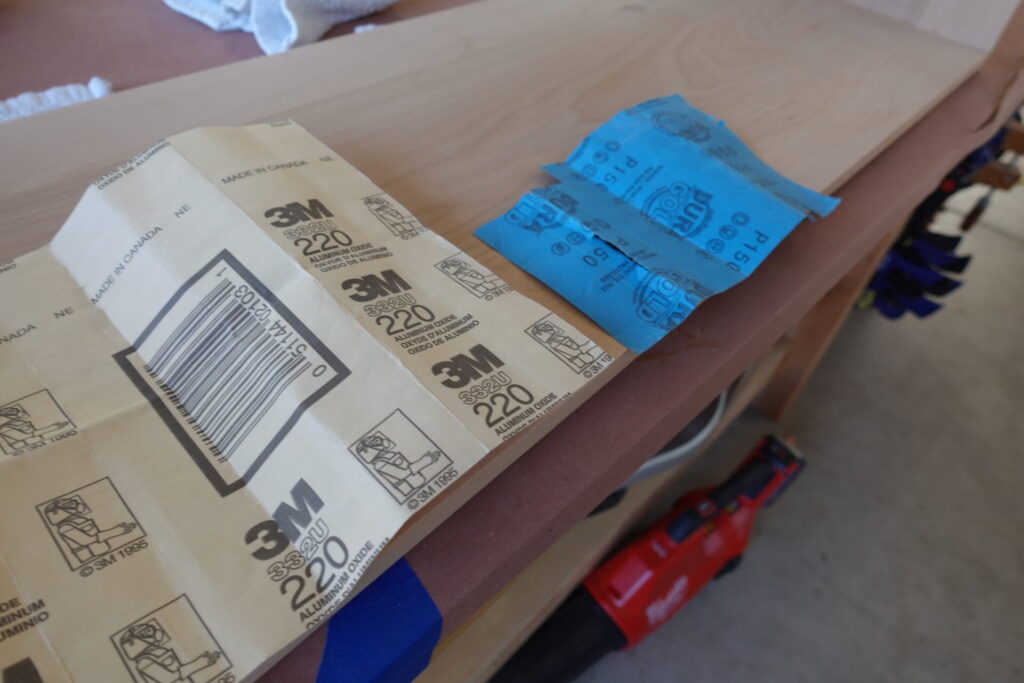
Next it was onto everyone’s favorite past time: sanding. Lots of sanding. This is the last sand before the finish so it took a bunch of time. Starting at 100, then 120, then 150 grit making sure to wipe and vacuum in between each sanding application.
Applying the Finish
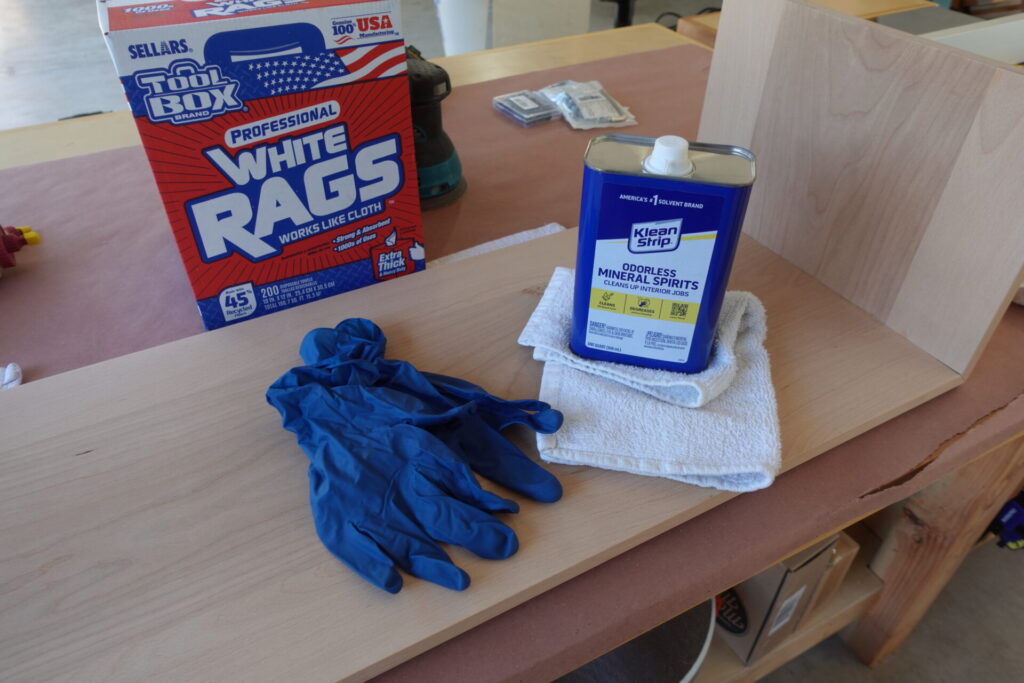
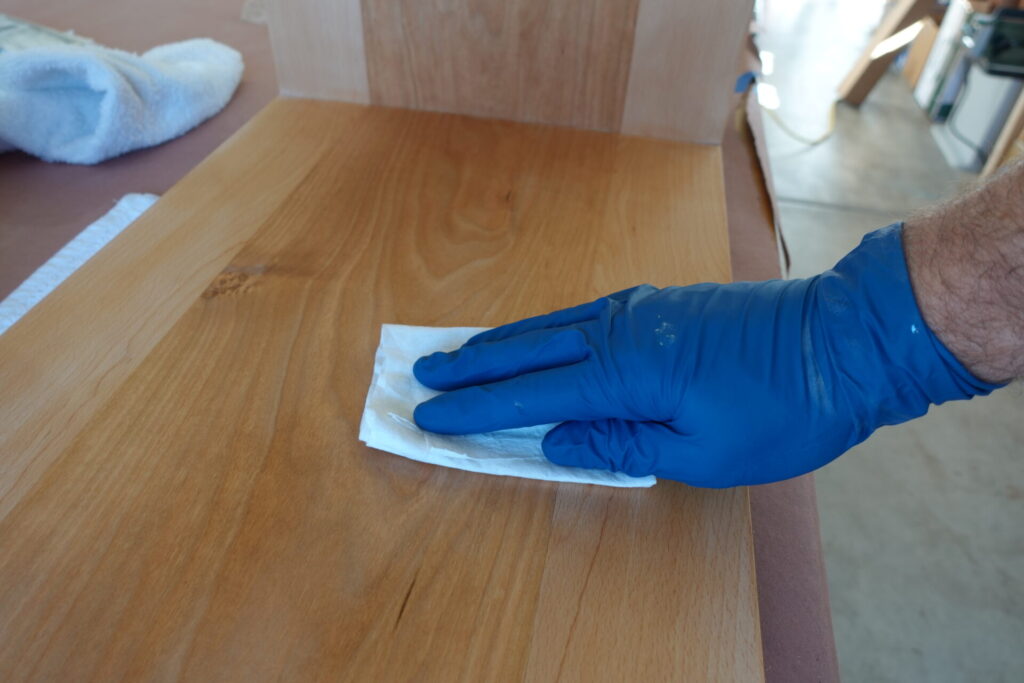
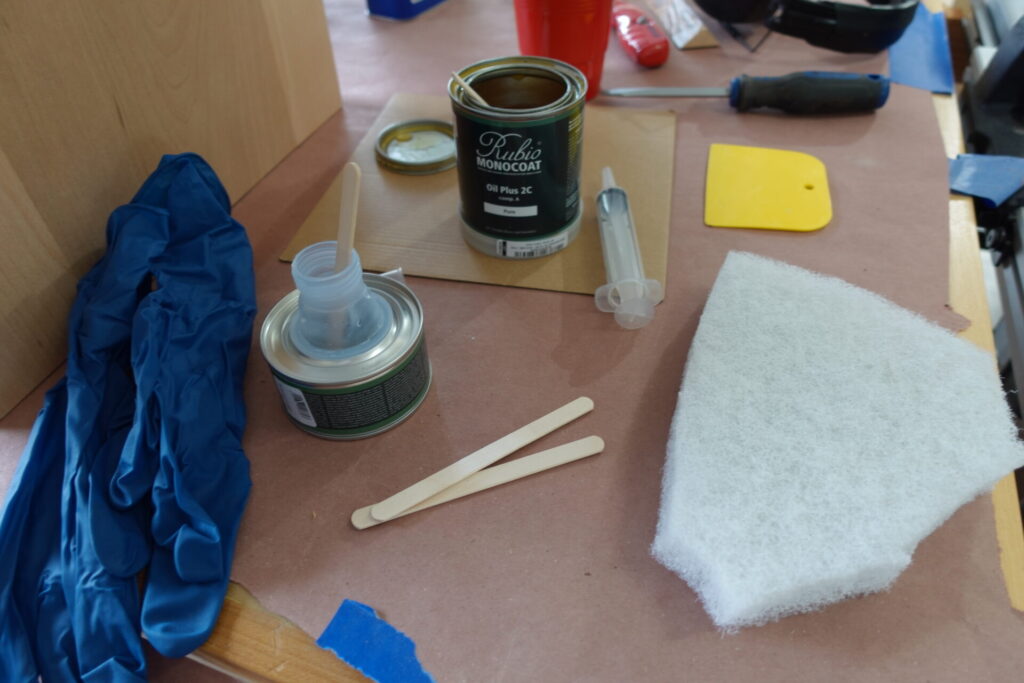

Oh, this is the fun part, when we really get to see the beauty of the wood come alive. First, we used mineral spirits on all sides to prepare the wood for the final finish. This process removes any of the small dust particulates from the wood and will allow the finish to properly bond to the wood fibers. After 24 hours the mineral spirits have fully evaporated and it’s time to apply the finish.
I had some Rubio Monocoat available from one of my other projects so I decided to go with this finish. I mixed the wax oil with the hardener by measuring with a disposable syringe, and applying with a non-abrasive pad. After working in the Rubio Monocoat to all sides, I then removed all the excess oil with shop towels. I was super happy with the results.
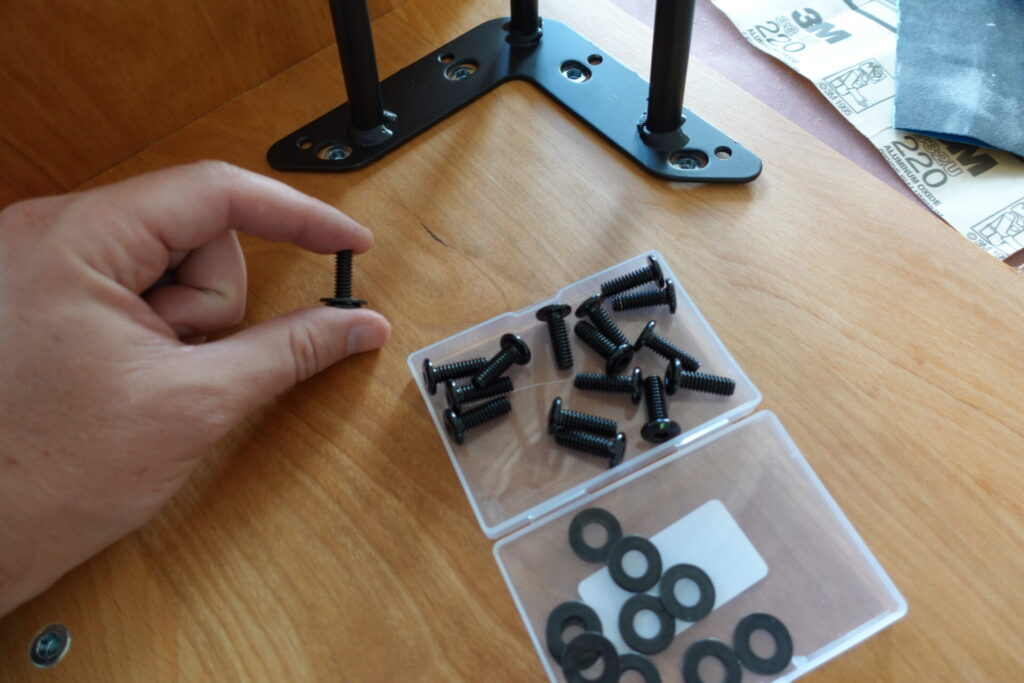
Adding Table Legs
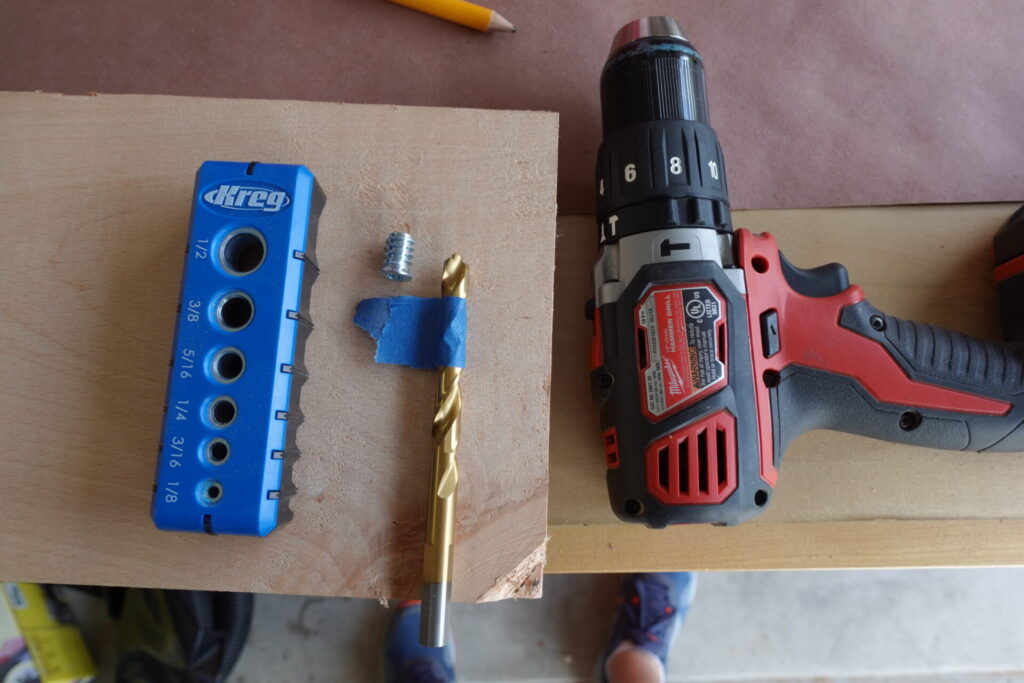
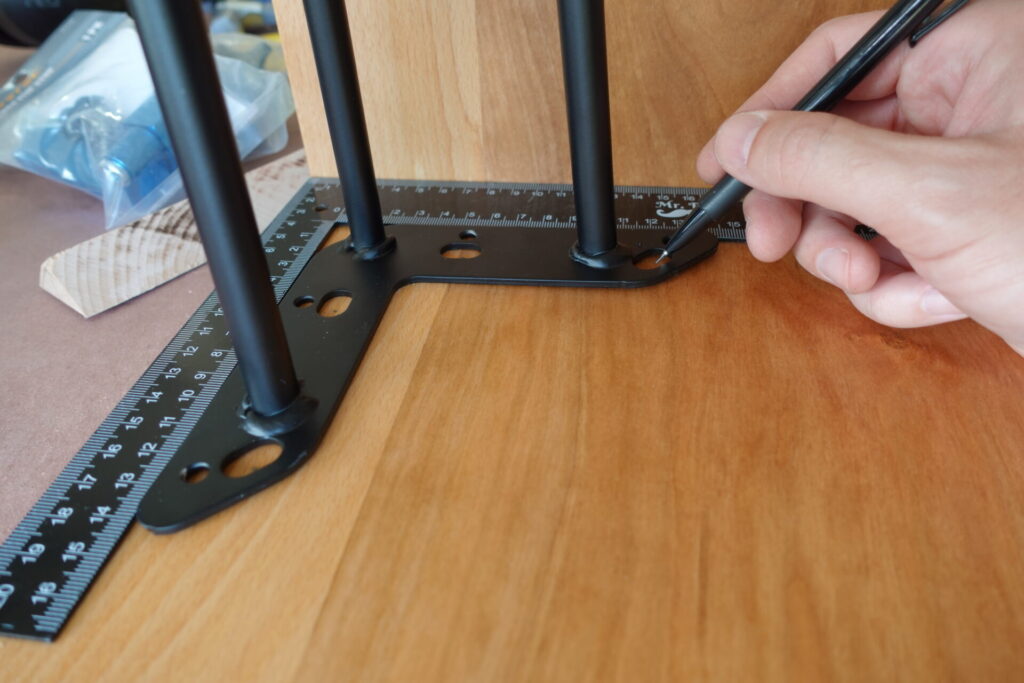
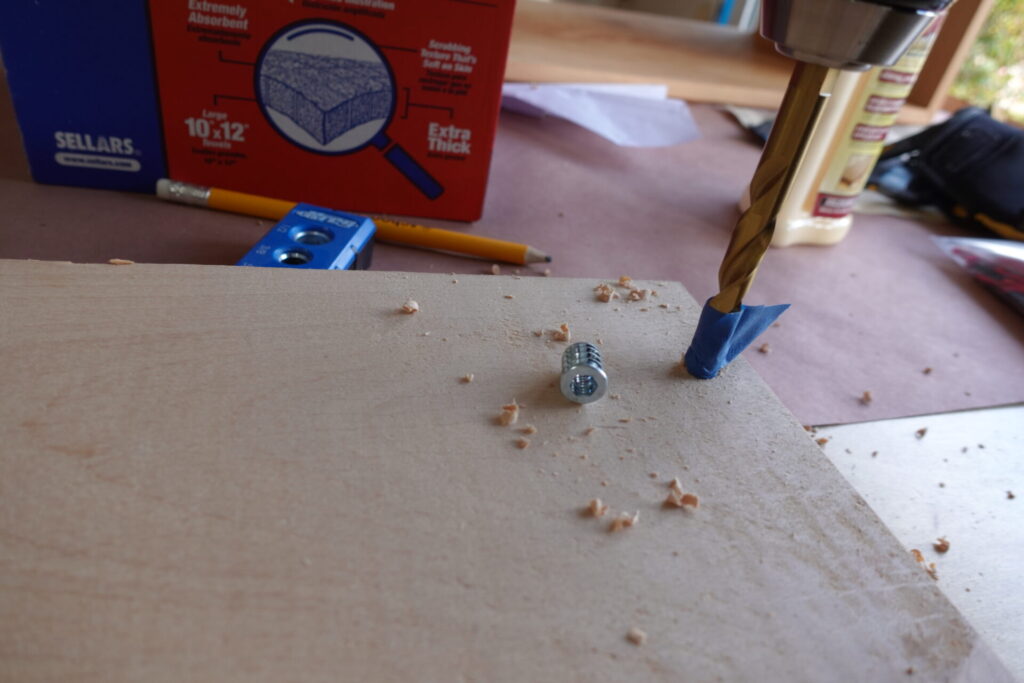
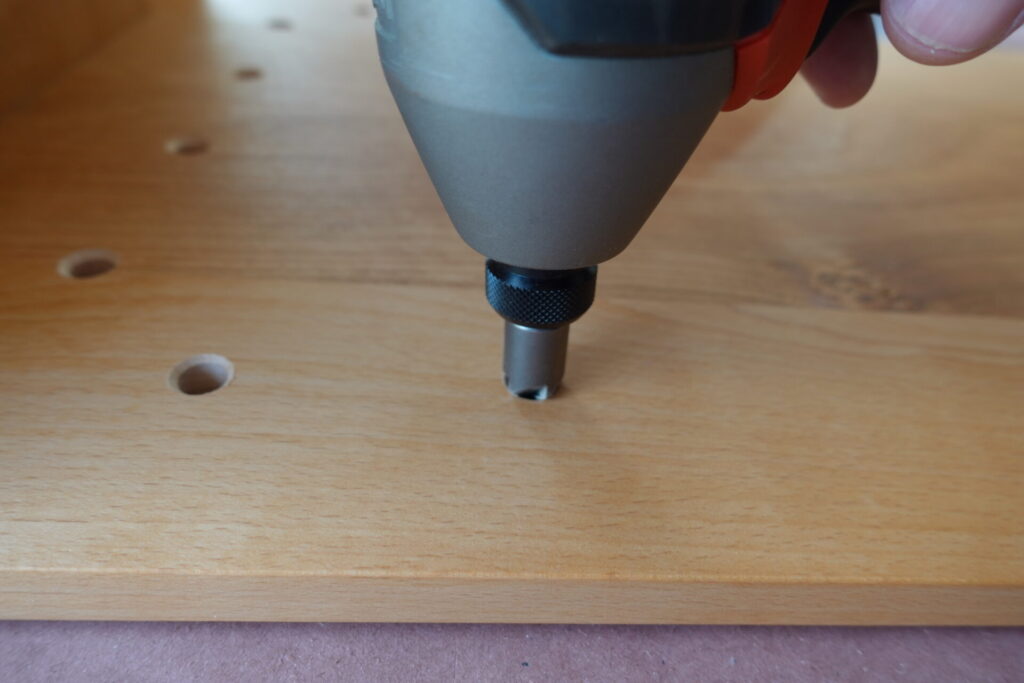
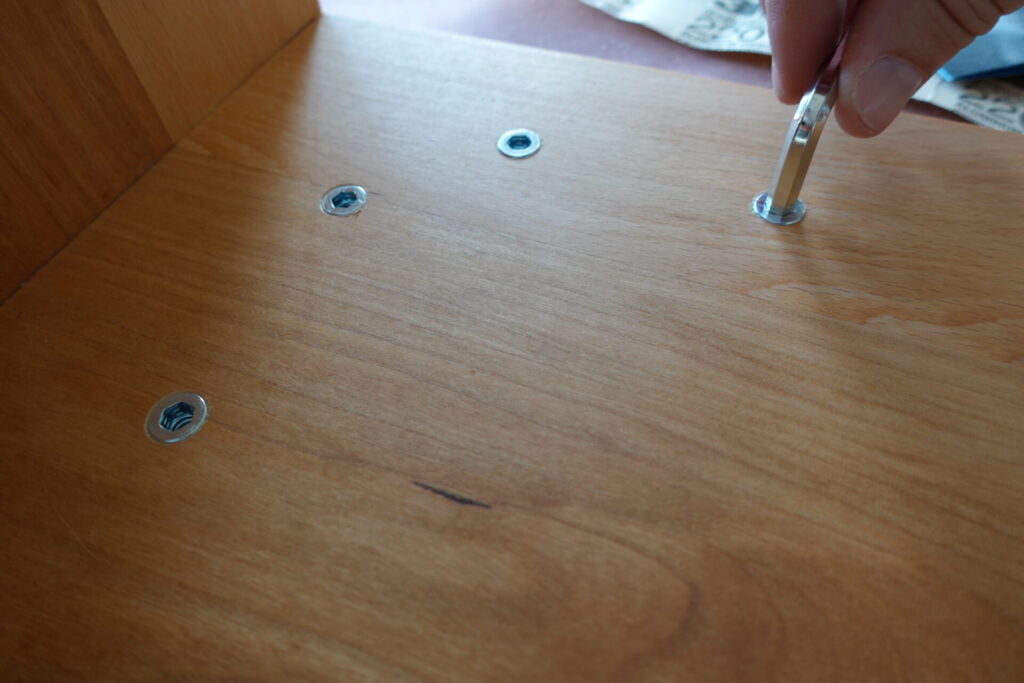
Instead of screwing the table legs into the top with screws, I opted for threaded inserts instead. This will make it possible to remove the legs and reattach if needed in the future. The process here is pretty straight forward. However the main concern is not drilling through the table top surface. So by adding the masking tape to the drill bit, we can sneak up to the perfect depth without drilling through the top of the table.
Also by adding a countersink profile to the holes, the threaded inserts were able to fit right into place. I had to add some washers to the bolts in order to fully lock the table legs into place, and they worked like a charm.
Final Result