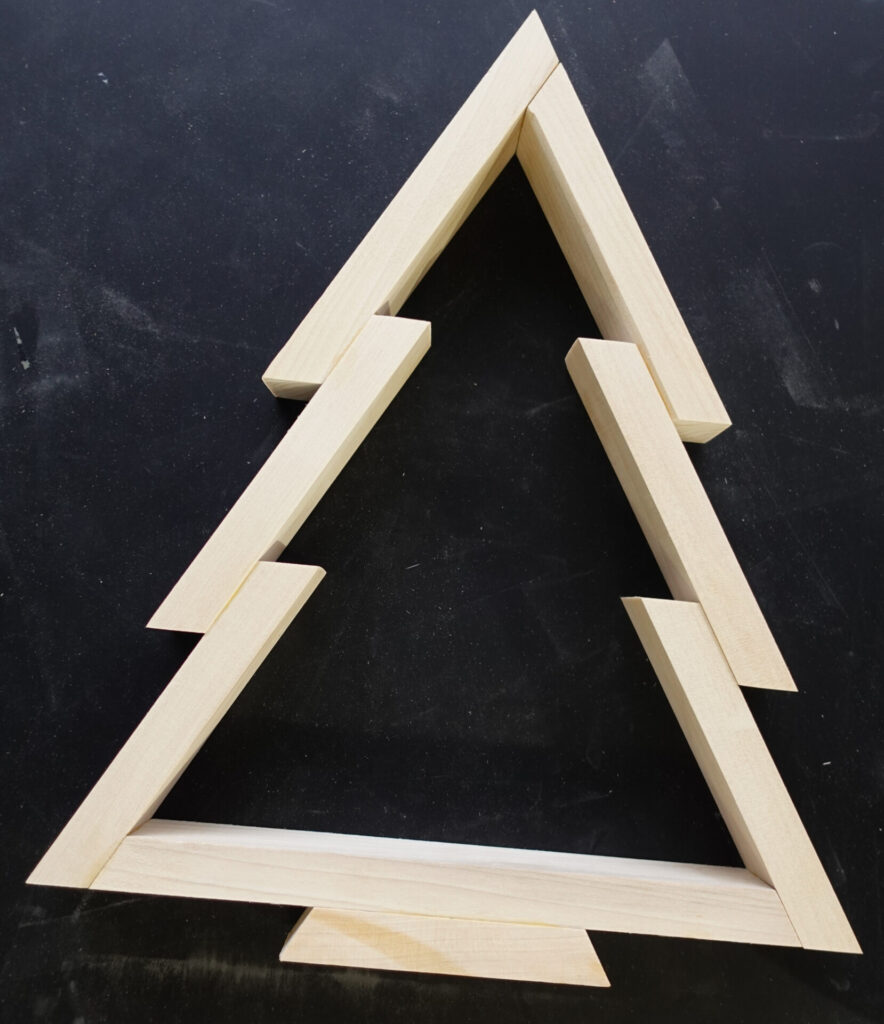
Easy to build and fun to display Christmas tree decorations made from scrap wood

There is a time and place when art enters the zeitgeist, and you know it has arrived because you see it everywhere. This year, these little Christmas trees fit the mold and they popped up everywhere. Folks in forums explained how easy they are to make and also how profitable they are to sell. I had to give them a try and see what the fuss was all about.
I had some leftover 1×2″ poplar wood trim from my outfeed table and it turned out to work perfectly. But I think any scrap wood would work well too.
Tools & Materials Needed for this Build:
Materials
- (1) 1″x2″x5′ Poplar Wood
- Brad Nails
- Wood Glue
Tools
- Chop Saw
- Clamps
- Brad Nail Gun (optional)
- Belt Sander (or sandpaper)
- Tape Measure
Let’s Build!
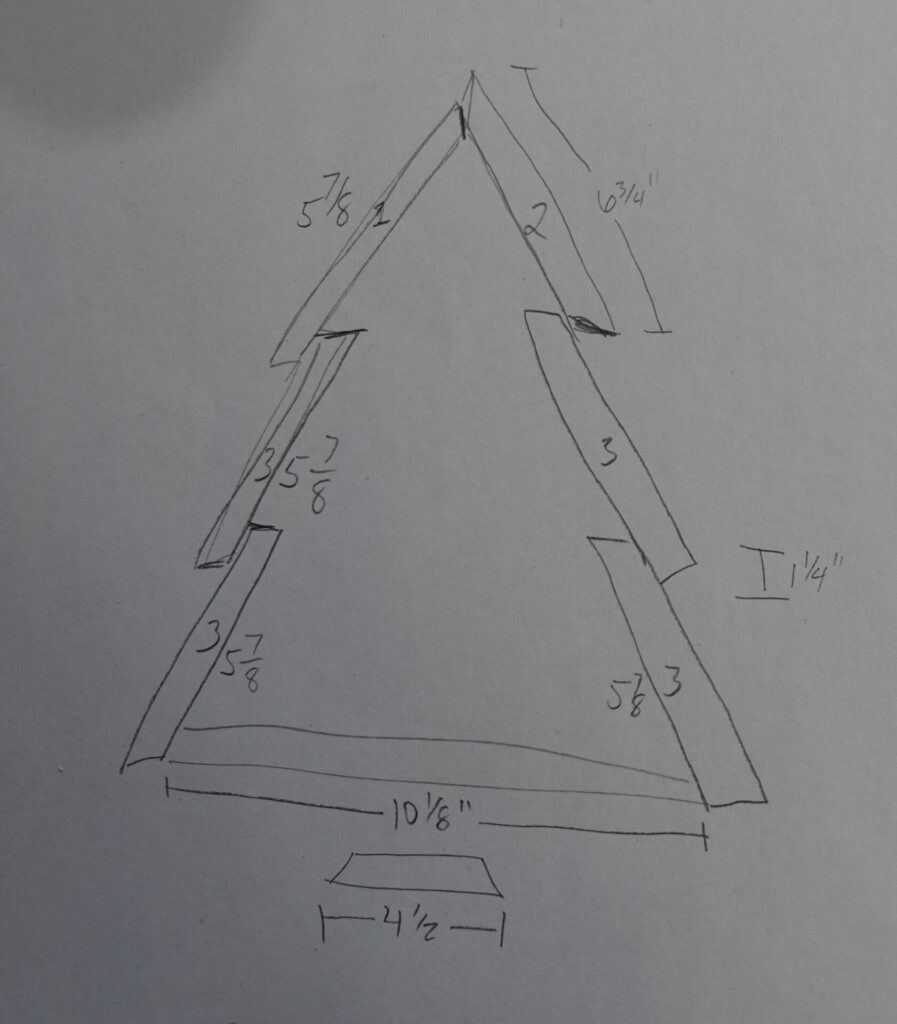
Original Sketch of the Christmas Tree
Level of Difficulty: Easy
Estimated Time to Complete: 2 Hours
Lessons Learned:
– Brad nails do not look the best. Next time will test only wood glueBuild Notes: All angles are cut to 30 degrees
Step One: Start at the Top
Nota Bene: All cuts will be cut at 30 degrees


Begin with the top two pieces of the tree and follow the cuts below
Cut Pieces to Size
In the drawing above, you can see the over dramatic angles to get the sense of which way to cut the angles.
- Cut the first piece labeled “1” to a length of 5 7/8″
- Cut the second piece labeled “2” to 6 3/4″
- Cut pieces labeled “3” to 5 7/8″
- Cut the bottom piece to 10 1/8″
- Cut the small stand to 4 1/2″
Step Two: Sand Pieces

I started with 80 grit, but found it was too aggressive. After switching the belt to 180, I was happy with the result
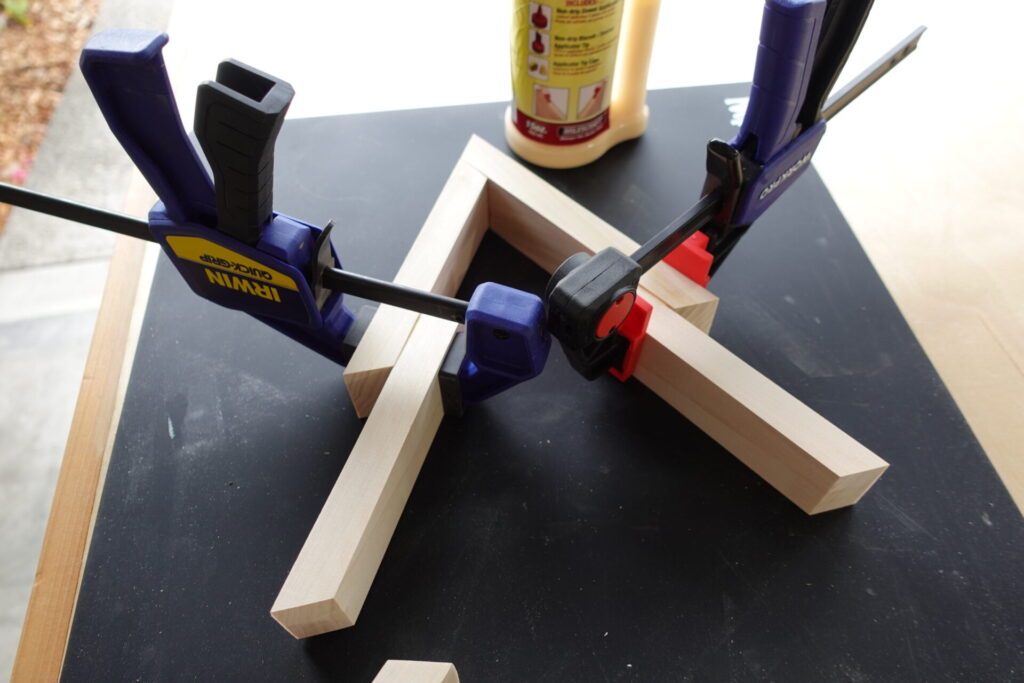
Step Three: Glue the Tree Branches


Step Four: Paint or Finish (Optional)
Not shown here, but you can paint these little saplings or finish them with your favorite finish. (My favorite at the moment being: Osmo Hard Wax Oil)
Finished Product